
Growing Leeks at Home might seem intimidating, but trust me, it’s easier than you think! Imagine stepping outside your back door and snipping fresh, flavorful leeks to add to your favorite soup or stew. No more trips to the grocery store for limp, overpriced leeks – just vibrant, homegrown goodness right at your fingertips.
Leeks have a rich history, dating back to ancient Egypt, where they were prized for their culinary and medicinal properties. The Romans, known for their sophisticated palates, also embraced leeks, spreading their cultivation throughout Europe. Today, leeks remain a staple in cuisines worldwide, adding a delicate oniony flavor to countless dishes.
But why bother with growing leeks at home when you can buy them at the store? Well, for starters, homegrown leeks taste infinitely better! Plus, you have complete control over the growing process, ensuring they’re free from harmful pesticides and chemicals. In this DIY article, I’m going to share some simple tricks and hacks that will have you harvesting a bountiful crop of leeks in no time, even if you’re a complete beginner. We’ll cover everything from seed starting to planting to harvesting, so you can enjoy fresh, delicious leeks all season long. Let’s get started!
Growing Leeks at Home: A Beginner’s Guide
Okay, so you want to grow leeks at home? Awesome! Leeks are surprisingly easy to cultivate, and nothing beats the flavor of homegrown veggies. I’ve been growing them for years, and I’m excited to share my tips and tricks with you. This guide will walk you through everything from starting seeds to harvesting your delicious leeks. Let’s get started!
Choosing Your Leek Variety
First things first, let’s talk about leek varieties. There are a bunch to choose from, and the best one for you will depend on your climate and when you want to harvest. Here are a few popular options:
* ‘American Flag’: This is a classic, reliable variety that’s known for its long, white shanks and mild flavor. It’s a great all-around choice.
* ‘Giant Musselburgh’: As the name suggests, this variety produces huge leeks! It’s very hardy and can withstand cold weather.
* ‘King Richard’: This is an early-maturing variety, perfect if you want to harvest your leeks sooner rather than later.
* ‘Bandit’: A good choice for warmer climates, known for its disease resistance.
Do a little research to see which varieties are best suited for your area. Local nurseries are a great resource for this!
Starting Leek Seeds Indoors
Starting leek seeds indoors gives them a head start, especially if you live in a region with a shorter growing season. I usually start mine about 8-10 weeks before the last expected frost.
1. Gather Your Supplies: You’ll need:
* Leek seeds
* Seed starting trays or small pots
* Seed starting mix (a fine, sterile soil mix)
* A spray bottle filled with water
* A heat mat (optional, but helpful)
* A grow light (also optional, but recommended)
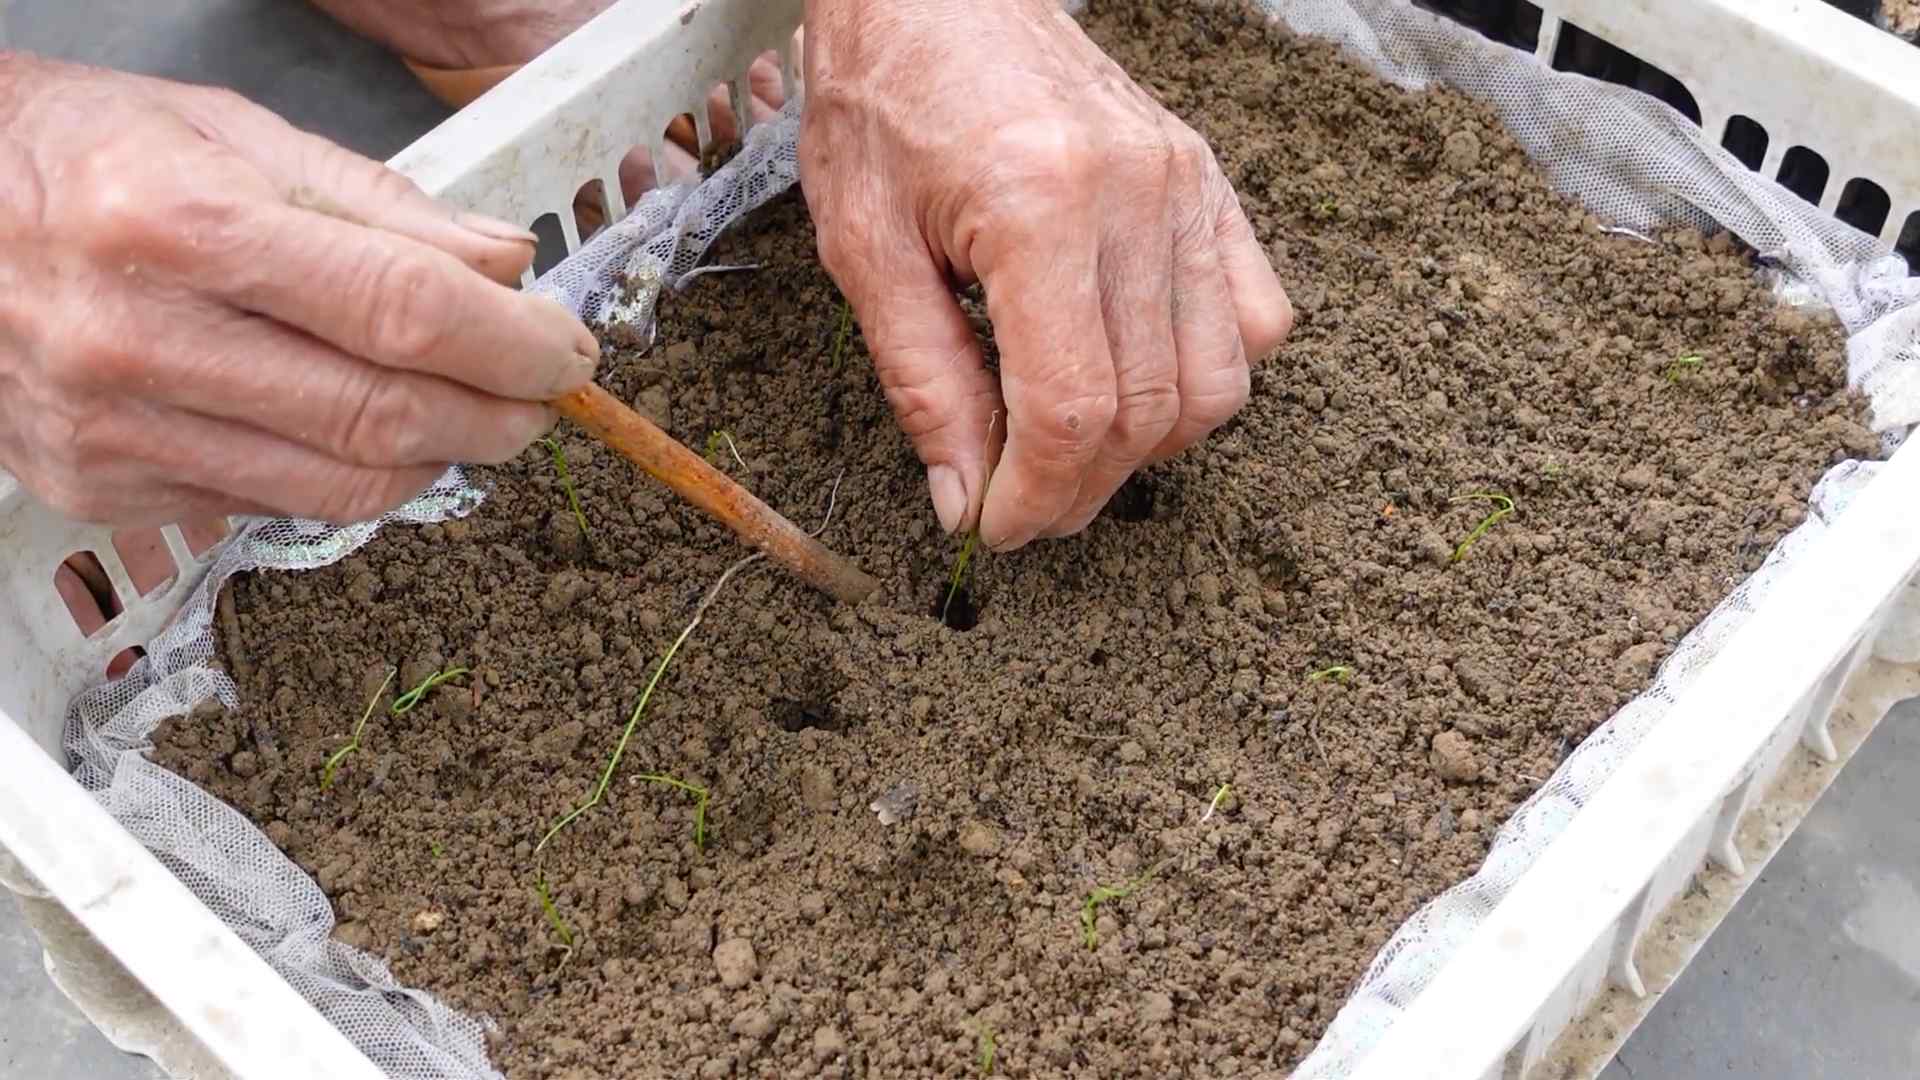
2. Sow the Seeds: Fill your seed starting trays or pots with seed starting mix. Moisten the mix thoroughly with your spray bottle. Then, sow the leek seeds about ¼ inch deep, spacing them about ½ inch apart. I usually sow a few seeds per cell or pot, just in case some don’t germinate.
3. Provide Warmth and Light: Leek seeds need warmth to germinate. Place your seed starting trays on a heat mat if you have one. Cover the trays with a clear plastic dome or plastic wrap to help retain moisture. Place the trays under a grow light or in a sunny window. If using a window, rotate the trays regularly to prevent the seedlings from leaning towards the light.
4. Keep the Soil Moist: Check the soil moisture daily and mist with your spray bottle as needed to keep it consistently moist, but not soggy.
5. Germination: Leek seeds typically germinate in 7-14 days. Once the seedlings emerge, remove the plastic dome or plastic wrap.
6. Thin the Seedlings: If you sowed multiple seeds per cell or pot, thin them out to one seedling per cell or pot once they have a few true leaves (the leaves that look like miniature leek leaves). Use small scissors to snip off the weaker seedlings at the soil line.
7. Harden Off the Seedlings: Before transplanting your leek seedlings outdoors, you need to “harden them off.” This process gradually acclimates them to outdoor conditions. Start by placing the seedlings outdoors in a sheltered location for an hour or two each day, gradually increasing the amount of time they spend outside over the course of a week or two. Protect them from strong winds and direct sunlight during this process.
Preparing the Garden Bed
While your leek seedlings are growing indoors, it’s time to prepare your garden bed. Leeks prefer well-drained soil that’s rich in organic matter.
1. Choose a Sunny Location: Leeks need at least 6 hours of sunlight per day.
2. Amend the Soil: Dig in plenty of compost or well-rotted manure to improve soil fertility and drainage. I usually add a few inches of compost to my leek bed.
3. Loosen the Soil: Use a garden fork or tiller to loosen the soil to a depth of at least 12 inches. This will allow the leek roots to grow easily.
4. Create a Trench (Optional, but Recommended): This is a trick I learned from an old gardener, and it really helps to blanch the leeks (make the white part longer). Dig a trench about 6 inches deep and 6 inches wide. You’ll plant the leek seedlings at the bottom of the trench and gradually fill it in as they grow.
Transplanting Leek Seedlings Outdoors
Once your leek seedlings are hardened off and the danger of frost has passed, it’s time to transplant them into the garden.
1. Water the Seedlings: Water the seedlings thoroughly before transplanting. This will help them to handle the transplanting process better.
2. Carefully Remove the Seedlings: Gently remove the seedlings from their trays or pots, being careful not to damage the roots. If the roots are tightly bound, gently tease them apart.
3. Plant the Seedlings: If you dug a trench, plant the seedlings at the bottom of the trench, spacing them about 6 inches apart. If you didn’t dig a trench, plant the seedlings in holes that are about 6 inches apart.
4. Backfill with Soil: Gently backfill the holes or trench with soil, making sure to cover the roots completely.
5. Water Thoroughly: Water the newly transplanted seedlings thoroughly.
Caring for Your Leeks
Leeks are relatively low-maintenance, but they do need some care to thrive.
1. Water Regularly: Water your leeks regularly, especially during dry periods. They need consistent moisture to grow well.
2. Weed Regularly: Keep the area around your leeks free of weeds. Weeds compete with the leeks for nutrients and water.
3. Fertilize (Optional): If your soil is poor, you can fertilize your leeks with a balanced fertilizer every few weeks. Follow the instructions on the fertilizer package. I usually use a liquid seaweed fertilizer.
4. Hilling (Important for Blanching): As your leeks grow, gradually fill in the trench with soil. This process, called hilling, blanches the leeks, making the white part longer and more tender. You can also hill leeks that weren’t planted in a trench by mounding soil around the base of the plants.
5. Pest and Disease Control: Leeks are generally resistant to pests and diseases, but they can be susceptible to onion thrips and leek moth. Inspect your plants regularly for signs of infestation. If you find pests, you can try spraying them with insecticidal soap or neem oil. For diseases, ensure good air circulation and avoid overhead watering.
Harvesting Your Leeks
You can harvest leeks at any size, but they’re usually ready to harvest when they’re about 1 inch in diameter.
1. Loosen the Soil: Use a garden fork to loosen the soil around the leeks.
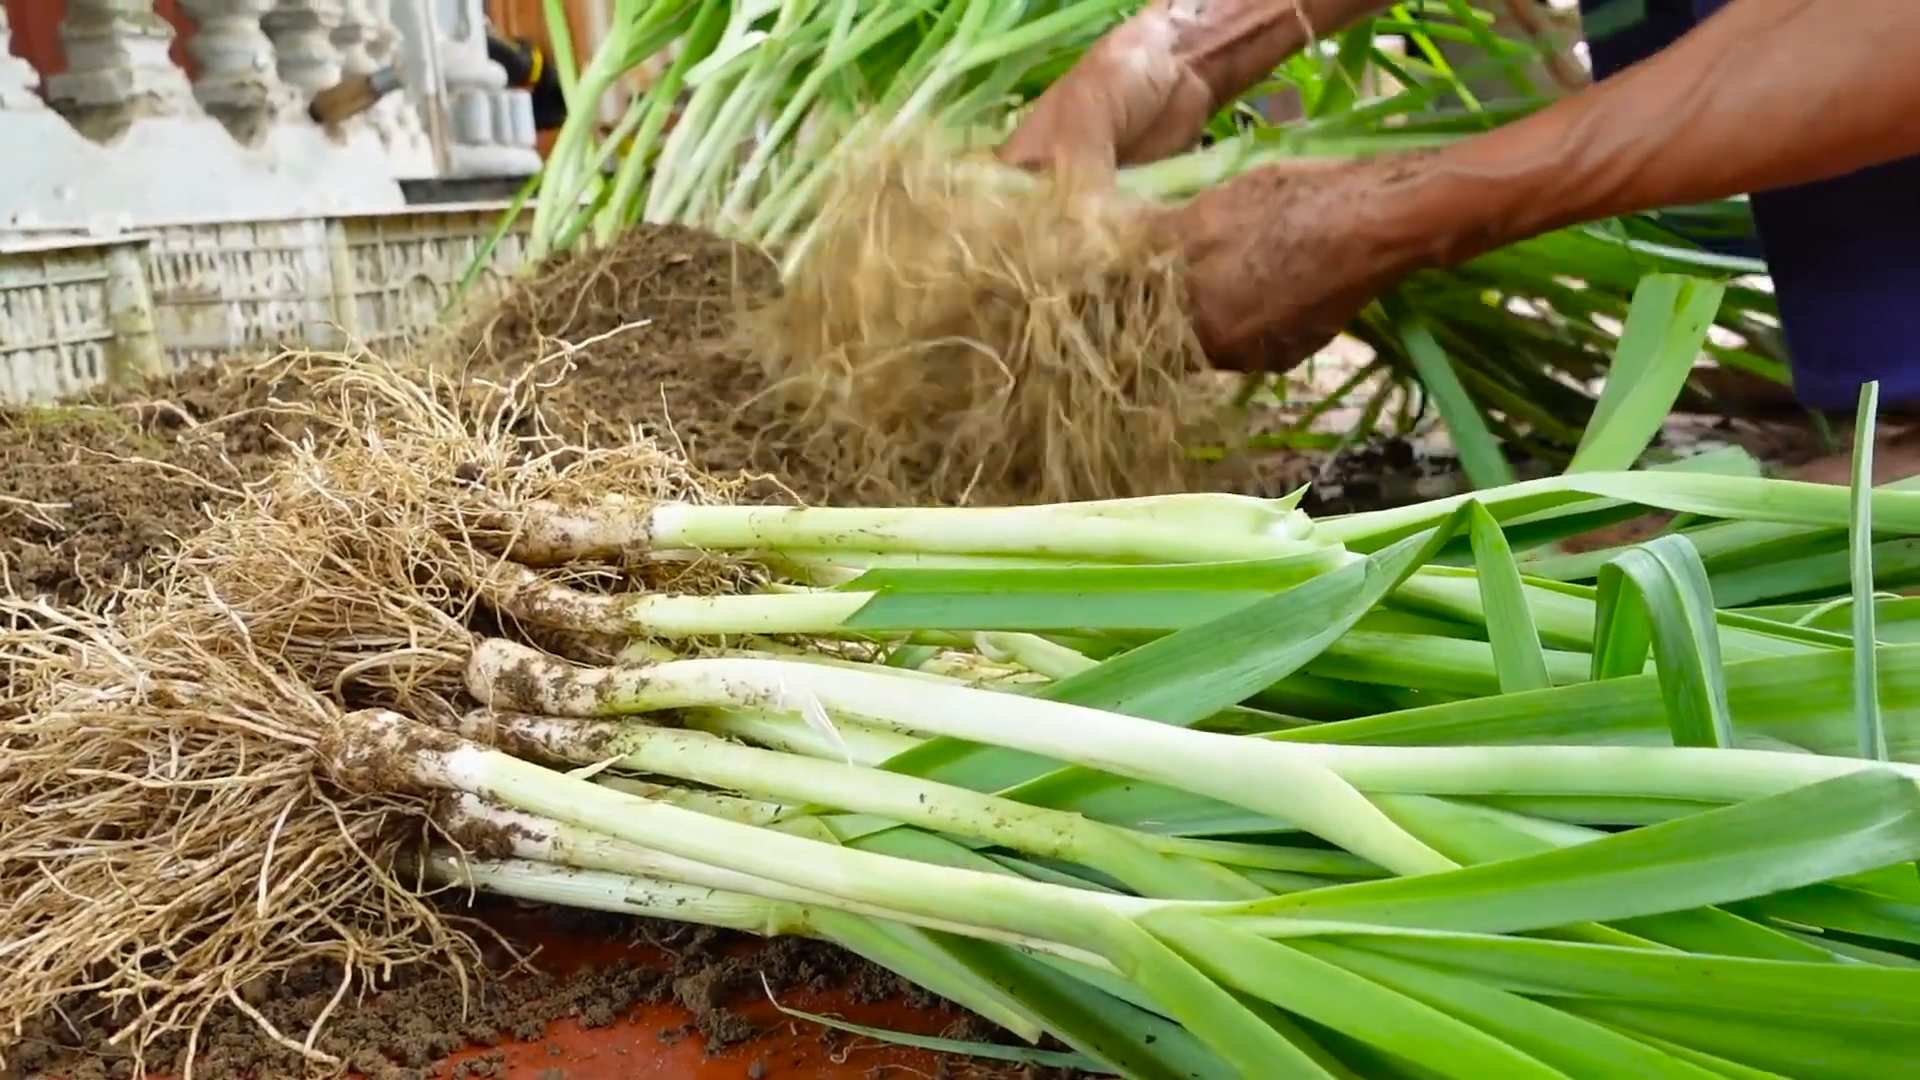
2. Pull the Leeks: Gently pull the leeks out of the ground.
3. Clean the Leeks: Wash the leeks thoroughly to remove any dirt.
4. Store the Leeks: Leeks can be stored in the refrigerator for several weeks. Wrap them loosely in plastic wrap or place them in a plastic bag. You can also freeze leeks. To freeze them, blanch them in boiling water for a few minutes, then cool them in i
Okay, so you want to grow leeks at home? Awesome! Leeks are surprisingly easy to cultivate, and nothing beats the flavor of homegrown veggies. I’ve been growing them for years, and I’m excited to share my tips and tricks with you. This guide will walk you through everything from starting seeds to harvesting your delicious leeks. Let’s get started!
Choosing Your Leek Variety
First things first, let’s talk about leek varieties. There are a bunch to choose from, and the best one for you will depend on your climate and when you want to harvest. Here are a few popular options:
* ‘American Flag’: This is a classic, reliable variety that’s known for its long, white shanks and mild flavor. It’s a great all-around choice.
* ‘Giant Musselburgh’: As the name suggests, this variety produces huge leeks! It’s very hardy and can withstand cold weather.
* ‘King Richard’: This is an early-maturing variety, perfect if you want to harvest your leeks sooner rather than later.
* ‘Bandit’: A good choice for warmer climates, known for its disease resistance.
Do a little research to see which varieties are best suited for your area. Local nurseries are a great resource for this!
Starting Leek Seeds Indoors
Starting leek seeds indoors gives them a head start, especially if you live in a region with a shorter growing season. I usually start mine about 8-10 weeks before the last expected frost.
1. Gather Your Supplies: You’ll need:
* Leek seeds
* Seed starting trays or small pots
* Seed starting mix (a fine, sterile soil mix)
* A spray bottle filled with water
* A heat mat (optional, but helpful)
* A grow light (also optional, but recommended)
2. Sow the Seeds: Fill your seed starting trays or pots with seed starting mix. Moisten the mix thoroughly with your spray bottle. Then, sow the leek seeds about ¼ inch deep, spacing them about ½ inch apart. I usually sow a few seeds per cell or pot, just in case some don’t germinate.
3. Provide Warmth and Light: Leek seeds need warmth to germinate. Place your seed starting trays on a heat mat if you have one. Cover the trays with a clear plastic dome or plastic wrap to help retain moisture. Place the trays under a grow light or in a sunny window. If using a window, rotate the trays regularly to prevent the seedlings from leaning towards the light.
4. Keep the Soil Moist: Check the soil moisture daily and mist with your spray bottle as needed to keep it consistently moist, but not soggy.
5. Germination: Leek seeds typically germinate in 7-14 days. Once the seedlings emerge, remove the plastic dome or plastic wrap.
6. Thin the Seedlings: If you sowed multiple seeds per cell or pot, thin them out to one seedling per cell or pot once they have a few true leaves (the leaves that look like miniature leek leaves). Use small scissors to snip off the weaker seedlings at the soil line.
7. Harden Off the Seedlings: Before transplanting your leek seedlings outdoors, you need to “harden them off.” This process gradually acclimates them to outdoor conditions. Start by placing the seedlings outdoors in a sheltered location for an hour or two each day, gradually increasing the amount of time they spend outside over the course of a week or two. Protect them from strong winds and direct sunlight during this process.
Preparing the Garden Bed
While your leek seedlings are growing indoors, it’s time to prepare your garden bed. Leeks prefer well-drained soil that’s rich in organic matter.
1. Choose a Sunny Location: Leeks need at least 6 hours of sunlight per day.
2. Amend the Soil: Dig in plenty of compost or well-rotted manure to improve soil fertility and drainage. I usually add a few inches of compost to my leek bed.
3. Loosen the Soil: Use a garden fork or tiller to loosen the soil to a depth of at least 12 inches. This will allow the leek roots to grow easily.
4. Create a Trench (Optional, but Recommended): This is a trick I learned from an old gardener, and it really helps to blanch the leeks (make the white part longer). Dig a trench about 6 inches deep and 6 inches wide. You’ll plant the leek seedlings at the bottom of the trench and gradually fill it in as they grow.
Transplanting Leek Seedlings Outdoors
Once your leek seedlings are hardened off and the danger of frost has passed, it’s time to transplant them into the garden.
1. Water the Seedlings: Water the seedlings thoroughly before transplanting. This will help them to handle the transplanting process better.
2. Carefully Remove the Seedlings: Gently remove the seedlings from their trays or pots, being careful not to damage the roots. If the roots are tightly bound, gently tease them apart.
3. Plant the Seedlings: If you dug a trench, plant the seedlings at the bottom of the trench, spacing them about 6 inches apart. If you didn’t dig a trench, plant the seedlings in holes that are about 6 inches apart.
4. Backfill with Soil: Gently backfill the holes or trench with soil, making sure to cover the roots completely.
5. Water Thoroughly: Water the newly transplanted seedlings thoroughly.
Caring for Your Leeks
Leeks are relatively low-maintenance, but they do need some care to thrive.
1. Water Regularly: Water your leeks regularly, especially during dry periods. They need consistent moisture to grow well.
2. Weed Regularly: Keep the area around your leeks free of weeds. Weeds compete with the leeks for nutrients and water.
3. Fertilize (Optional): If your soil is poor, you can fertilize your leeks with a balanced fertilizer every few weeks. Follow the instructions on the fertilizer package. I usually use a liquid seaweed fertilizer.
4. Hilling (Important for Blanching): As your leeks grow, gradually fill in the trench with soil. This process, called hilling, blanches the leeks, making the white part longer and more tender. You can also hill leeks that weren’t planted in a trench by mounding soil around the base of the plants.
5. Pest and Disease Control: Leeks are generally resistant to pests and diseases, but they can be susceptible to onion thrips and leek moth. Inspect your plants regularly for signs of infestation. If you find pests, you can try spraying them with insecticidal soap or neem oil. For diseases, ensure good air circulation and avoid overhead watering.
Harvesting Your Leeks
You can harvest leeks at any size, but they’re usually ready to harvest when they’re about 1 inch in diameter.
1. Loosen the Soil: Use a garden fork to loosen the soil around the leeks.
2. Pull the Leeks: Gently pull the leeks out of the ground.
3. Clean the Leeks: Wash the leeks thoroughly to remove any dirt.
4. Store the Leeks: Leeks can be stored in the refrigerator for several weeks. Wrap them loosely in plastic wrap or place them in a plastic bag. You can also freeze leeks. To freeze them, blanch them in boiling water for a few minutes, then cool them in ice water. Drain them well and then freeze them in freezer bags.
Troubleshooting
Even with the best planning, sometimes things don’t go exactly as expected. Here are a few common problems you might encounter when growing leeks and how to deal with them:
* Leek Moth: This pest can tunnel into the leeks, causing damage. Use netting to protect your plants, or handpick the caterpillars.
* Onion Thrips: These tiny insects can suck the sap from the leaves, causing them to turn silvery. Spray with insecticidal soap or neem oil.
* Bolting: If your leeks start to flower prematurely, it’s called bolting. This can happen if they experience stress, such as extreme temperatures or lack of water. Remove the flower stalk to encourage the plant to continue growing.
* Slow Growth: If your leeks are growing slowly, it could be due to poor soil, lack of water, or insufficient sunlight. Amend the soil with compost, water regularly, and make sure they’re getting at least 6 hours of sunlight per day.
Enjoying Your Homegrown Leeks
Now for the best part – enjoying the fruits (or vegetables!) of your labor! Leeks are incredibly versatile and can be used in a variety of dishes. Here are a few ideas:
* Le
Conclusion
So, there you have it! Growing leeks at home is not only achievable, but it’s also incredibly rewarding. From the satisfying crunch of a freshly harvested leek to the knowledge that you nurtured it from seed (or transplant!), the entire process is a testament to the joys of home gardening. We’ve walked you through the steps, from choosing the right variety to understanding the nuances of watering and feeding. But why is this DIY trick a must-try?
Firstly, the flavor of homegrown leeks is simply unparalleled. Store-bought leeks, while convenient, often lack the depth and sweetness that comes from being freshly picked. When you grow your own, you control the entire process, ensuring optimal conditions for flavor development. You’ll be amazed at the difference!
Secondly, growing leeks at home is a fantastic way to reduce your carbon footprint and support sustainable practices. By sourcing your own produce, you’re minimizing transportation costs and reducing your reliance on industrial agriculture. Plus, you can avoid the use of harmful pesticides and herbicides, ensuring that your leeks are healthy and safe for your family.
Thirdly, it’s a cost-effective way to enjoy this versatile vegetable. Leeks can be surprisingly expensive at the grocery store, especially during certain times of the year. By growing your own, you can significantly reduce your grocery bill and enjoy a steady supply of fresh leeks throughout the growing season.
But the benefits don’t stop there! Growing leeks is also a therapeutic and enjoyable hobby. It’s a chance to connect with nature, get some exercise, and learn new skills. There’s something incredibly satisfying about watching your plants grow and thrive, knowing that you played a part in their success.
Now, let’s talk about variations and suggestions. If you’re short on space, consider growing leeks in containers. Choose a large pot with good drainage and use a high-quality potting mix. You can also try intercropping leeks with other vegetables, such as carrots or onions, to maximize your garden space.
For those who live in colder climates, consider starting your leeks indoors several weeks before the last frost. This will give them a head start and ensure a longer growing season. You can also use row covers or cold frames to protect your leeks from frost and extend their harvest.
And for those who are feeling adventurous, why not try growing different varieties of leeks? There are many different types to choose from, each with its own unique flavor and characteristics. Experiment with different varieties to find your favorites!
Ultimately, the key to success with growing leeks at home is to be patient and observant. Pay attention to your plants’ needs and adjust your care accordingly. Don’t be afraid to experiment and try new things. And most importantly, have fun!
We encourage you to give this DIY trick a try. You won’t be disappointed! Once you’ve harvested your first crop of homegrown leeks, be sure to share your experience with us. We’d love to hear about your successes, your challenges, and your favorite ways to use your homegrown leeks. Share your photos and stories on social media using #HomegrownLeeks and let’s inspire others to join the fun! Remember, mastering the art of growing leeks at home is a journey, not a destination. Enjoy the process, learn from your mistakes, and savor the delicious rewards. Happy gardening!
Frequently Asked Questions (FAQ)
What is the best time of year to plant leeks?
The best time to plant leeks depends on your climate. In general, leeks are a cool-season crop, meaning they thrive in cooler temperatures. For most regions, you can start leeks indoors 8-10 weeks before the last expected frost in spring. This allows them to get a head start before transplanting them outdoors. Alternatively, you can direct sow leek seeds outdoors in late spring or early summer, once the soil has warmed up. For fall harvests, you can also plant leeks in late summer or early fall. The key is to provide them with enough time to mature before the first hard frost. Check your local gardening resources for specific planting dates in your area.
How much sunlight do leeks need?
Leeks need at least 6 hours of sunlight per day to thrive. They prefer full sun, but they can tolerate partial shade, especially in hotter climates. When choosing a location for your leeks, make sure it receives plenty of direct sunlight throughout the day. If you’re growing leeks in containers, you can move them around to ensure they get enough sunlight. Insufficient sunlight can result in leggy, weak plants with poor bulb development.
What type of soil is best for growing leeks?
Leeks prefer well-drained, fertile soil that is rich in organic matter. The ideal soil pH is between 6.0 and 7.0. Before planting, amend your soil with compost, aged manure, or other organic materials to improve its fertility and drainage. Leeks also benefit from a soil that is loose and easy to work with, as this allows their roots to penetrate deeply. Avoid planting leeks in heavy clay soil, as this can lead to waterlogging and root rot. If you have clay soil, amend it with plenty of organic matter to improve its drainage and structure.
How often should I water my leeks?
Leeks need consistent moisture to thrive, especially during hot, dry weather. Water your leeks deeply and regularly, aiming to keep the soil consistently moist but not waterlogged. The frequency of watering will depend on your climate, soil type, and the age of your plants. Young leeks need more frequent watering than mature plants. Check the soil moisture regularly by sticking your finger into the soil. If the top inch of soil feels dry, it’s time to water. Avoid overhead watering, as this can lead to fungal diseases. Instead, water at the base of the plants.
Do leeks need fertilizer?
Yes, leeks benefit from regular fertilization. They are heavy feeders and need a steady supply of nutrients to grow and develop properly. Before planting, incorporate a slow-release fertilizer into the soil. During the growing season, fertilize your leeks every 2-3 weeks with a balanced liquid fertilizer or compost tea. Avoid over-fertilizing, as this can lead to excessive foliage growth and poor bulb development. Follow the instructions on the fertilizer label carefully.
How do I blanch leeks?
Blanching leeks is a technique that involves excluding light from the lower portion of the plant, resulting in a whiter, more tender stalk. There are several ways to blanch leeks. One method is to gradually hill up soil around the base of the plants as they grow. Another method is to wrap the lower portion of the plants with cardboard or newspaper. You can also use specialized blanching collars. Start blanching your leeks when they are about 6-8 inches tall. Continue to blanch them until harvest. The longer you blanch them, the whiter and more tender the stalks will be.
When are leeks ready to harvest?
Leeks are typically ready to harvest 100-120 days after planting. They can be harvested at any size, depending on your preference. For smaller, more tender leeks, harvest them when they are about 1 inch in diameter. For larger, more mature leeks, harvest them when they are about 2-3 inches in diameter. To harvest leeks, loosen the soil around the base of the plant with a garden fork and gently pull the leek out of the ground. Trim off the roots and the top portion of the leaves.
How do I store leeks?
Freshly harvested leeks can be stored in the refrigerator for up to 2 weeks. To store them, wrap them loosely in plastic wrap or place them in a plastic bag. You can also store leeks in a cool, dark place, such as a root cellar. For longer-term storage, you can freeze leeks. To freeze them, wash and chop the leeks, then blanch them in boiling water for 2-3 minutes. Drain the leeks and cool them in ice water. Pack the leeks into freezer bags or containers and freeze them.
What are some common pests and diseases that affect leeks?
Leeks are relatively pest-resistant, but they can be affected by a few common pests and diseases. Onion thrips, leek moths, and onion maggots are common pests that can damage leeks. Fungal diseases, such as downy mildew and white rot, can also affect leeks. To prevent pests and diseases, practice good garden hygiene, such as removing weeds and debris from around your plants. You can also use organic pest control methods, such as insecticidal soap or neem oil. If you notice signs of disease, remove the affected plants immediately to prevent the spread of the disease.
Can I grow leeks in containers?
Yes, you can grow leeks in containers. Choose a large pot with good drainage and use a high-quality potting mix. Make sure the pot is at least 12 inches deep to accommodate the leeks’ roots. Plant the leek seedlings about 4-6 inches apart. Water the leeks regularly and fertilize them every 2-3 weeks. Place the container in a sunny location that receives at least 6 hours of sunlight per day. Container-grown leeks may need more frequent watering than those grown in the ground.
Leave a Comment