
Growing Taro at Home might seem like an exotic endeavor, reserved for tropical landscapes, but I’m here to tell you it’s totally achievable, even if you’re miles away from Hawaii! For centuries, taro has been a staple food in Polynesian cultures, deeply intertwined with their traditions and way of life. Imagine bringing a piece of that rich heritage into your own backyard!
But why should you consider growing taro at home? Well, beyond its fascinating history, taro is incredibly nutritious, packed with vitamins, minerals, and fiber. Plus, let’s be honest, there’s something incredibly satisfying about harvesting your own food. This DIY guide will walk you through everything you need to know, from selecting the right variety to troubleshooting common problems.
I know what you might be thinking: “I don’t have a green thumb!” Don’t worry, I’ve got you covered. This isn’t just another gardening article; it’s a collection of tried-and-true tips and tricks that I’ve learned along the way. We’ll break down the process into manageable steps, so you can confidently start growing taro at home and enjoy the fruits (or rather, the roots!) of your labor. Get ready to impress your friends and family with your newfound gardening skills!

Growing Taro at Home: A Beginner’s Guide
Hey there, fellow plant enthusiasts! Ever thought about growing your own taro? It might seem a little exotic, but trust me, it’s totally doable, even if you don’t have a sprawling farm. I’m going to walk you through everything you need to know to cultivate this delicious and nutritious root vegetable right in your own backyard (or even in a large container!).
Choosing Your Taro Variety
Okay, first things first, let’s talk about varieties. There are tons of different taro cultivars out there, each with its own unique characteristics. Some are better suited for certain climates, and some have different flavor profiles. Here are a few popular choices:
* Bun Long: This is a common variety, known for its large corms and good flavor. It’s relatively easy to grow and adapts well to different conditions.
* Dasheen: Another widely grown variety, Dasheen produces smaller corms but is still quite productive. It’s a good choice if you’re limited on space.
* Eddoe: Eddoe taro produces smaller, more numerous corms than Dasheen. It has a slightly different flavor and texture.
* Japanese Taro: This variety is known for its mild flavor and tender texture. It’s a bit more sensitive to cold temperatures, so keep that in mind if you live in a cooler climate.
I recommend doing a little research to see which variety is best suited for your local climate and your personal preferences. You can usually find taro corms or starts at local nurseries, farmers’ markets, or even online.
Preparing for Planting
Before you even think about sticking that taro corm in the ground, you need to get your planting area ready. Taro loves rich, well-draining soil that’s consistently moist.
* Soil Preparation: Taro thrives in slightly acidic soil with a pH between 5.5 and 6.5. Amend your soil with plenty of organic matter, like compost, well-rotted manure, or peat moss. This will improve drainage, water retention, and nutrient availability. I usually dig in a generous amount of compost a few weeks before planting.
* Sunlight: Taro needs at least 6 hours of sunlight per day to grow well. Choose a location that gets plenty of sun, but also offers some protection from the hottest afternoon sun, especially in warmer climates.
* Water: Taro is a water-loving plant, so make sure your planting area has good access to water. If you’re growing in a container, make sure it has drainage holes to prevent waterlogging.
* Container Growing: If you’re growing taro in a container, choose a large pot (at least 15-20 gallons) with drainage holes. Use a high-quality potting mix that’s rich in organic matter.
Planting Your Taro
Alright, now for the fun part – planting! Here’s how I do it:
1. Choose Your Corms: Select healthy, firm taro corms that are free from blemishes or signs of rot. If the corms have any sprouts, that’s even better!
2. Sprouting (Optional): You can sprout your taro corms before planting to give them a head start. To do this, place the corms in a warm, humid location, like a greenhouse or a sunny windowsill. Keep them lightly moist, and they should start to sprout in a few weeks.
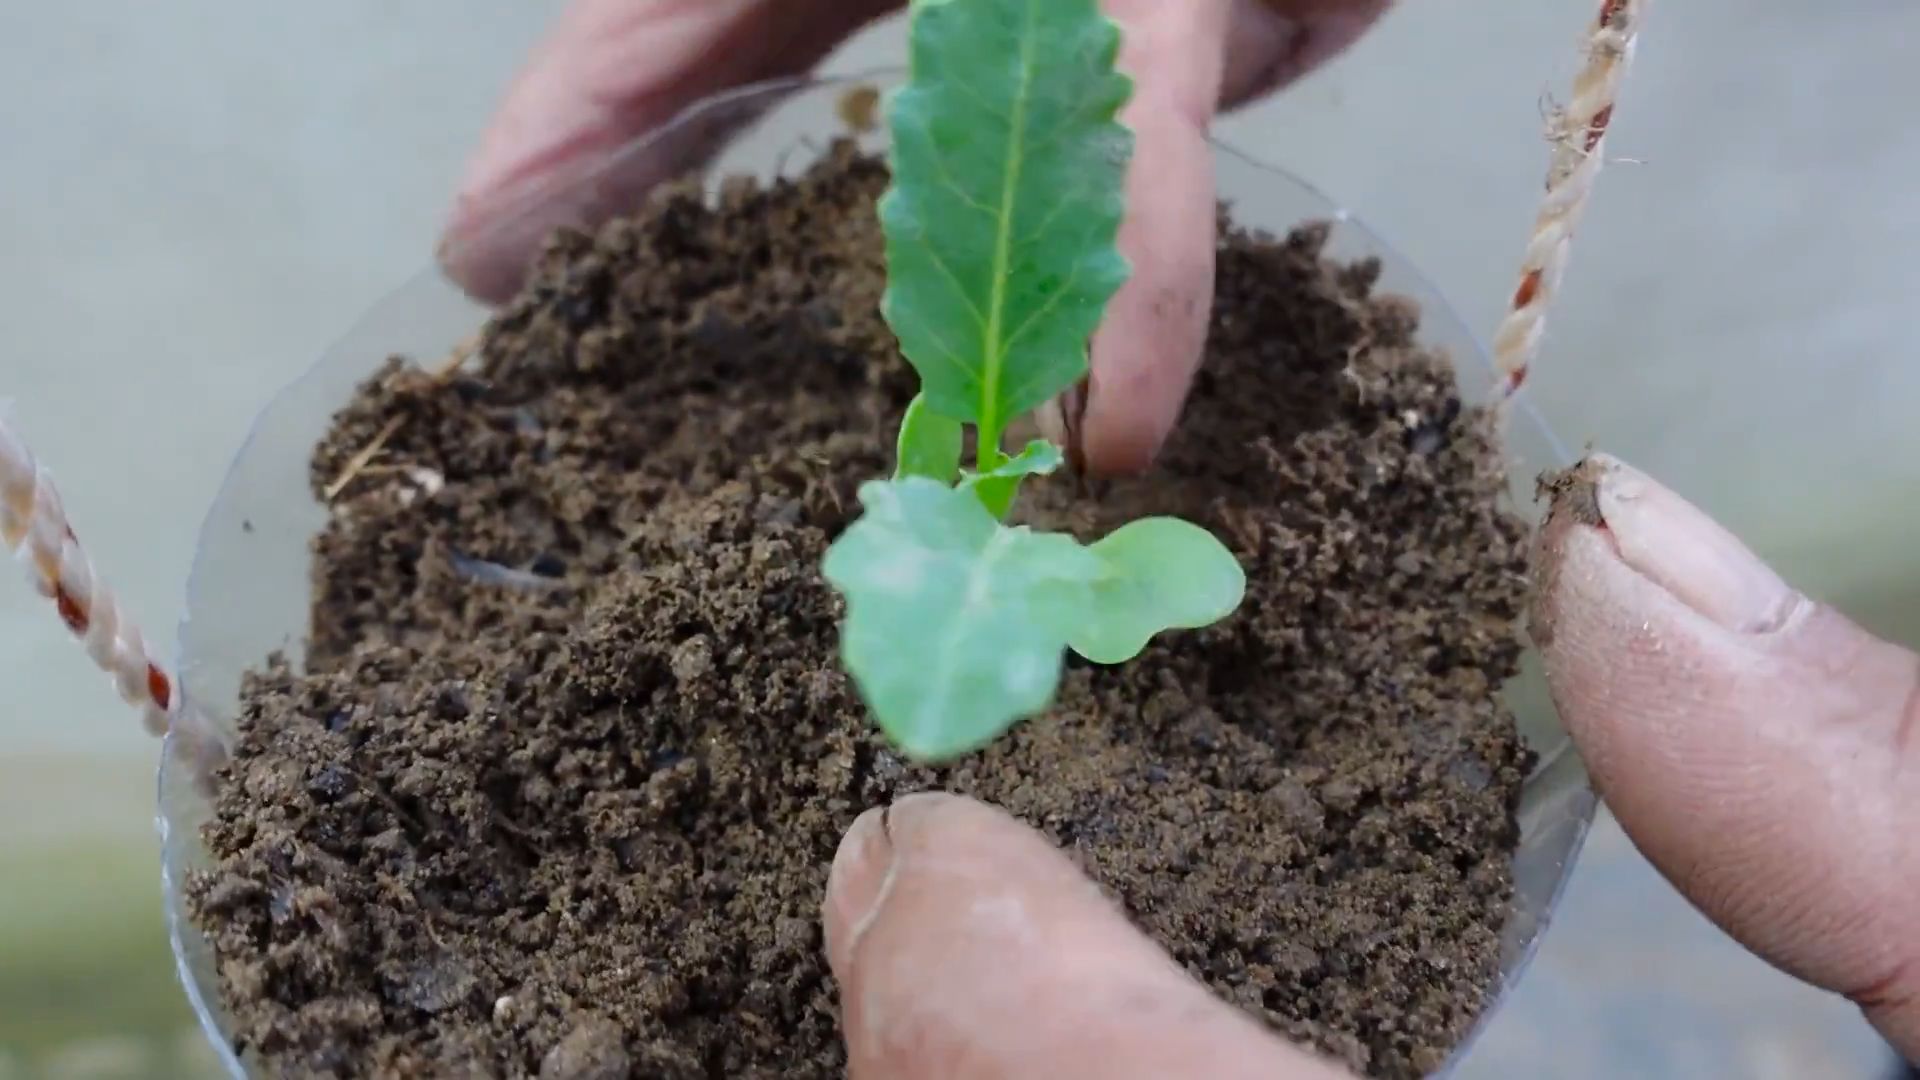
3. Planting Depth: Dig a hole that’s about 4-6 inches deep. Place the taro corm in the hole with the sprout (if there is one) pointing upwards. Cover the corm with soil and gently firm it down.
4. Spacing: If you’re planting multiple taro plants, space them about 2-3 feet apart to give them plenty of room to grow.
5. Watering: Water the newly planted taro corms thoroughly. Keep the soil consistently moist, but not waterlogged.
Caring for Your Taro Plants
Once your taro plants are in the ground, it’s important to provide them with the right care to ensure they thrive.
* Watering: Taro needs consistent moisture, especially during the growing season. Water deeply whenever the top inch of soil feels dry to the touch. In hot, dry weather, you may need to water daily.
* Fertilizing: Taro is a heavy feeder, so it benefits from regular fertilization. I like to use a balanced fertilizer (like 10-10-10) every few weeks during the growing season. You can also use organic fertilizers, like compost tea or fish emulsion.
* Weeding: Keep the area around your taro plants free from weeds. Weeds can compete with taro for nutrients and water.
* Pest Control: Taro is generally pest-resistant, but it can be susceptible to aphids, spider mites, and other common garden pests. Inspect your plants regularly for signs of pests and take action if necessary. You can use insecticidal soap or neem oil to control pests.
* Mulching: Mulching around your taro plants can help to retain moisture, suppress weeds, and regulate soil temperature. Use organic mulches, like straw, wood chips, or shredded leaves.
* Hilling: As your taro plants grow, you can hill the soil around the base of the stems. This will encourage the development of more corms.
Harvesting Your Taro
Okay, this is the moment we’ve all been waiting for – harvesting! Taro is typically ready to harvest about 6-12 months after planting, depending on the variety and growing conditions.
* Signs of Maturity: The leaves of the taro plant will start to turn yellow and die back when the corms are mature. This is a good indication that it’s time to harvest.
* Harvesting Technique: To harvest taro, carefully dig around the base of the plant with a shovel or garden fork. Gently lift the plant out of the ground, being careful not to damage the corms.
* Cleaning: Remove the soil from the corms and wash them thoroughly.
* Curing: After harvesting, you can cure the taro corms to improve their flavor and storage life. To cure taro, place the corms in a cool, dry, well-ventilated location for a few weeks.
* Storage: Store cured taro corms in a cool, dry place. They should keep for several months.
Important Safety Note
Raw taro is toxic and should never be eaten. Taro contains calcium oxalate crystals, which can cause irritation and burning in the mouth and throat. Cooking taro thoroughly breaks down these crystals and makes it safe to eat. Always cook taro before consuming it.
Troubleshooting
Even with the best care, you might encounter some challenges when growing taro. Here are a few common problems and how to address them:
* Yellowing Leaves: Yellowing leaves can be a sign of nutrient deficiency, overwatering, or underwatering. Check the soil moisture and nutrient levels and adjust accordingly.
* Stunted Growth: Stunted growth can be caused by poor soil, lack of sunlight, or pest infestations. Make sure your taro plants are getting enough sunlight, water, and nutrients, and address any pest problems promptly.
* Root Rot: Root rot is a fungal disease that can occur in waterlogged soil. Make sure your soil is well-draining and avoid overwatering.
* Pest Problems: Keep an eye out for common garden pests, like aphids, spider mites, and whiteflies. Treat infestations with insecticidal soap or neem oil.
Enjoying Your Homegrown Taro
Now that you’ve harvested your taro, it’s time to enjoy the fruits (or rather, roots) of your labor! Taro can be used in a variety of dishes, both sweet and savory.
* Poi: Poi is a traditional Hawaiian dish made from pounded taro. It’s a staple food in Hawaii and is often served with kalua pig or other traditional dishes.
* Taro Chips: Taro chips are a delicious and healthy snack. Simply slice the taro thinly, toss with oil and spices, and bake or fry until crispy.
* Taro Fries: Taro fries are a great alternative to potato fries. Cut the taro into fries, toss with oil and spices, and bake or fry until golden brown.
* Taro Curry: Taro can be added to curries for a hearty and flavorful dish.
* Taro Cake: Taro cake is a popular dessert in many Asian countries. It’s made with grated taro, rice flour, and other ingredients.
I personally love making taro chips – they’re so easy and satisfying!
Propagating Taro
Want to expand your taro patch? You can easily propagate taro from corms or cormels (small corms that grow around the main corm).
* From Corms: Simply plant a healthy taro corm as described above
Conclusion
So, there you have it! Growing taro at home, while it might seem daunting at first, is a surprisingly rewarding experience. This DIY trick, transforming your kitchen scraps into a thriving plant, is more than just a fun project; it’s a step towards sustainable living, a connection to nature, and a source of fresh, delicious taro right at your fingertips. Forget relying solely on grocery stores – imagine the satisfaction of harvesting your own taro, knowing exactly where it came from and how it was grown.
This method is a must-try for several reasons. First, it’s incredibly cost-effective. You’re essentially recycling the top portion of the taro you’ve already purchased, turning waste into a valuable resource. Second, it’s a fantastic way to learn about plant propagation and the life cycle of taro. You’ll gain a deeper appreciation for the food you eat and the natural processes that bring it to your table. Third, it’s a beautiful and unique addition to your indoor or outdoor garden. The large, heart-shaped leaves of the taro plant add a touch of the tropics to any space.
But the benefits don’t stop there. Growing your own taro allows you to control the growing environment, ensuring that your plant is free from harmful pesticides and herbicides. You can tailor the soil composition and watering schedule to meet the specific needs of your taro, resulting in a healthier and more productive plant.
Ready to take your taro growing to the next level? Consider experimenting with different varieties of taro. There are many cultivars available, each with its own unique flavor and texture. Some varieties are better suited for boiling, while others are ideal for roasting or frying. You can also try growing your taro in different types of containers, such as terracotta pots or raised garden beds.
Another variation to explore is hydroponic taro cultivation. This method involves growing taro in water without soil, using nutrient-rich solutions to provide the plant with everything it needs to thrive. Hydroponics can be a great option for those who live in urban areas with limited space or poor soil quality.
Don’t be afraid to get creative and personalize your taro growing experience. Add companion plants to your garden to attract beneficial insects and improve soil health. Use organic fertilizers to nourish your taro and promote vigorous growth. The possibilities are endless!
We wholeheartedly encourage you to try this DIY trick for growing taro at home. It’s a simple, sustainable, and incredibly rewarding project that will bring joy and deliciousness to your life. Once you’ve given it a try, we’d love to hear about your experience! Share your photos, tips, and stories in the comments below. Let’s build a community of taro enthusiasts and learn from each other. Happy growing!
Frequently Asked Questions (FAQ)
What kind of taro is best for regrowing?
The best taro for regrowing is one that is fresh and firm, with a healthy-looking top portion. Look for taro that is free from blemishes, bruises, or soft spots. Any variety of taro can be regrown, but some varieties may be more readily available in your area than others. Experiment with different types to see which ones thrive best in your growing conditions.
How long does it take for taro to grow?
The time it takes for taro to grow from a cutting to a mature plant can vary depending on several factors, including the variety of taro, the growing conditions, and the size of the initial cutting. Generally, it takes about 6-9 months for taro to reach maturity and be ready for harvest. You’ll know your taro is ready when the leaves start to yellow and die back.
Can I grow taro indoors?
Yes, you can absolutely grow taro indoors, especially in cooler climates. Provide it with plenty of bright, indirect sunlight. A south-facing window is ideal. Ensure the pot has good drainage and keep the soil consistently moist. You might need to supplement humidity, especially during dry winter months. Consider using a humidifier or placing the pot on a pebble tray filled with water.
What kind of soil does taro need?
Taro thrives in rich, well-draining soil that is high in organic matter. A good soil mix for taro would include equal parts of potting soil, compost, and perlite or vermiculite. The compost provides essential nutrients, while the perlite or vermiculite improves drainage and aeration. Avoid using heavy clay soils, as they can become waterlogged and lead to root rot.
How often should I water my taro plant?
Taro plants love moisture and need to be watered regularly. Keep the soil consistently moist, but not waterlogged. Water deeply whenever the top inch of soil feels dry to the touch. During hot, dry weather, you may need to water your taro plant more frequently. Reduce watering during the winter months when the plant is not actively growing.
What are common pests and diseases that affect taro?
Common pests that can affect taro include aphids, spider mites, and mealybugs. These pests can suck the sap from the leaves, causing them to yellow and wilt. To control these pests, you can spray your taro plant with insecticidal soap or neem oil. Diseases that can affect taro include root rot and leaf blight. Root rot is caused by overwatering and poor drainage, while leaf blight is caused by fungal pathogens. To prevent these diseases, ensure your taro plant is planted in well-draining soil and avoid overwatering.
Is taro poisonous if eaten raw?
Yes, taro is poisonous if eaten raw. It contains calcium oxalate crystals, which can cause a burning sensation in the mouth and throat. These crystals are broken down during cooking, making taro safe to eat. Always cook taro thoroughly before consuming it. Boiling, steaming, roasting, or frying are all effective methods of cooking taro.
How do I harvest taro?
You can harvest taro when the leaves start to yellow and die back, typically after 6-9 months of growth. To harvest, carefully dig around the base of the plant and lift the corm (the underground stem) out of the soil. Use a sharp knife to remove the leaves and roots from the corm. Wash the corm thoroughly and store it in a cool, dry place.
Can I grow taro in a container?
Yes, taro can be successfully grown in containers. Choose a large container with good drainage holes. Fill the container with a rich, well-draining potting mix. Water regularly and fertilize every few weeks with a balanced fertilizer. Container-grown taro may not grow as large as taro grown in the ground, but it can still produce a decent harvest.
What fertilizer should I use for taro?
Use a balanced fertilizer with an NPK ratio of 10-10-10 or 20-20-20. Apply the fertilizer according to the package directions. You can also use organic fertilizers, such as compost tea or fish emulsion. Fertilize your taro plant every few weeks during the growing season. Avoid over-fertilizing, as this can burn the roots.
Leave a Comment