
Harvesting Sweet Potatoes can feel like unearthing buried treasure! Imagine the satisfaction of digging into your garden and pulling out those vibrant, earthy jewels you’ve nurtured yourself. But knowing when and how to harvest them is key to enjoying their sweet, delicious flavor.
For centuries, sweet potatoes have been a staple in diets across the globe, with origins tracing back to Central and South America. They’ve been cultivated and cherished for their nutritional value and versatility in countless dishes. From simple roasted wedges to decadent pies, the sweet potato has earned its place as a beloved food source.
So, why do you need this DIY guide? Well, harvesting too early can result in bland, underdeveloped potatoes, while waiting too long can lead to rot and pest damage. I’m here to share my tried-and-true tips and tricks to ensure you get the most bountiful and flavorful harvest possible. This isn’t just about digging up potatoes; it’s about maximizing your gardening efforts and enjoying the fruits (or rather, vegetables!) of your labor. With the right knowledge, harvesting sweet potatoes can be a rewarding and delicious experience. Let’s get started!
Harvesting Sweet Potatoes: A Gardener’s Guide to the Sweetest Reward
Okay, fellow gardeners, so you’ve nurtured your sweet potato vines all season, and now the moment of truth has arrived: harvest time! Harvesting sweet potatoes is one of the most rewarding experiences in the garden. There’s nothing quite like digging into the earth and unearthing those beautiful, orange treasures you’ve worked so hard to grow. But before you grab your shovel and start digging, let’s make sure we do it right to maximize your yield and ensure those sweet potatoes are ready for curing and storing.
When to Harvest: Timing is Everything
Knowing when to harvest is crucial. You don’t want to pull them up too early, or they won’t be fully developed. Wait too long, and you risk frost damage, which can ruin your entire crop. Here’s what to look for:
* Days to Maturity: Check your seed packet or plant tag. Most sweet potato varieties mature in 90-120 days. Mark your planting date on your calendar and count forward.
* First Frost Warning: This is your biggest indicator. Sweet potatoes are very sensitive to frost. Even a light frost can damage the tubers near the surface. If a frost is predicted, harvest immediately, even if they aren’t quite at their full maturity date. It’s better to have slightly smaller sweet potatoes than rotten ones.
* Yellowing Vines: As the sweet potatoes mature, the vines will start to yellow and the growth will slow down. This is a good sign that they are ready to be harvested. Don’t rely solely on this, though, as other factors can cause yellowing.
* Test Dig: The best way to know for sure is to do a test dig. About two weeks before your expected harvest date, carefully dig around one plant and check the size of the sweet potatoes. If they are a good size and look healthy, you’re good to go!
Tools You’ll Need: Gathering Your Gear
Before you start digging, gather your tools. Having the right equipment will make the job much easier and prevent damage to your precious sweet potatoes.
* Garden Fork or Shovel: A garden fork is generally preferred because it’s less likely to slice into the sweet potatoes. However, a shovel will work if you’re careful.
* Gloves: Protect your hands from dirt and potential scratches.
* Pruning Shears or Knife: To cut the vines.
* Tarp or Burlap Sacks: To lay the harvested sweet potatoes on. Avoid concrete, as it can bruise them.
* Soft Brush: For gently removing excess dirt.
* Curing Location: A warm, humid, and well-ventilated space for curing (more on that later!).
The Harvesting Process: Digging Up the Treasure
Alright, let’s get our hands dirty! Here’s a step-by-step guide to harvesting your sweet potatoes:
1. Prepare the Area: Clear away any weeds or debris around the sweet potato vines. This will give you more room to work and prevent you from accidentally damaging the tubers.
2. Cut the Vines: Using your pruning shears or knife, cut the vines a few inches above the ground. This will make it easier to dig around the plants. Discard the vines (or compost them if they are healthy).
3. Loosen the Soil: Carefully insert your garden fork or shovel about a foot away from the base of the plant. Gently loosen the soil around the plant, working your way around in a circle. Be very careful not to stab or cut the sweet potatoes.
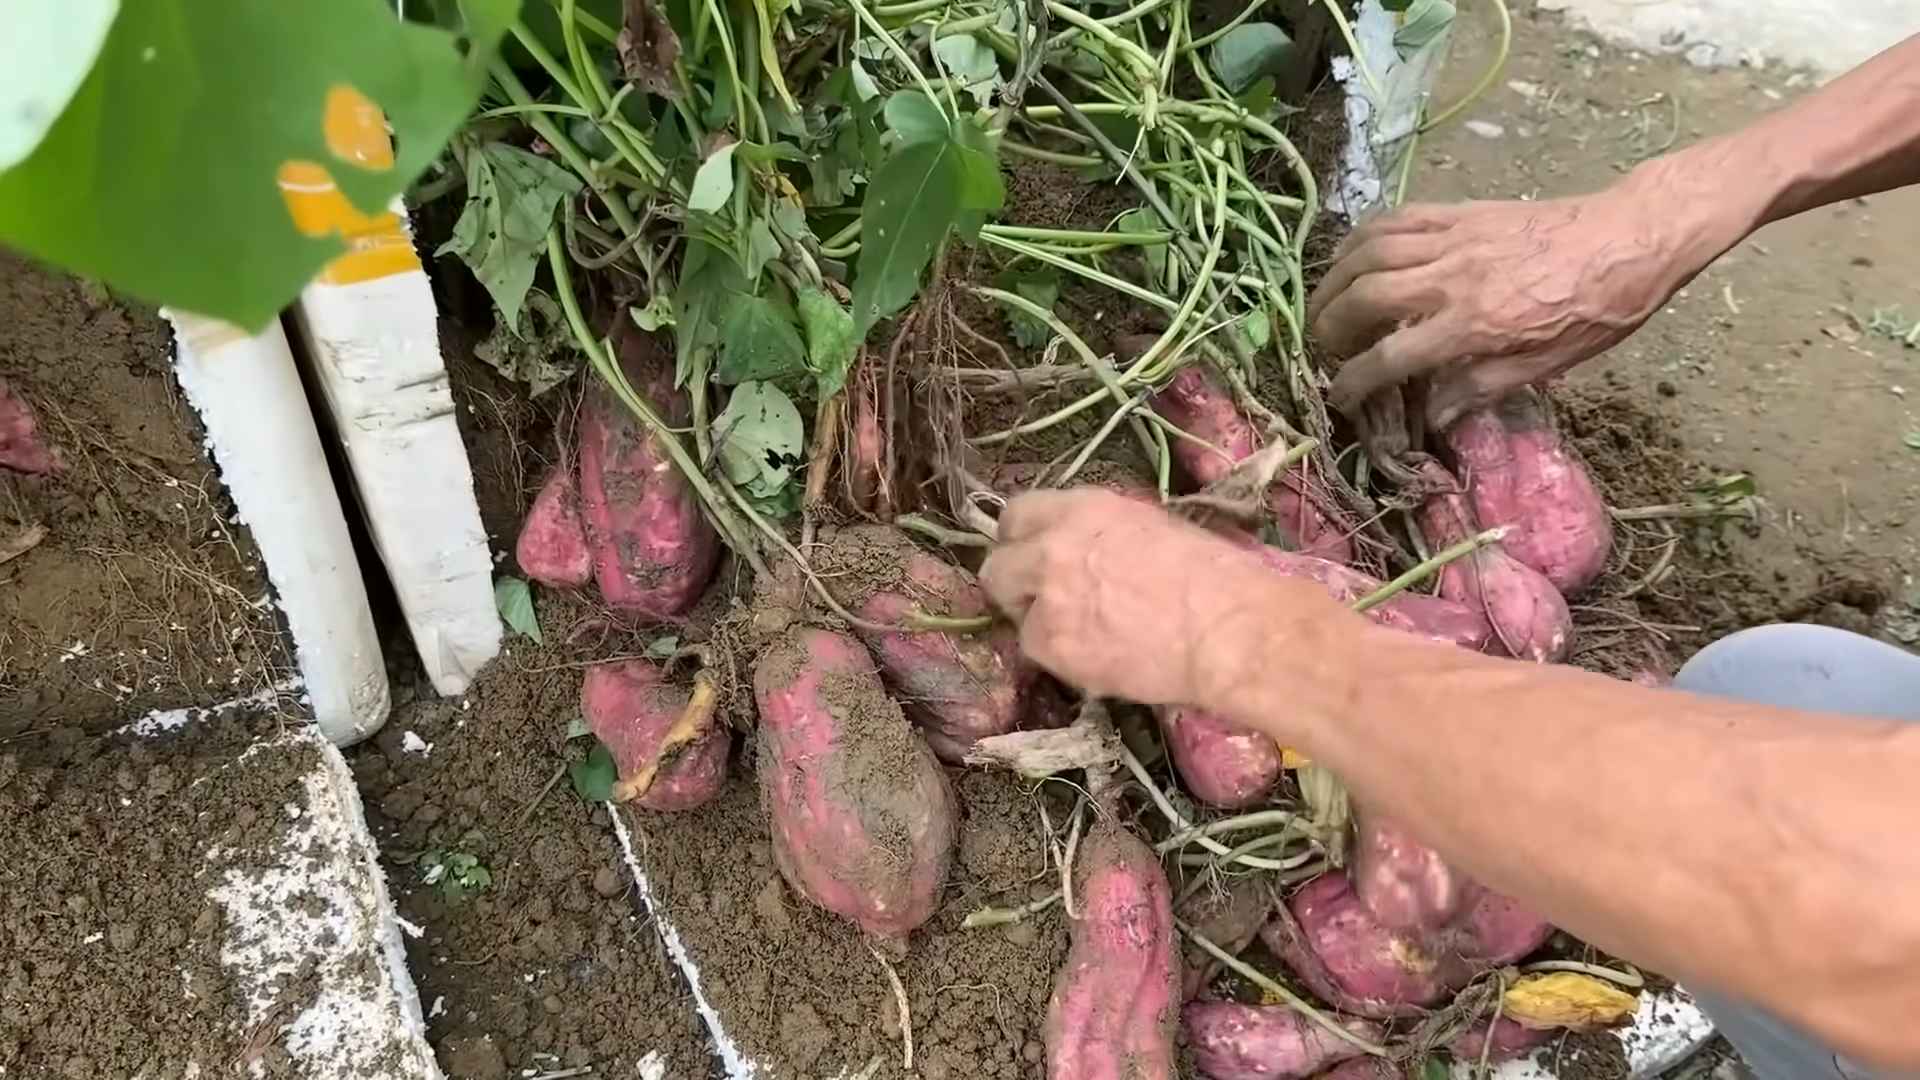
4. Lift the Plant: Once the soil is loosened, gently lift the plant from the ground. You may need to use your hands to help dislodge the sweet potatoes.
5. Unearth the Sweet Potatoes: Carefully remove the sweet potatoes from the soil. They will be attached to the roots. Handle them gently to avoid bruising.
6. Lay Them Out to Dry: Place the harvested sweet potatoes on your tarp or burlap sacks in a single layer. Allow them to dry in the sun for a few hours. This will help to toughen the skins and prevent rot.
7. Brush Off Excess Dirt: Once the sweet potatoes are dry, use a soft brush to gently remove any excess dirt. Don’t wash them! Washing can promote rot.
8. Inspect for Damage: Carefully inspect each sweet potato for cuts, bruises, or other damage. Set aside any damaged sweet potatoes to be used immediately, as they won’t store well.
9. Prepare for Curing: Now that you’ve harvested your sweet potatoes, it’s time to cure them.
Curing Sweet Potatoes: The Secret to Sweetness
Curing is an essential step in the sweet potato harvesting process. It allows the starches in the sweet potatoes to convert to sugars, making them sweeter and more flavorful. It also helps to heal any minor cuts or bruises and toughens the skins, which improves their storage life.
1. Find a Suitable Location: You’ll need a warm, humid, and well-ventilated space for curing. A temperature of 80-85°F (27-29°C) and a humidity level of 85-90% is ideal. A greenhouse, shed, or even a spare room with a humidifier can work.
2. Arrange the Sweet Potatoes: Place the sweet potatoes in a single layer in crates, boxes, or on shelves. Make sure they are not touching each other to allow for good air circulation.
3. Maintain Temperature and Humidity: Monitor the temperature and humidity regularly. Use a thermometer and hygrometer to keep track. If the humidity is too low, you can mist the sweet potatoes with water or place a pan of water in the room. If the temperature is too low, use a space heater.
4. Curing Time: Cure the sweet potatoes for 7-10 days.
5. Check for Rot: During the curing process, check the sweet potatoes regularly for signs of rot. Remove any rotten sweet potatoes immediately to prevent the spread of disease.
Storing Sweet Potatoes: Keeping the Harvest Fresh
After curing, your sweet potatoes are ready for long-term storage. Proper storage is essential to keep them fresh and delicious for months to come.
1. Choose a Cool, Dark, and Dry Location: The ideal storage location is a cool, dark, and dry place with a temperature of 55-60°F (13-16°C) and a humidity level of 50-75%. A root cellar, basement, or unheated garage can work well.
2. Pack the Sweet Potatoes: Place the cured sweet potatoes in crates, boxes, or baskets lined with newspaper or burlap. Make sure they are not touching each other.
3. Avoid Refrigeration: Do not refrigerate sweet potatoes! Refrigeration will cause them to develop a hard core and lose their flavor.
4. Check Regularly: Check the sweet potatoes regularly for signs of rot. Remove any rotten sweet potatoes immediately.
5. Storage Life: Properly cured and stored sweet potatoes can last for several months.
Troubleshooting: Common Problems and Solutions
Even with the best planning, things can sometimes go wrong. Here are some common problems you might encounter when harvesting and storing sweet potatoes, and how to solve them:
* Sweet Potatoes Rotting: This is usually caused by damage during harvesting, improper curing, or poor storage conditions. Handle the sweet potatoes carefully, ensure proper curing, and store them in a cool, dark, and dry place.
* Sweet Potatoes Not Sweet Enough: This can be due to harvesting too early or not curing them properly. Make sure to harvest at the right time and cure them for the recommended duration.
* Sweet Potatoes Developing a Hard Core: This is usually caused by refrigeration. Do not refrigerate sweet potatoes.
* Pest Damage: Sweet potatoes can be susceptible to pests like rodents and insects. Store them in a secure location and check them regularly for signs of pest damage.
Enjoying Your Harvest: The Sweetest Reward
After all your hard work, it’s time to enjoy the fruits (or rather, tubers) of your labor! Sweet potatoes are incredibly versatile and can be used in a wide variety of dishes, from sweet to savory. Roast them, bake them, mash them, fry them, or add them to soups and stews. The possibilities are endless!
I hope this guide has been helpful in your sweet potato harvesting journey. Happy gardening, and enjoy your delicious harvest!
Conclusion
So, there you have it! Harvesting sweet potatoes doesn’t have to be a daunting task relegated to seasoned farmers. With a little planning, the right tools, and this straightforward guide, you can successfully unearth your own delicious, homegrown sweet potatoes. The satisfaction of enjoying produce you’ve nurtured from seed (or slip!) to table is truly unparalleled.
Why is this DIY approach a must-try? Because it puts you in control. You dictate the timing, ensuring your sweet potatoes are harvested at peak ripeness for optimal flavor and storage. You avoid the potential bruising and damage that can occur with commercial harvesting methods. And, perhaps most importantly, you connect with the earth and the process of growing your own food – a deeply rewarding experience in itself.
But the fun doesn’t stop there! Consider these variations to personalize your sweet potato harvest:
* **Succession Planting:** Plant different varieties of sweet potatoes with varying maturity dates to extend your harvest season. Imagine enjoying fresh sweet potatoes from late summer well into the fall!
* **Curing Experimentation:** Experiment with different curing methods. Some prefer a warm, humid environment, while others find success with a more moderate approach. Document your results to discover what works best for your climate and sweet potato variety.
* **Companion Planting Benefits:** Next year, plan your garden to include companion plants that deter pests and improve soil health around your sweet potatoes. Marigolds, for example, are known to repel nematodes.
* **Sweet Potato Greens:** Don’t forget the greens! Sweet potato leaves are edible and nutritious. Harvest them sparingly throughout the growing season for a delicious and healthy addition to salads or stir-fries. Just be sure to only harvest from plants that haven’t been treated with pesticides.
We are confident that once you experience the joy of harvesting sweet potatoes from your own garden, you’ll be hooked. The taste of freshly dug, homegrown sweet potatoes is simply unmatched. The vibrant color, the earthy aroma, and the naturally sweet flavor will transform your favorite recipes.
Don’t be intimidated by the process. Start small, learn as you go, and embrace the challenges. Remember to be gentle when digging to avoid damaging the tubers. And most importantly, have fun!
We wholeheartedly encourage you to give this DIY trick a try. Share your experiences, your successes, and even your challenges in the comments below. We’d love to hear about your sweet potato adventures! Let’s build a community of gardeners who are passionate about growing and enjoying their own food. Happy harvesting!
Frequently Asked Questions (FAQ)
When is the best time to harvest my sweet potatoes?
The ideal time for harvesting sweet potatoes is typically 90-120 days after planting slips, or about three to four weeks before the first expected frost in your area. Look for signs like yellowing leaves and a slight cracking of the soil around the base of the plant. A test dig can also help determine maturity – dig up a sample sweet potato and check its size and skin thickness. If the skin is easily rubbed off, it’s not quite ready.
How do I know if my sweet potatoes are ready to harvest if I don’t know when they were planted?
Even without knowing the exact planting date, there are visual cues to look for. As mentioned, yellowing leaves are a key indicator. Also, check the vines – if they start to die back, it’s a sign that the plant is nearing the end of its growth cycle. You can also gently probe the soil around the base of the plant to feel for the presence of sweet potatoes. If you find some that are a good size, it’s likely time to harvest.
What tools do I need to harvest sweet potatoes?
You’ll need a few essential tools:
* **Garden Fork or Spading Fork:** This is crucial for loosening the soil around the sweet potatoes without damaging them. Avoid using a shovel, as it’s more likely to cut into the tubers.
* **Gloves:** Protect your hands from dirt and potential scratches.
* **Pruning Shears or Knife:** To cut the vines before digging.
* **Trowel (Optional):** For carefully uncovering sweet potatoes that are close to the surface.
* **Containers:** Baskets, buckets, or wheelbarrows to transport your harvested sweet potatoes.
How do I cure sweet potatoes after harvesting?
Curing is essential for developing the sweetness and improving the storage life of sweet potatoes. Here’s a general guideline:
1. **Handle with Care:** Avoid bruising or damaging the sweet potatoes during harvesting and curing.
2. **Clean Gently:** Brush off any excess dirt, but do not wash them.
3. **Curing Environment:** Place the sweet potatoes in a warm (80-85°F or 27-29°C), humid (85-90% humidity) environment for 5-10 days. A greenhouse, shed, or even a spare room with a humidifier can work.
4. **Proper Ventilation:** Ensure good air circulation to prevent mold growth.
5. **Storage:** After curing, store the sweet potatoes in a cool (55-60°F or 13-16°C), dry, and well-ventilated place. Avoid storing them in the refrigerator, as this can cause them to develop a hard core.
Can I eat sweet potatoes immediately after harvesting?
While you *can* eat sweet potatoes immediately after harvesting, they won’t be as sweet or flavorful as those that have been cured. Curing allows the starches in the sweet potatoes to convert to sugars, resulting in a sweeter taste and a smoother texture.
How long can I store sweet potatoes after curing?
Properly cured and stored sweet potatoes can last for several months, typically 4-7 months. Check them periodically for any signs of spoilage, such as soft spots or mold. Discard any that are damaged.
What if I accidentally damage a sweet potato during harvesting?
Damaged sweet potatoes are more susceptible to rot and won’t store well. It’s best to use them as soon as possible. You can roast them, bake them, or use them in any recipe that calls for sweet potatoes.
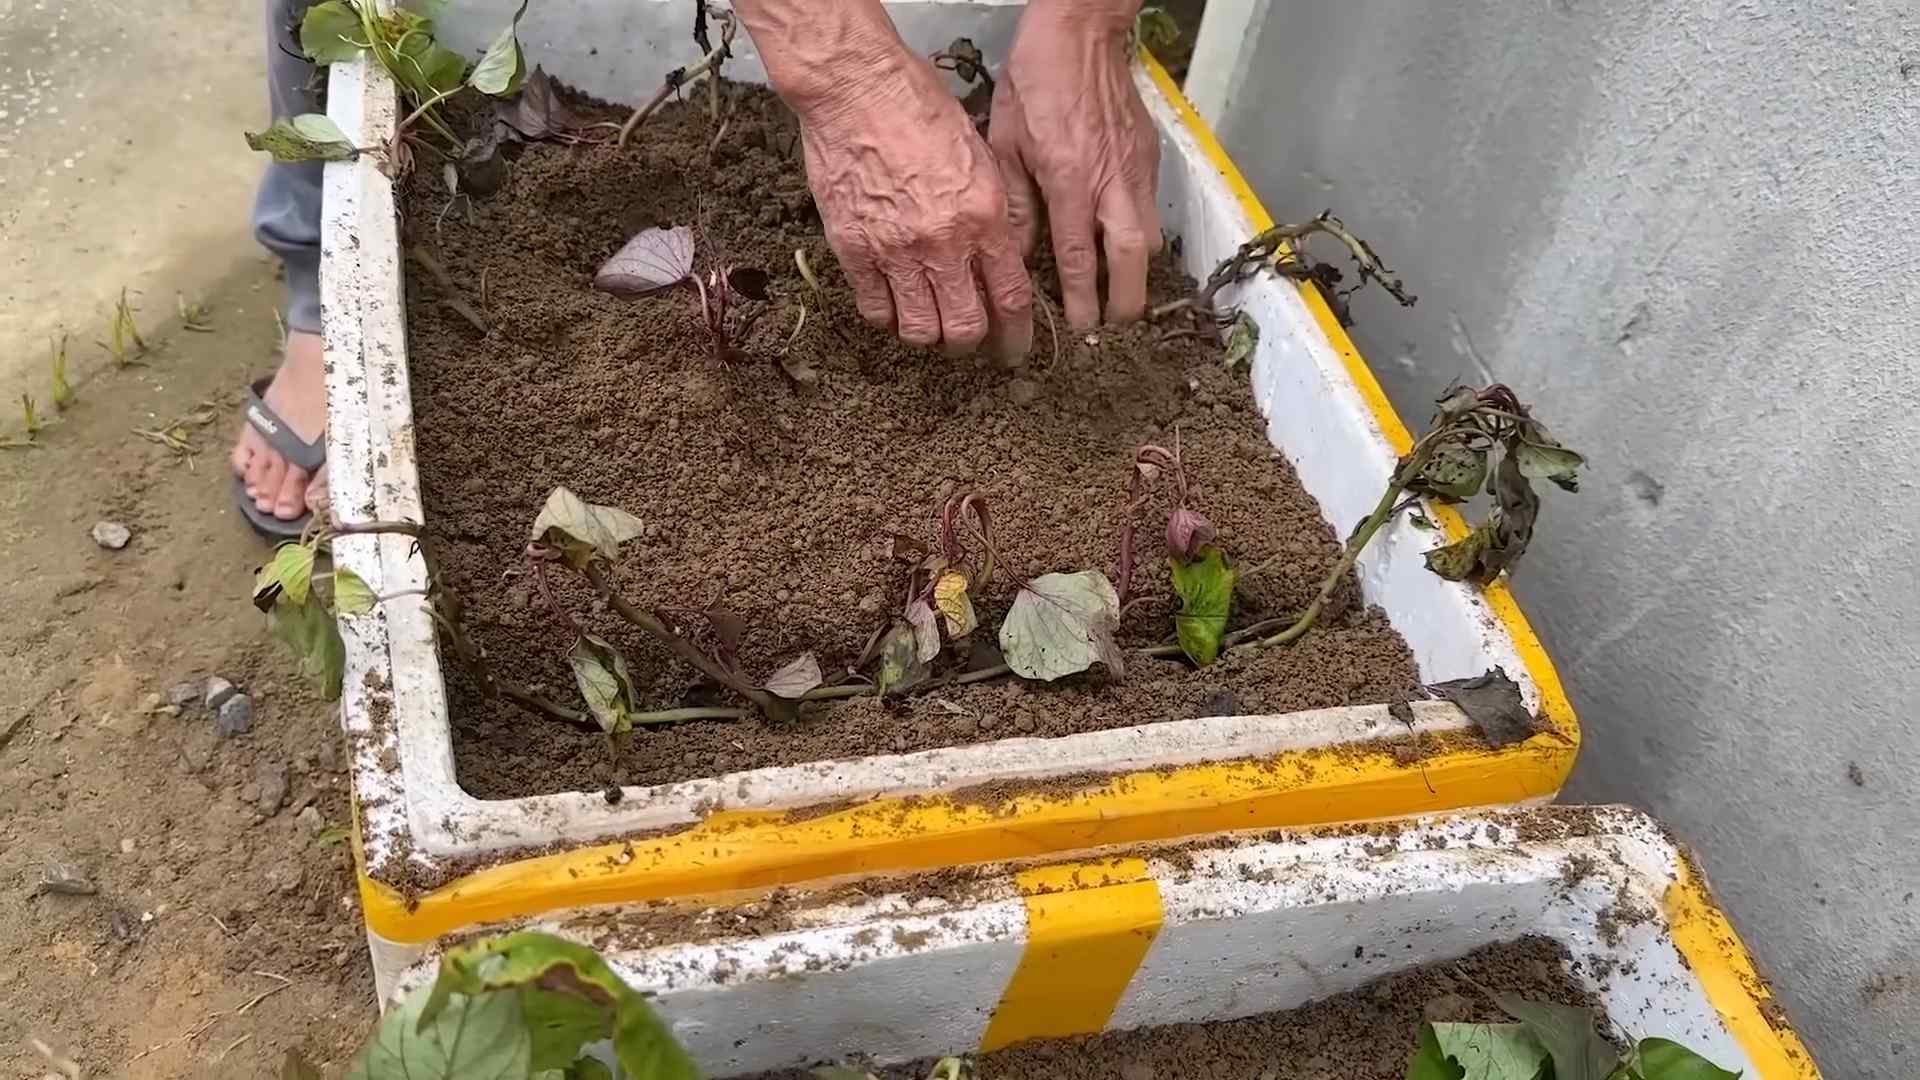
Can I grow sweet potatoes in containers?
Yes, you can! Choose a large container (at least 20 gallons) with good drainage. Use a well-draining potting mix and provide plenty of sunlight. Container-grown sweet potatoes may not produce as many tubers as those grown in the ground, but it’s a great option for gardeners with limited space.
What are some common pests and diseases that affect sweet potatoes?
Common pests include sweet potato weevils, wireworms, and nematodes. Diseases include stem rot, scurf, and black rot. Practice crop rotation, use disease-resistant varieties, and maintain good soil health to minimize pest and disease problems.
Are sweet potato leaves edible?
Yes, sweet potato leaves are edible and nutritious. They can be eaten raw in salads or cooked like spinach. Choose young, tender leaves and avoid harvesting from plants that have been treated with pesticides. They are a great addition to your diet and provide a unique flavor.

Leave a Comment