
Home Garden Tomatoes: Imagine biting into a juicy, sun-ripened tomato, bursting with flavor, that you grew yourself! There’s nothing quite like the taste of homegrown tomatoes, and the satisfaction of nurturing them from tiny seedlings to vibrant, fruit-bearing plants. But let’s be honest, sometimes getting those perfect tomatoes can feel like a real challenge.
Growing tomatoes at home has been a cherished tradition for generations. From the sprawling kitchen gardens of Italian grandmothers to the victory gardens of wartime America, the tomato has held a special place in our hearts and on our tables. It’s a symbol of summer, freshness, and the simple pleasures of life.
That’s why I’m so excited to share these DIY tricks and hacks with you! Maybe your tomatoes are always small, or perhaps they suffer from blossom end rot. Maybe you’re just looking for ways to maximize your yield and get the most out of your home garden tomatoes. Whatever your tomato-growing woes, I’ve got you covered. This article is packed with easy-to-follow tips and clever solutions that will help you cultivate the tomato garden of your dreams. Get ready to transform your tomato growing experience!
Growing the Juiciest Tomatoes: My Foolproof DIY Guide
Okay, tomato lovers, gather ’round! I’m about to share all my secrets for growing the most delicious, plump, and juicy tomatoes right in your own backyard. Forget those bland supermarket tomatoes – we’re talking flavor explosions here! This isn’t just about throwing some seeds in the ground; it’s about creating the perfect environment for your tomato plants to thrive. So, let’s get our hands dirty!
Choosing the Right Tomato Variety
Before we even think about planting, we need to pick the right tomato variety. This is crucial because different varieties have different needs and produce different types of tomatoes.
* Determinate vs. Indeterminate: This is the first big decision. Determinate tomatoes grow to a certain size and then produce all their fruit at once, making them great for canning. Indeterminate tomatoes, on the other hand, keep growing and producing fruit throughout the season. I personally prefer indeterminate varieties because I love having a continuous supply of fresh tomatoes.
* Tomato Type: Do you want big beefsteak tomatoes for sandwiches, juicy cherry tomatoes for salads, or Roma tomatoes for sauces? Think about how you plan to use your tomatoes and choose accordingly.
* Disease Resistance: Look for varieties that are resistant to common tomato diseases like Verticillium wilt (V), Fusarium wilt (F), and nematodes (N). This will save you a lot of headaches later on.
* My Personal Favorites: I’ve had great success with ‘Early Girl’ (early and reliable), ‘Brandywine’ (amazing flavor, but needs staking), ‘San Marzano’ (perfect for sauces), and ‘Sungold’ (the sweetest cherry tomatoes ever!).
Starting Your Tomato Seeds Indoors (Optional, but Recommended)
Starting your seeds indoors gives you a head start on the growing season, especially if you live in a cooler climate. I highly recommend it!
What You’ll Need:
* Tomato seeds (obviously!)
* Seed starting trays or small pots
* Seed starting mix (this is different from regular potting soil)
* A spray bottle
* A heat mat (optional, but helpful)
* A grow light (also optional, but highly recommended)
Step-by-Step Instructions:
1. Prepare Your Seed Starting Trays: Fill your seed starting trays or pots with seed starting mix. Gently tap the trays to settle the soil.
2. Sow the Seeds: Make a small indentation (about ¼ inch deep) in the soil and place 2-3 seeds in each indentation. Cover the seeds with a thin layer of seed starting mix.
3. Water Gently: Use a spray bottle to gently moisten the soil. You don’t want to overwater, just keep the soil consistently damp.
4. Provide Warmth: Place the trays on a heat mat (if using) and cover them with a humidity dome or plastic wrap to create a humid environment.
5. Provide Light: Place the trays under a grow light or in a sunny window. If using a grow light, keep it a few inches above the trays and adjust as the seedlings grow.
6. Monitor and Water: Check the soil moisture daily and water as needed to keep it consistently damp.
7. Thin the Seedlings: Once the seedlings have their first true leaves (the second set of leaves), thin them out by snipping off the weaker seedlings at the soil line. Leave only one strong seedling per cell or pot.
8. Harden Off the Seedlings: About a week before you plan to transplant the seedlings outdoors, start hardening them off. This means gradually exposing them to outdoor conditions. Start by placing them outside for an hour or two each day, gradually increasing the time each day.
Preparing Your Garden Bed
Tomatoes are heavy feeders, so preparing your garden bed properly is essential for success.
What You’ll Need:
* A sunny spot (tomatoes need at least 6-8 hours of sunlight per day)
* Well-draining soil
* Compost or well-rotted manure
* Tomato fertilizer (I like to use an organic tomato fertilizer)
* A shovel or garden fork
Step-by-Step Instructions:
1. Choose a Sunny Location: Select a spot in your garden that gets at least 6-8 hours of sunlight per day.
2. Prepare the Soil: Loosen the soil with a shovel or garden fork to a depth of at least 12 inches.
3. Amend the Soil: Mix in plenty of compost or well-rotted manure to improve soil fertility and drainage. I usually add a generous amount – about 2-3 inches of compost spread over the entire bed.
4. Add Fertilizer: Incorporate a tomato fertilizer into the soil according to the package directions.
5. Test Your Soil (Optional): If you’re unsure about your soil’s pH, you can test it using a soil testing kit. Tomatoes prefer a slightly acidic soil pH of around 6.0-6.8.
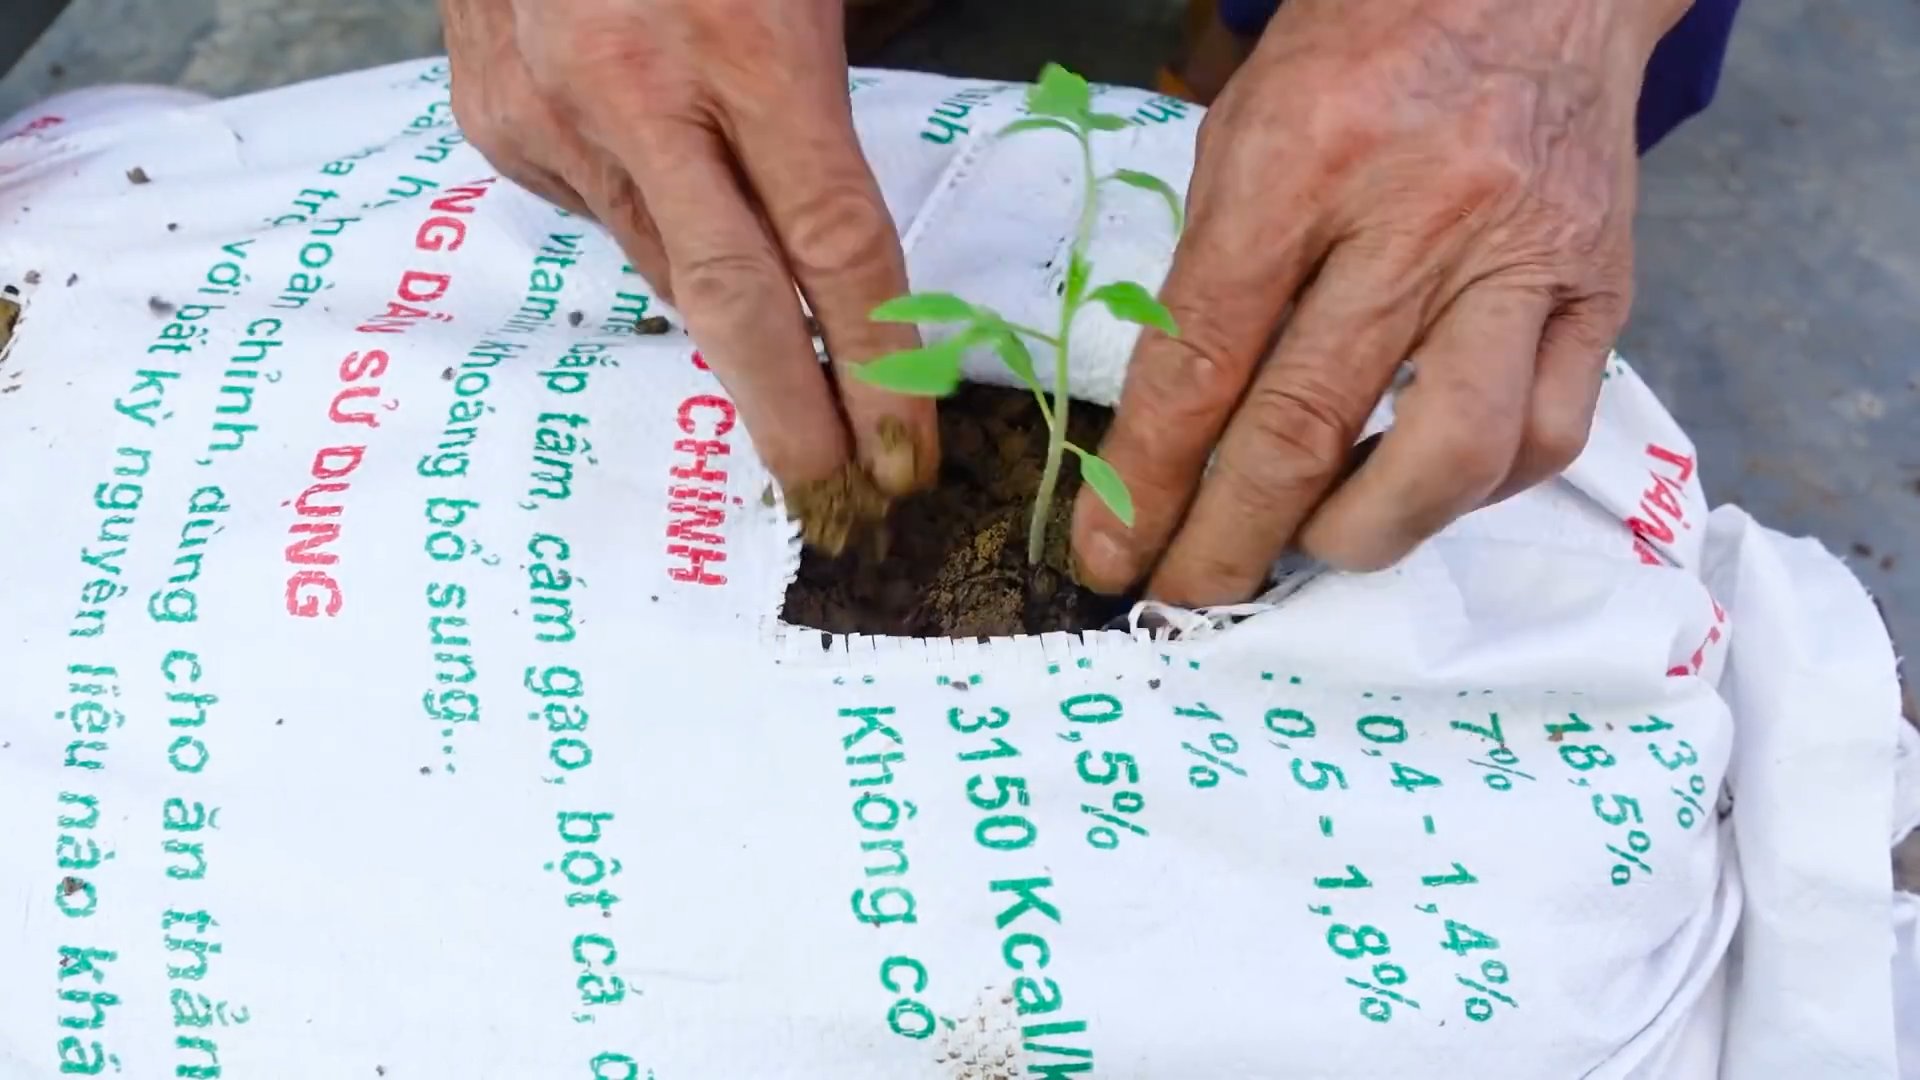
Transplanting Your Tomato Seedlings
Now for the exciting part – getting those little seedlings into the ground!
What You’ll Need:
* Your hardened-off tomato seedlings
* A trowel
* Tomato cages or stakes
* Mulch (straw, wood chips, or shredded leaves)
* Water
Step-by-Step Instructions:
1. Choose a Cloudy Day: Transplant your seedlings on a cloudy day or in the late afternoon to avoid shocking them.
2. Dig a Hole: Dig a hole that is slightly larger than the root ball of your seedling.
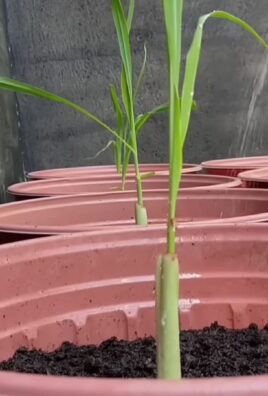
3. Plant Deep: This is a crucial step! Tomatoes can grow roots along their stems, so planting them deep will encourage a stronger root system. Remove the bottom leaves of the seedling and plant it so that the lowest remaining leaves are just above the soil line.
4. Space Properly: Space your tomato plants according to the variety. Determinate tomatoes can be planted closer together (about 2-3 feet apart), while indeterminate tomatoes need more space (about 3-4 feet apart).
5. Add Support: Immediately after planting, install tomato cages or stakes to support the plants as they grow. This will prevent the plants from sprawling on the ground and keep the fruit clean.
6. Water Thoroughly: Water the seedlings thoroughly after planting.
7. Mulch: Apply a layer of mulch around the base of the plants to help retain moisture, suppress weeds, and regulate soil temperature.
Caring for Your Tomato Plants
Once your tomato plants are in the ground, it’s important to provide them with the care they need to thrive.
* Watering: Water your tomato plants deeply and regularly, especially during hot, dry weather. Aim to water at the base of the plants to avoid wetting the foliage, which can lead to disease. I usually water deeply 2-3 times a week, depending on the weather.
* Fertilizing: Continue to fertilize your tomato plants every 2-3 weeks with a tomato fertilizer. Follow the package directions carefully.
* Pruning: Pruning is important for indeterminate tomato varieties. Remove the suckers (the small shoots that grow between the main stem and the branches) to encourage the plant to focus its energy on producing fruit. I usually prune my tomato plants once a week.
* Pest and Disease Control: Keep an eye out for pests and diseases. Common tomato pests include aphids, tomato hornworms, and whiteflies. Common tomato diseases include early blight, late blight, and blossom end rot. Treat any problems promptly with appropriate organic or chemical controls. I prefer to use organic methods whenever possible.
* Supporting the Plants: As the plants grow, make sure they are adequately supported by their cages or stakes. Tie the stems to the supports as needed.
Dealing with Common Tomato Problems
Even with the best care, you may encounter some problems along the way. Here are a few common issues and how to deal with them:
* Blossom End Rot: This is caused by a calcium deficiency in the fruit. To prevent blossom end rot, make sure your soil is well-drained and that you are watering your plants consistently. You can also add calcium to the soil by mixing in bone meal or crushed eggshells.
* Early Blight: This is a fungal disease that causes dark spots on the leaves. To prevent early blight, avoid overhead watering and provide good air circulation around the plants. You can also treat early blight with a fungicide.
* Tomato Hornworms: These large green caterpillars can quickly defoliate your tomato plants. Handpick them off the plants and drop them into a bucket of soapy water.
* Aphids: These small insects suck the sap from the leaves, causing them to curl and yellow. Spray aphids with a strong stream of water or treat them with insecticidal soap.
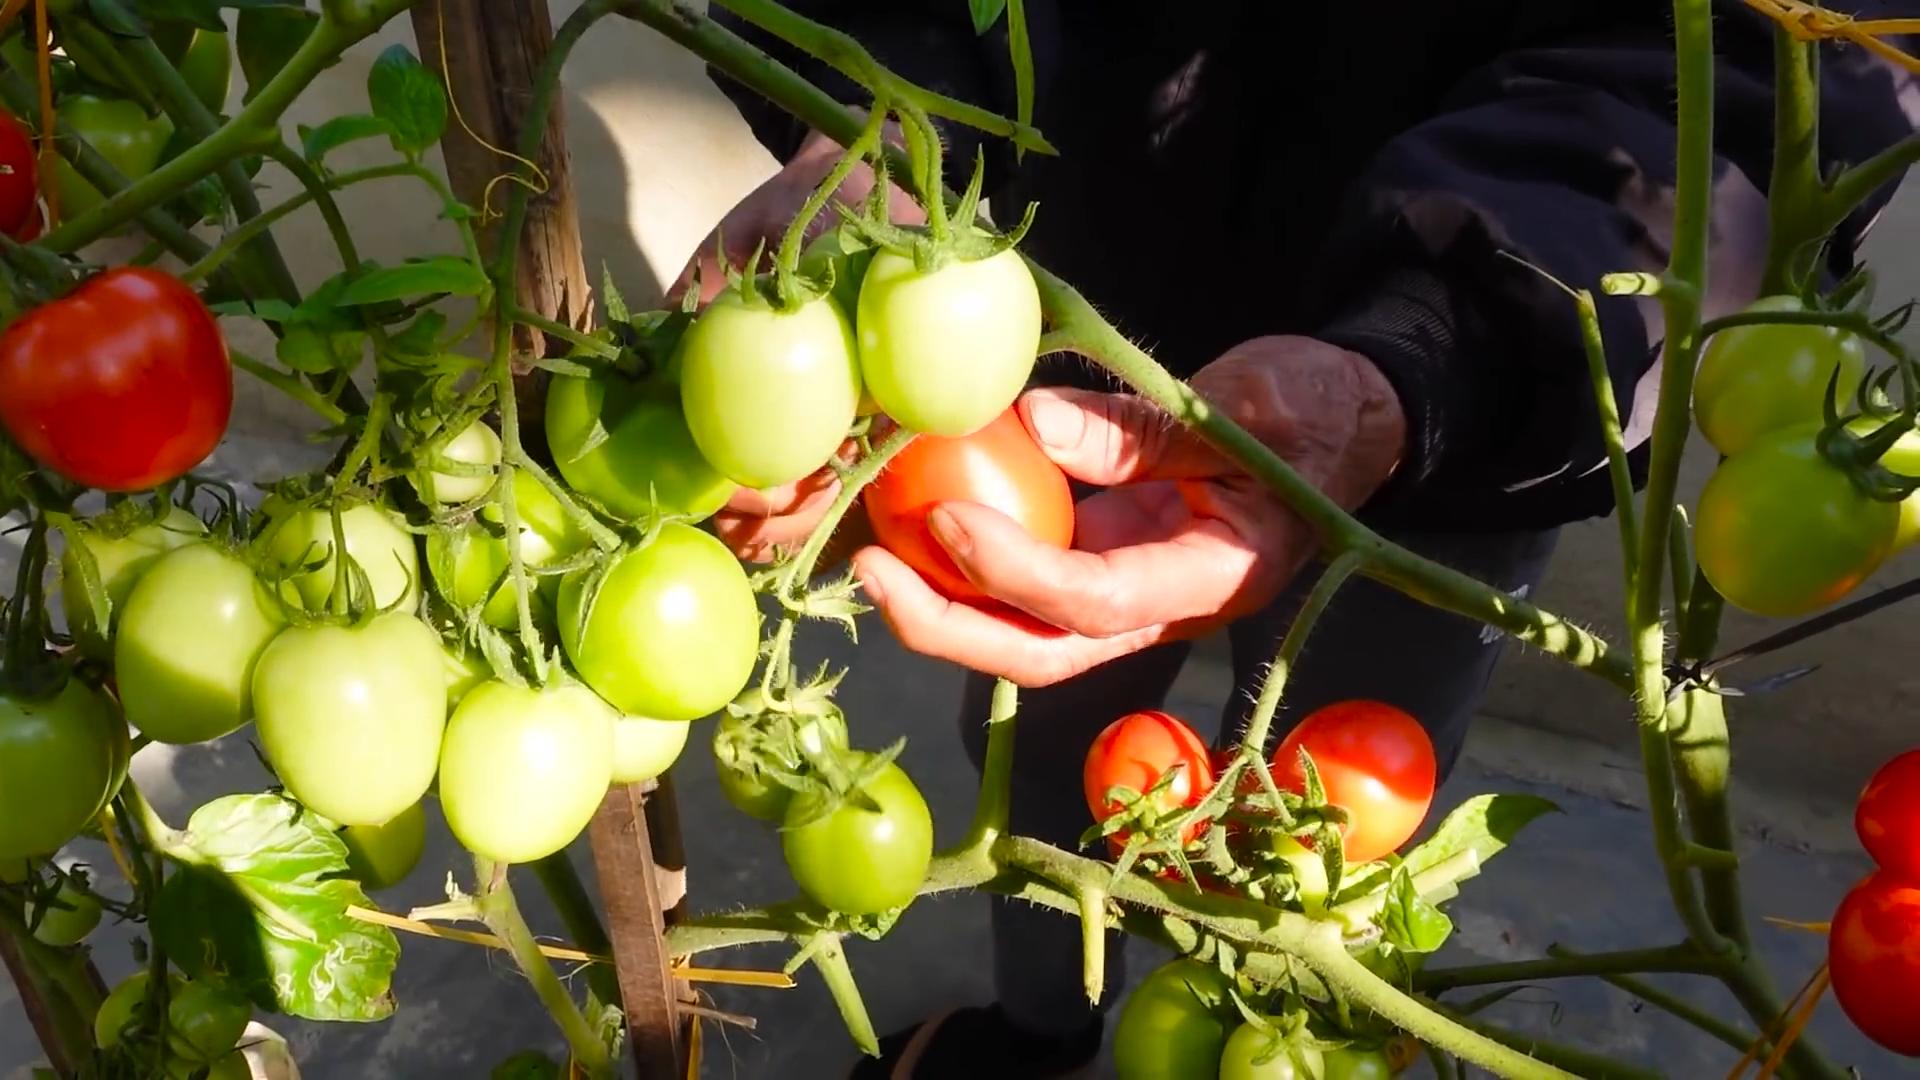
Harvesting Your Tomatoes
The moment we’ve all been waiting for – harvesting those delicious tomatoes!
*
Conclusion
So, there you have it! This simple yet incredibly effective DIY trick for boosting your home garden tomatoes is a game-changer. We’ve walked you through the process, highlighting how easy it is to implement and the significant impact it can have on your tomato yield and overall plant health. Forget expensive fertilizers and complicated gardening techniques; this method focuses on harnessing the power of readily available resources to create a thriving tomato patch.
Why is this a must-try? Because it’s cost-effective, environmentally friendly, and, most importantly, it works! Imagine biting into a juicy, sun-ripened tomato, knowing you nurtured it to perfection with your own hands using a simple, natural technique. The satisfaction is unparalleled. This isn’t just about growing tomatoes; it’s about connecting with nature, understanding the needs of your plants, and enjoying the fruits (or vegetables!) of your labor.
But the beauty of gardening lies in experimentation. Feel free to adapt this DIY trick to suit your specific needs and preferences. For example, if you’re using eggshells, try crushing them into a finer powder for faster decomposition and nutrient release. You could also experiment with different ratios of ingredients, observing how your tomato plants respond. Consider adding a small amount of Epsom salts to the soil around your plants for an extra boost of magnesium, which is crucial for chlorophyll production and overall plant health.
Another variation involves incorporating coffee grounds into the mix. Coffee grounds are rich in nitrogen, which is essential for leafy growth. However, be mindful of the acidity of coffee grounds and use them sparingly, especially if your soil is already acidic. You can also compost the coffee grounds first to neutralize the acidity.
Don’t be afraid to get creative! The key is to observe your plants closely and adjust your approach accordingly. Are the leaves turning yellow? Perhaps they need more nitrogen. Are the fruits developing blossom end rot? They might need more calcium. This DIY trick provides a solid foundation, but your own observations and adjustments will make it even more effective.
We are confident that this DIY trick will transform your home garden tomatoes. It’s a simple, sustainable, and rewarding way to cultivate a bountiful harvest. So, grab your gardening gloves, gather your supplies, and get ready to witness the magic unfold.
We encourage you to try this DIY trick and share your experiences with us! Let us know how it worked for you, what variations you tried, and any tips you discovered along the way. Your feedback will help us refine this technique and share it with even more gardeners. Happy gardening!
Frequently Asked Questions (FAQ)
What exactly is this DIY trick for home garden tomatoes?
This DIY trick involves amending the soil around your tomato plants with readily available materials to improve nutrient availability, drainage, and overall soil health. It typically involves incorporating ingredients like crushed eggshells (for calcium), banana peels (for potassium), and compost (for a balanced mix of nutrients) directly into the soil or creating a nutrient-rich “tea” to water your plants. The specific ingredients and methods can vary, but the underlying principle is to provide your tomato plants with the essential nutrients they need to thrive without relying on synthetic fertilizers.
Why is calcium so important for tomato plants?
Calcium is crucial for the development of strong cell walls in tomato plants. A calcium deficiency can lead to blossom end rot, a common problem where the bottom of the tomato develops a dark, sunken, and leathery spot. Adding crushed eggshells to the soil provides a slow-release source of calcium, helping to prevent this issue and promote healthy fruit development.
How often should I apply this DIY trick to my tomato plants?
The frequency of application depends on the specific ingredients you’re using and the overall health of your plants. Generally, you can incorporate crushed eggshells and banana peels into the soil at planting time and then reapply them every few weeks throughout the growing season. For nutrient-rich “tea,” you can water your plants with it every one to two weeks. Observe your plants closely and adjust the frequency based on their needs. If you notice signs of nutrient deficiency, such as yellowing leaves or blossom end rot, you may need to apply the DIY trick more frequently.
Can I use this DIY trick for other plants besides tomatoes?
Yes, many of the principles behind this DIY trick can be applied to other plants as well. Calcium, potassium, and other essential nutrients are beneficial for a wide range of fruits, vegetables, and flowers. However, it’s important to research the specific nutrient requirements of each plant and adjust the ingredients and application frequency accordingly. For example, some plants prefer acidic soil, so you might want to avoid using coffee grounds or other acidic materials.
What if I don’t have access to eggshells or banana peels? Are there any alternatives?
Yes, there are several alternatives you can use. For calcium, you can use bone meal or agricultural lime. For potassium, you can use wood ash (in moderation, as it can raise the soil pH) or seaweed extract. Compost is a great all-around soil amendment that provides a balanced mix of nutrients. You can also purchase organic fertilizers that are specifically formulated for tomato plants.
Is there a risk of over-fertilizing my tomato plants with this DIY trick?
While it’s less likely to over-fertilize with natural materials compared to synthetic fertilizers, it’s still possible. Over-fertilizing can lead to excessive leafy growth at the expense of fruit production. Pay attention to the appearance of your plants and adjust the application frequency accordingly. If you notice that your plants are growing vigorously but not producing many tomatoes, you may need to reduce the amount of fertilizer you’re using.
How do I know if my soil is acidic or alkaline?
You can test your soil pH using a soil testing kit, which is available at most garden centers. The ideal pH for tomato plants is between 6.0 and 6.8, which is slightly acidic. If your soil is too acidic, you can add lime to raise the pH. If it’s too alkaline, you can add sulfur or organic matter to lower the pH.
Can I use this DIY trick in containers as well as in the ground?
Yes, this DIY trick can be used in both containers and in the ground. However, container-grown plants tend to dry out and deplete nutrients more quickly than plants grown in the ground, so you may need to apply the DIY trick more frequently. Make sure your containers have good drainage to prevent waterlogging.
What are some other tips for growing healthy home garden tomatoes?
In addition to this DIY trick, there are several other things you can do to promote healthy tomato growth. Choose a sunny location with at least six hours of sunlight per day. Water your plants deeply and regularly, especially during hot weather. Provide support for your plants with stakes or cages to prevent them from falling over. Prune your plants to improve air circulation and prevent disease. And be sure to protect your plants from pests and diseases.
How long does it take to see results from this DIY trick?
The time it takes to see results can vary depending on the health of your plants and the growing conditions. However, you should start to see improvements in your plants’ growth and fruit production within a few weeks of applying this DIY trick. Be patient and consistent, and you’ll be rewarded with a bountiful harvest of delicious, homegrown tomatoes.
Leave a Comment