
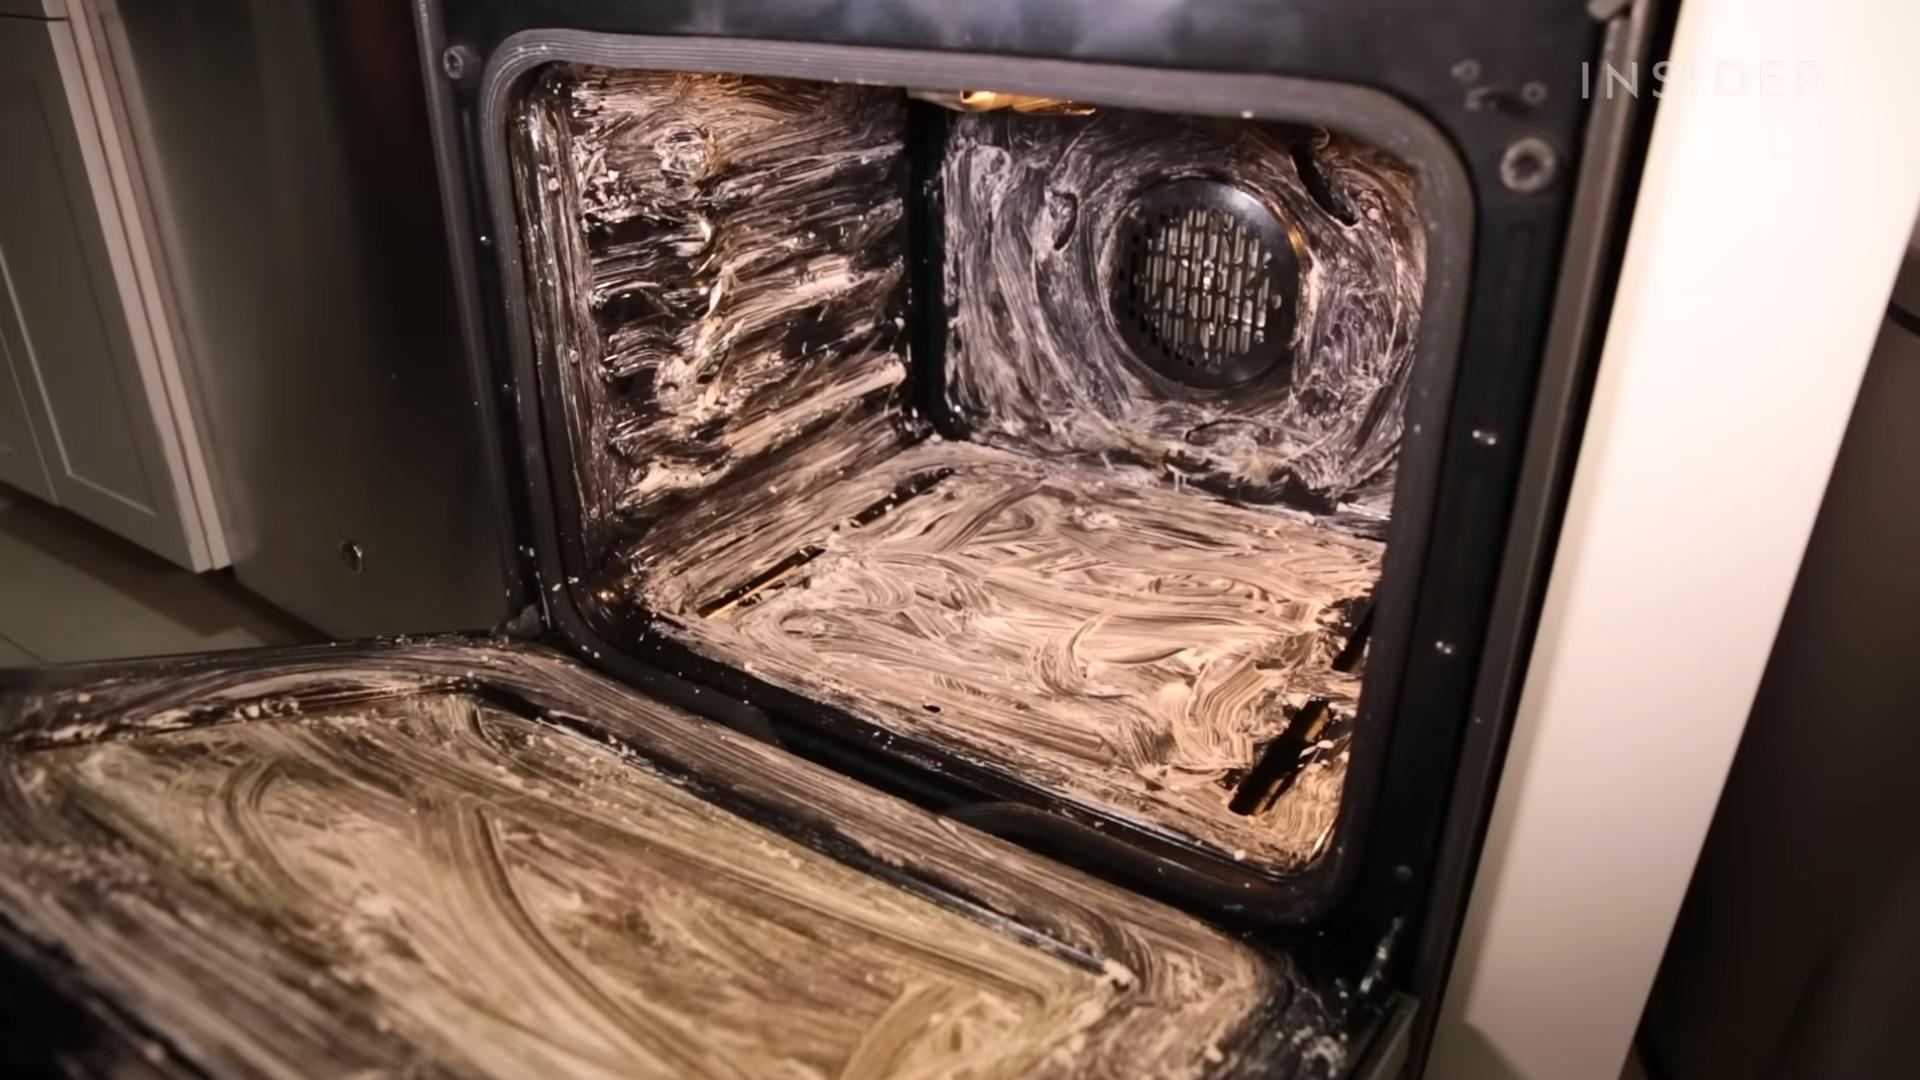
DIY Oven Cleaning: Is your oven looking less like a culinary haven and more like a burnt offering? Don’t despair! We’ve all been there. That greasy, grimy buildup can seem intimidating, but trust me, you don’t need harsh chemicals or expensive cleaning services to restore your oven to its former glory.
For generations, resourceful homemakers have relied on simple, natural ingredients to tackle tough cleaning tasks. Think about it – before the advent of commercial cleaners, our grandmothers were keeping their ovens sparkling with ingredients they already had in their pantries. This tradition of resourcefulness is not only budget-friendly but also kinder to our environment and our health.
Let’s face it, a clean oven isn’t just about aesthetics. Burnt food residue can affect the taste of your dishes and even create unpleasant odors. Plus, a clean oven operates more efficiently, saving you energy and money in the long run. That’s why mastering the art of DIY Oven Cleaning is a skill that keeps on giving. I’m going to share some easy-to-follow, step-by-step instructions and some clever hacks that will have your oven looking brand new in no time. So, ditch the elbow grease and let’s get started!
DIY Oven Cleaning: The Baking Soda and Vinegar Powerhouse!
Okay, let’s face it, cleaning the oven is probably on everyone’s list of least favorite chores. But a sparkling clean oven not only looks better, it also helps your food cook more evenly and can even improve its taste! I’m going to walk you through my favorite method for a deep clean using just baking soda and vinegar – two ingredients you probably already have in your pantry! This method is super effective, budget-friendly, and avoids those harsh chemicals that can leave a lingering smell.
What You’ll Need:
Before we get started, let’s gather our supplies. Trust me, having everything ready will make the process so much smoother.
* Baking Soda: This is our main cleaning agent. A whole box is a good idea, depending on how dirty your oven is.
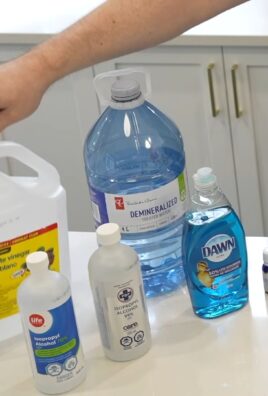
* White Vinegar: The magic ingredient that reacts with the baking soda to loosen grime.
* Water: For making a paste and rinsing.
* Spray Bottle: To apply the vinegar.
* Rubber Gloves: Protect your hands!
* Sponge or Scrub Brush: For scrubbing away the loosened gunk. I prefer a non-scratch scrub brush.
* Plastic Scraper or Spatula: To help remove stubborn baked-on messes.
* Paper Towels or Cleaning Rags: For wiping down surfaces.
* Trash Bags: For disposing of the dirty baking soda paste.
* Old Towels or Newspaper: To protect your floor.
Preparing Your Oven for Cleaning
This is a crucial step! We need to get the oven ready for its spa day.
1. Remove the Oven Racks: Take out all the oven racks, broiler pan, pizza stone, or anything else that’s inside. We’ll clean these separately.
2. Protect Your Floor: Lay down old towels or newspaper around the base of your oven to catch any drips or spills. This will save you from having to clean the floor later!
3. Initial Wipe Down (Optional): If your oven has loose crumbs or debris, give it a quick wipe down with a damp cloth or paper towel. This will help the baking soda paste adhere better.
Making and Applying the Baking Soda Paste
This is where the real cleaning power comes in!
1. Mix the Paste: In a bowl, combine 1/2 cup of baking soda with enough water to form a spreadable paste. You want it to be thick enough to stick to the oven walls, but not so thick that it’s difficult to apply. I usually start with a few tablespoons of water and add more gradually until I get the right consistency.
2. Coat the Oven: Using your hands (with gloves on, of course!), spread the baking soda paste all over the interior surfaces of your oven. This includes the back, sides, top, bottom, and even the door. Avoid the heating elements! You want a nice, even layer.
3. Focus on Problem Areas: Pay extra attention to areas with heavy grease or baked-on food. Apply a thicker layer of paste to these spots.
4. Let it Sit: Now comes the waiting game. Let the baking soda paste sit for at least 12 hours, or even overnight. The longer it sits, the more time it has to loosen the grime. I usually do this before I go to bed so it can work its magic while I sleep.
Cleaning the Oven Racks
While the baking soda paste is working its magic inside the oven, let’s tackle those grimy racks.
1. Choose Your Method: There are a few ways to clean oven racks. I’ll share my two favorites:
* The Bathtub Soak: This is my go-to method for really dirty racks. Line your bathtub with old towels to protect the surface. Fill the tub with hot water and add about 1/2 cup of dish soap and 1/2 cup of laundry detergent. Submerge the racks in the water and let them soak for several hours, or even overnight.
* The Trash Bag Method: If you don’t want to use your bathtub, you can use a large trash bag. Place the racks inside the bag, pour in about 1/2 cup of ammonia, and seal the bag tightly. Leave it outside or in a well-ventilated area for 24 hours. The ammonia fumes will help loosen the grime. Important: Never mix ammonia with bleach!
2. Scrub and Rinse: After soaking, scrub the racks with a sponge or scrub brush to remove any remaining grime. Rinse them thoroughly with clean water.
3. Dry the Racks: Let the racks air dry completely before putting them back in the oven.
Removing the Baking Soda Paste and Final Cleaning
Okay, the waiting is over! It’s time to remove the baking soda paste and reveal a cleaner oven.
1. Scrape Away the Paste: Use a plastic scraper or spatula to scrape away as much of the dried baking soda paste as possible. This can be a bit messy, so have your trash bags handy.
2. Vinegar Power! Fill your spray bottle with white vinegar. Spray the entire interior of the oven with vinegar. The vinegar will react with any remaining baking soda, creating a foamy mixture.
3. Wipe Down: Use a sponge or cleaning rags to wipe down all the surfaces of the oven. The vinegar will help loosen any remaining grime and neutralize the baking soda. You may need to rinse your sponge or rag frequently.
4. Rinse Thoroughly: Once you’ve wiped down the entire oven, rinse it thoroughly with clean water. This is important to remove any lingering vinegar or baking soda residue.
5. Dry the Oven: Use clean towels or paper towels to dry the interior of the oven completely.
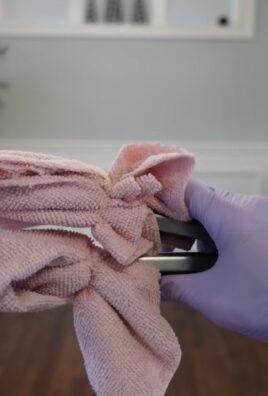
6. Clean the Oven Door: Don’t forget the oven door! Clean the glass with a glass cleaner or a mixture of vinegar and water. Wipe down the exterior of the door with a damp cloth.
Final Touches and Reassembly
We’re almost there! Just a few more steps to complete the transformation.
1. Replace the Oven Racks: Once the oven and racks are completely dry, carefully place the racks back inside the oven.
2. Run a Low-Temperature Cycle (Optional): To ensure that all traces of vinegar and baking soda are gone, you can run the oven on a low temperature (around 300 degrees Fahrenheit) for about 15-20 minutes. This will help evaporate any remaining moisture.
3. Enjoy Your Clean Oven! Step back and admire your sparkling clean oven! You did it!
Dealing with Stubborn Stains
Sometimes, even with the baking soda and vinegar method, you might encounter some stubborn stains that just won’t budge. Here are a few tips for tackling those tough spots:
* More Baking Soda Paste: For particularly stubborn stains, try applying a thicker layer of baking soda paste and letting it sit for even longer – up to 24 hours.
* Lemon Juice: Lemon juice is a natural degreaser and can help break down stubborn grease. Cut a lemon in half and rub it directly onto the stain. Let it sit for a few minutes, then wipe it away with a damp cloth.
* Steel Wool (Use with Caution): For really tough baked-on messes, you can try using steel wool. However, be very careful not to scratch the oven’s surface. Test it in an inconspicuous area first.
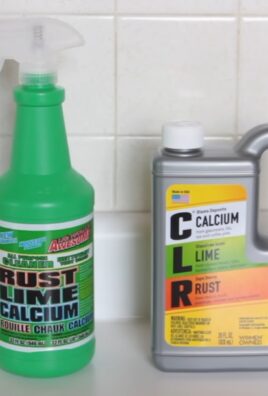
* Commercial Oven Cleaner (As a Last Resort): If all else fails, you can use a commercial oven cleaner. However, be sure to follow the manufacturer’s instructions carefully and wear appropriate safety gear, such as gloves and a mask.
Maintaining Your Clean Oven
Now that you’ve put in all that effort to clean your oven
Okay, let’s face it, cleaning the oven is probably on everyone’s list of least favorite chores. But a sparkling clean oven not only looks better, it also helps your food cook more evenly and can even improve its taste! I’m going to walk you through my favorite method for a deep clean using just baking soda and vinegar – two ingredients you probably already have in your pantry! This method is super effective, budget-friendly, and avoids those harsh chemicals that can leave a lingering smell.
What You’ll Need:
Before we get started, let’s gather our supplies. Trust me, having everything ready will make the process so much smoother.
* Baking Soda: This is our main cleaning agent. A whole box is a good idea, depending on how dirty your oven is.
* White Vinegar: The magic ingredient that reacts with the baking soda to loosen grime.
* Water: For making a paste and rinsing.
* Spray Bottle: To apply the vinegar.
* Rubber Gloves: Protect your hands!
* Sponge or Scrub Brush: For scrubbing away the loosened gunk. I prefer a non-scratch scrub brush.
* Plastic Scraper or Spatula: To help remove stubborn baked-on messes.
* Paper Towels or Cleaning Rags: For wiping down surfaces.
* Trash Bags: For disposing of the dirty baking soda paste.
* Old Towels or Newspaper: To protect your floor.
Preparing Your Oven for Cleaning
This is a crucial step! We need to get the oven ready for its spa day.
1. Remove the Oven Racks: Take out all the oven racks, broiler pan, pizza stone, or anything else that’s inside. We’ll clean these separately.
2. Protect Your Floor: Lay down old towels or newspaper around the base of your oven to catch any drips or spills. This will save you from having to clean the floor later!
3. Initial Wipe Down (Optional): If your oven has loose crumbs or debris, give it a quick wipe down with a damp cloth or paper towel. This will help the baking soda paste adhere better.
Making and Applying the Baking Soda Paste
This is where the real cleaning power comes in!
1. Mix the Paste: In a bowl, combine 1/2 cup of baking soda with enough water to form a spreadable paste. You want it to be thick enough to stick to the oven walls, but not so thick that it’s difficult to apply. I usually start with a few tablespoons of water and add more gradually until I get the right consistency.
2. Coat the Oven: Using your hands (with gloves on, of course!), spread the baking soda paste all over the interior surfaces of your oven. This includes the back, sides, top, bottom, and even the door. Avoid the heating elements! You want a nice, even layer.
3. Focus on Problem Areas: Pay extra attention to areas with heavy grease or baked-on food. Apply a thicker layer of paste to these spots.
4. Let it Sit: Now comes the waiting game. Let the baking soda paste sit for at least 12 hours, or even overnight. The longer it sits, the more time it has to loosen the grime. I usually do this before I go to bed so it can work its magic while I sleep.
Cleaning the Oven Racks
While the baking soda paste is working its magic inside the oven, let’s tackle those grimy racks.
1. Choose Your Method: There are a few ways to clean oven racks. I’ll share my two favorites:
* The Bathtub Soak: This is my go-to method for really dirty racks. Line your bathtub with old towels to protect the surface. Fill the tub with hot water and add about 1/2 cup of dish soap and 1/2 cup of laundry detergent. Submerge the racks in the water and let them soak for several hours, or even overnight.
* The Trash Bag Method: If you don’t want to use your bathtub, you can use a large trash bag. Place the racks inside the bag, pour in about 1/2 cup of ammonia, and seal the bag tightly. Leave it outside or in a well-ventilated area for 24 hours. The ammonia fumes will help loosen the grime. Important: Never mix ammonia with bleach!
2. Scrub and Rinse: After soaking, scrub the racks with a sponge or scrub brush to remove any remaining grime. Rinse them thoroughly with clean water.
3. Dry the Racks: Let the racks air dry completely before putting them back in the oven.
Removing the Baking Soda Paste and Final Cleaning
Okay, the waiting is over! It’s time to remove the baking soda paste and reveal a cleaner oven.
1. Scrape Away the Paste: Use a plastic scraper or spatula to scrape away as much of the dried baking soda paste as possible. This can be a bit messy, so have your trash bags handy.
2. Vinegar Power! Fill your spray bottle with white vinegar. Spray the entire interior of the oven with vinegar. The vinegar will react with any remaining baking soda, creating a foamy mixture.
3. Wipe Down: Use a sponge or cleaning rags to wipe down all the surfaces of the oven. The vinegar will help loosen any remaining grime and neutralize the baking soda. You may need to rinse your sponge or rag frequently.
4. Rinse Thoroughly: Once you’ve wiped down the entire oven, rinse it thoroughly with clean water. This is important to remove any lingering vinegar or baking soda residue.
5. Dry the Oven: Use clean towels or paper towels to dry the interior of the oven completely.
6. Clean the Oven Door: Don’t forget the oven door! Clean the glass with a glass cleaner or a mixture of vinegar and water. Wipe down the exterior of the door with a damp cloth.
Final Touches and Reassembly
We’re almost there! Just a few more steps to complete the transformation.
1. Replace the Oven Racks: Once the oven and racks are completely dry, carefully place the racks back inside the oven.
2. Run a Low-Temperature Cycle (Optional): To ensure that all traces of vinegar and baking soda are gone, you can run the oven on a low temperature (around 300 degrees Fahrenheit) for about 15-20 minutes. This will help evaporate any remaining moisture.
3. Enjoy Your Clean Oven! Step back and admire your sparkling clean oven! You did it!
Dealing with Stubborn Stains
Sometimes, even with the baking soda and vinegar method, you might encounter some stubborn stains that just won’t budge. Here are a few tips for tackling those tough spots:
* More Baking Soda Paste: For particularly stubborn stains, try applying a thicker layer of baking soda paste and letting it sit for even longer – up to 24 hours.
* Lemon Juice: Lemon juice is a natural degreaser and can help break down stubborn grease. Cut a lemon in half and rub it directly onto the stain. Let it sit for a few minutes, then wipe it away with a damp cloth.
* Steel Wool (Use with Caution): For really tough baked-on messes, you can try using steel wool. However, be very careful not to scratch the oven’s surface. Test it in an inconspicuous area first.
* Commercial Oven Cleaner (As a Last Resort): If all else fails, you can use a commercial oven cleaner. However, be sure to follow the manufacturer’s instructions carefully and wear appropriate safety gear, such as gloves and a mask.
Maintaining Your Clean Oven
Now that you’ve put in all that effort to clean your oven, you’ll want to keep it looking its best! Here are a few tips for maintaining a clean oven:
* Wipe Up Spills Immediately: The best way to prevent baked-on messes is to wipe up spills as soon as they happen.
* Use Oven Liners: Oven liners can help catch drips and spills, making cleanup much easier.
* Self-Cleaning Cycle (If Applicable): If your oven has a self-cleaning cycle, use it regularly. However, be aware that self-cleaning cycles can produce a lot of heat and fumes, so make sure to ventilate your kitchen well.
* Regular Cleaning: Even with preventative measures, it’s still a good idea to give your oven a deep clean every few months.
And that’s it! I hope this guide has helped you conquer your oven-cleaning fears. With a little elbow grease and the power of baking soda and vinegar, you can have a sparkling clean oven in no time! Happy cleaning!

Conclusion
So, there you have it! Ditching those harsh chemicals and embracing this DIY oven cleaning method is more than just a trend; it’s a game-changer for your kitchen, your health, and your wallet. We’ve walked you through a simple, effective process that transforms a grimy oven into a sparkling clean appliance using ingredients you likely already have in your pantry.
Why is this a must-try? Because it’s safe, effective, and eco-friendly. Commercial oven cleaners are notorious for their fumes and caustic ingredients, posing risks to your respiratory system and potentially leaving residue that can affect the taste of your food. This DIY approach eliminates those concerns, offering a natural alternative that’s gentle yet powerful. Plus, think of the money you’ll save by skipping those expensive cleaners!
But the benefits don’t stop there. This method is incredibly versatile. Feel free to experiment with variations to suit your specific needs and preferences. For instance, if you have particularly stubborn baked-on grease, you can add a tablespoon of borax to the baking soda paste for extra cleaning power. Or, if you prefer a more fragrant cleaning experience, add a few drops of your favorite essential oil (like lemon or tea tree) to the vinegar spray. Just be sure to test the essential oil in an inconspicuous area first to ensure it doesn’t stain.
Another variation involves using cream of tartar instead of baking soda. Some people find that cream of tartar creates a smoother paste and is slightly less abrasive. The key is to find what works best for your oven and your cleaning style.
Don’t be afraid to adjust the proportions of baking soda and water to achieve the perfect paste consistency. You want it thick enough to adhere to the oven surfaces but spreadable enough to cover them evenly.
We understand that tackling a dirty oven can seem daunting, but trust us, this DIY method makes the process surprisingly manageable. The overnight soak allows the baking soda paste to work its magic, loosening the grime and making it much easier to wipe away.
We are confident that once you try this DIY oven cleaning trick, you’ll never go back to harsh chemical cleaners. It’s a simple, sustainable, and satisfying way to keep your oven looking its best.
Now, it’s your turn! We encourage you to give this DIY method a try and experience the difference for yourself. We’re eager to hear about your results, any variations you experimented with, and any tips you discovered along the way. Share your experiences in the comments below! Let’s build a community of clean oven enthusiasts who are passionate about natural cleaning solutions. Your insights could help others discover the joy of a sparkling clean oven without the harsh chemicals. So, grab your baking soda, vinegar, and a little elbow grease, and get ready to transform your oven! We can’t wait to hear your success stories.
Frequently Asked Questions (FAQ)
Q: How often should I clean my oven using this DIY method?
A: The frequency of cleaning depends on how often you use your oven and how much splattering occurs. As a general guideline, cleaning your oven every 3-6 months is a good practice. However, if you notice significant buildup of grease and grime, you may want to clean it more frequently. Regular spot cleaning of spills as they happen can also help extend the time between deep cleans.
Q: Can I use this DIY oven cleaning method on a self-cleaning oven?
A: While this method is generally safe for most ovens, it’s always best to consult your oven’s manual before using any cleaning products, even natural ones. Some self-cleaning ovens have specific coatings or components that could be damaged by certain ingredients. If your manual advises against using any cleaning products other than the self-cleaning cycle, it’s best to follow those instructions. However, many people successfully use this DIY method on self-cleaning ovens, especially to avoid the high heat and fumes of the self-cleaning cycle. If you choose to use it, be sure to thoroughly rinse the oven afterward to remove any residue.
Q: What if the baking soda paste dries out and becomes difficult to remove?
A: If the baking soda paste dries out and becomes hard to remove, don’t panic! Simply spray the dried paste with vinegar and let it sit for a few minutes. The vinegar will react with the baking soda, loosening the paste and making it easier to wipe away. You can also use a damp sponge or cloth to rehydrate the paste before wiping. For particularly stubborn areas, you may need to repeat the process or use a plastic scraper to gently loosen the dried paste. Avoid using metal scrapers, as they can scratch the oven’s surface.
Q: Is it safe to use this DIY oven cleaning method if I have pets or small children?
A: Yes, this DIY method is generally considered safe for households with pets and small children, as it uses non-toxic ingredients. However, it’s still important to take precautions. Keep pets and children away from the oven while you’re applying the baking soda paste and spraying the vinegar. Ensure that the oven is thoroughly rinsed after cleaning to remove any residue. While baking soda and vinegar are generally harmless, ingesting large amounts could cause stomach upset. As with any cleaning product, it’s always best to store baking soda and vinegar out of reach of children and pets.
Q: Can I use this method to clean the oven door glass?
A: Absolutely! This DIY method works wonders on oven door glass. Apply the baking soda paste to the glass, let it sit overnight, and then wipe it clean with vinegar and a damp cloth. For particularly stubborn stains, you can use a non-abrasive scrubbing pad. This method is much safer and more effective than using harsh chemical cleaners on the oven door glass.
Q: What if I don’t have time to let the baking soda paste sit overnight?
A: While letting the baking soda paste sit overnight is ideal for loosening stubborn grime, you can still achieve good results if you don’t have that much time. Apply the paste and let it sit for at least 2-3 hours. The longer it sits, the better, but even a few hours will help to soften the baked-on messes. You may need to use a little more elbow grease when wiping the oven clean, but it’s still a much easier process than trying to clean the oven without any pre-soaking.
Q: Can I use this method to clean my microwave?
A: While this specific recipe is designed for ovens, a similar principle can be applied to cleaning your microwave. Instead of a paste, you can microwave a bowl of water with a few tablespoons of vinegar for several minutes. The steam will loosen the grime inside the microwave, making it easy to wipe clean. You can also use a baking soda paste to scrub away stubborn stains. Be sure to unplug the microwave before cleaning and avoid getting water into any of the electrical components.
Q: What kind of vinegar should I use?
A: White distilled vinegar is the best choice for cleaning, as it’s inexpensive, readily available, and has a high acidity level. Apple cider vinegar can also be used, but it may leave a slight odor. Avoid using other types of vinegar, such as balsamic or red wine vinegar, as they can stain the oven.
Q: How do I get rid of the vinegar smell after cleaning?
A: The vinegar smell should dissipate quickly after cleaning. To speed up the process, you can leave the oven door open for a few hours to allow the oven to air out. You can also place a bowl of baking soda inside the oven to absorb any lingering odors. Another option is to heat a pot of water with lemon slices on the stovetop, which will release a fresh, citrusy scent into the kitchen.
Leave a Comment