
Planting corn in bags? Sounds a little unconventional, right? But trust me, this simple DIY trick can revolutionize your home garden, especially if you’re short on space or dealing with less-than-ideal soil. For centuries, corn has been a staple crop, deeply woven into the fabric of many cultures, providing sustenance and playing a vital role in traditions. From the ancient civilizations of Mesoamerica to modern-day backyard gardens, corn continues to nourish us.
Now, you might be thinking, “Why plant corn in a bag when I can just plant it in the ground?” Well, that’s where the magic of this DIY hack comes in! I’ve found that planting corn in bags offers incredible advantages. It allows you to control the soil quality, optimize drainage, and even move your corn plants around to chase the sun. Plus, it’s a fantastic solution for urban gardeners with limited space. Imagine harvesting fresh, sweet corn right from your balcony or patio!
This article is your ultimate guide to mastering this easy and rewarding technique. I’ll walk you through every step, from choosing the right bag and soil to nurturing your corn plants for a bountiful harvest. Get ready to ditch the traditional garden bed and embrace the innovative world of bag gardening – your taste buds (and your garden) will thank you!
Planting Corn in Bags: A DIY Guide to a Bountiful Harvest
Hey there, fellow gardening enthusiasts! I’m super excited to share one of my favorite gardening hacks with you: growing corn in bags! It’s a fantastic way to enjoy fresh, homegrown corn even if you have limited space or less-than-ideal soil. Plus, it’s a really fun and rewarding project. Let’s dive right in!
Why Grow Corn in Bags?
Before we get started, you might be wondering why you should even bother growing corn in bags. Well, here are a few compelling reasons:
* Space Saving: Perfect for balconies, patios, or small yards. You don’t need a huge plot of land to enjoy fresh corn.
* Soil Control: You have complete control over the soil composition, ensuring your corn gets the nutrients it needs.
* Portability: You can move the bags around to chase the sun or protect them from harsh weather.
* Weed Control: Bags significantly reduce weed competition, making your life easier.
* Early Start: You can start your corn indoors earlier in the season, giving you a head start on the growing season.
Materials You’ll Need
Okay, let’s gather our supplies. Here’s what you’ll need to get started:
* Large Bags: I recommend using heavy-duty polypropylene bags (like the kind used for animal feed or landscaping materials). They should be at least 20 gallons in size, but bigger is better. Think 30-40 gallons for optimal growth. You can also use grow bags specifically designed for plants.
* Potting Mix: A high-quality potting mix is crucial. Avoid using garden soil directly, as it can compact and not drain well in bags. I like to use a mix of compost, peat moss (or coco coir), and perlite or vermiculite.
* Corn Seeds: Choose a variety of corn that’s suitable for your climate and growing season. Sweet corn is a popular choice, but there are many other varieties to explore. Make sure to buy seeds from a reputable source.
* Slow-Release Fertilizer: Corn is a heavy feeder, so a slow-release fertilizer will provide a steady supply of nutrients throughout the growing season. Look for a fertilizer with a balanced NPK ratio (nitrogen, phosphorus, and potassium).
* Watering Can or Hose: Essential for keeping your corn plants hydrated.
* Trowel or Shovel: For filling the bags with potting mix and planting the seeds.
* Optional: Stakes or bamboo poles for support, especially for taller varieties of corn.
Step-by-Step Instructions: Planting Your Corn
Alright, let’s get our hands dirty! Here’s how to plant your corn in bags:
1. Prepare the Bags:
* First, find a well-ventilated area to work in.
* If your bags don’t have drainage holes, you’ll need to create some. I usually poke several holes in the bottom of the bag with a knife or drill. This is crucial for preventing waterlogging.
* Fold down the top edges of the bags a few inches to create a sturdy rim. This will make it easier to fill the bags and prevent them from collapsing.
2. Mix the Potting Mix:
* In a large container or on a tarp, combine your potting mix ingredients. I usually use a ratio of 1 part compost, 1 part peat moss (or coco coir), and 1 part perlite or vermiculite.
* Thoroughly mix everything together until it’s evenly distributed.
* Incorporate the slow-release fertilizer into the potting mix according to the package instructions. This will provide a steady supply of nutrients to your corn plants.
3. Fill the Bags:
* Carefully fill the bags with the prepared potting mix, leaving about 4-6 inches of space at the top.
* Gently pat down the soil to remove any air pockets.
* Water the soil thoroughly until it’s evenly moist but not soggy.
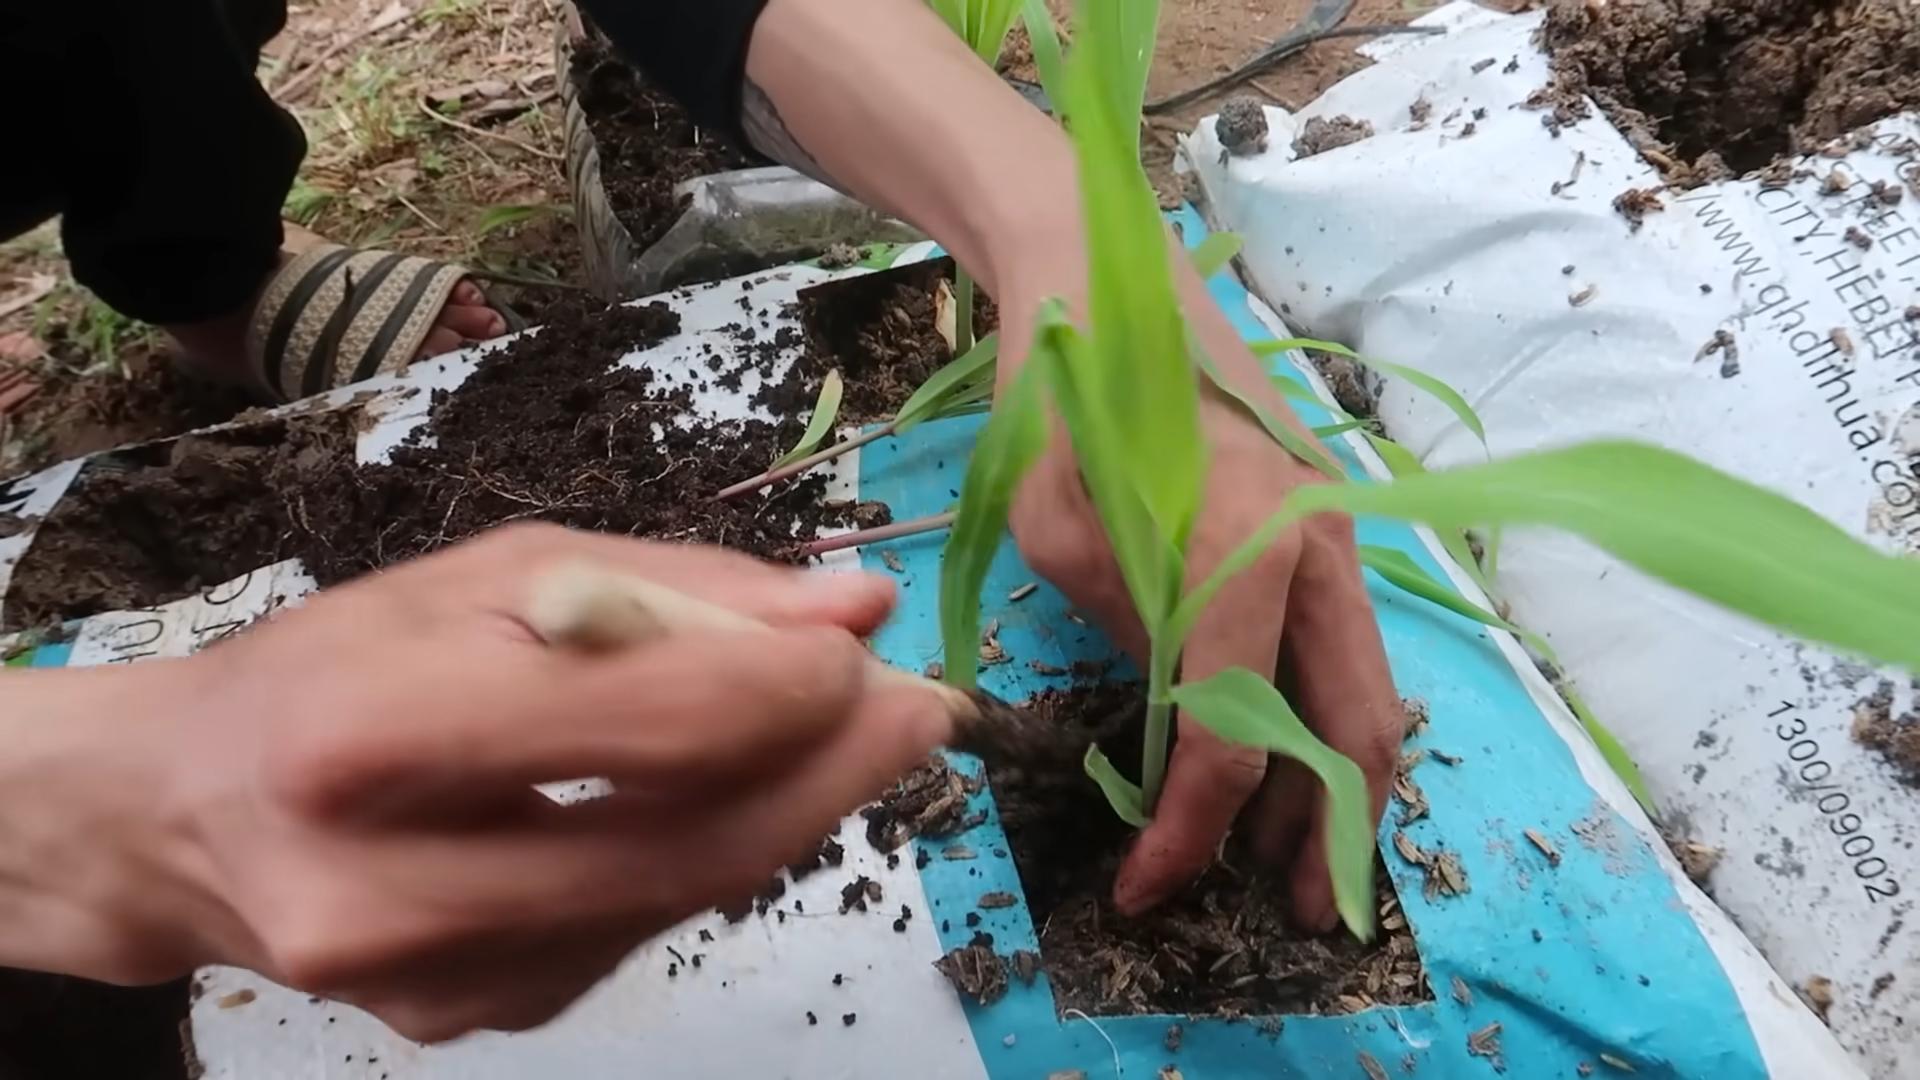
4. Plant the Corn Seeds:
* Corn needs to be planted in blocks rather than rows for proper pollination. This is because corn is wind-pollinated, and planting in a block increases the chances of successful pollination.
* Sow the corn seeds about 1-2 inches deep and 6-8 inches apart in a grid pattern within the bag. I usually plant 4-6 seeds per bag, depending on the size of the bag.
* Cover the seeds with soil and gently pat it down.
* Water the soil again to ensure good seed-to-soil contact.
5. Provide Sunlight and Warmth:
* Corn needs at least 6-8 hours of direct sunlight per day to thrive. Place the bags in a sunny location where they’ll receive plenty of sunlight.
* If you’re starting your corn indoors, use grow lights to provide supplemental light.
* Corn is sensitive to frost, so wait until the danger of frost has passed before moving the bags outdoors.
Caring for Your Corn Plants
Now that your corn is planted, it’s time to provide the care it needs to grow strong and healthy.
1. Watering:
* Corn needs consistent moisture, especially during hot weather. Water deeply whenever the top inch of soil feels dry to the touch.
* Avoid overwatering, as this can lead to root rot.
* Water in the morning to allow the foliage to dry before nightfall, which can help prevent fungal diseases.
2. Fertilizing:
* Even with slow-release fertilizer, corn may need supplemental feeding during the growing season.
* Side-dress the plants with a nitrogen-rich fertilizer when they are about 12 inches tall.
* Repeat the side-dressing every 2-3 weeks until the tassels appear.
3. Pollination:
* As mentioned earlier, corn is wind-pollinated. To ensure good pollination, you can hand-pollinate the plants by gently shaking the stalks when the tassels are shedding pollen.
* You can also cut the tassels and rub them on the silks of the developing ears.
* Planting in blocks rather than rows will also improve pollination.
4. Pest and Disease Control:
* Keep an eye out for common corn pests, such as corn earworms, aphids, and spider mites.
* Inspect the plants regularly and take action promptly if you notice any signs of infestation.
* You can use organic pest control methods, such as insecticidal soap or neem oil, to control pests.
* Prevent fungal diseases by providing good air circulation and avoiding overwatering.
5. Support:
* As the corn plants grow taller, they may need support to prevent them from falling over, especially during windy weather.
* You can use stakes or bamboo poles to support the plants.
* Tie the stalks to the stakes with twine or plant ties.
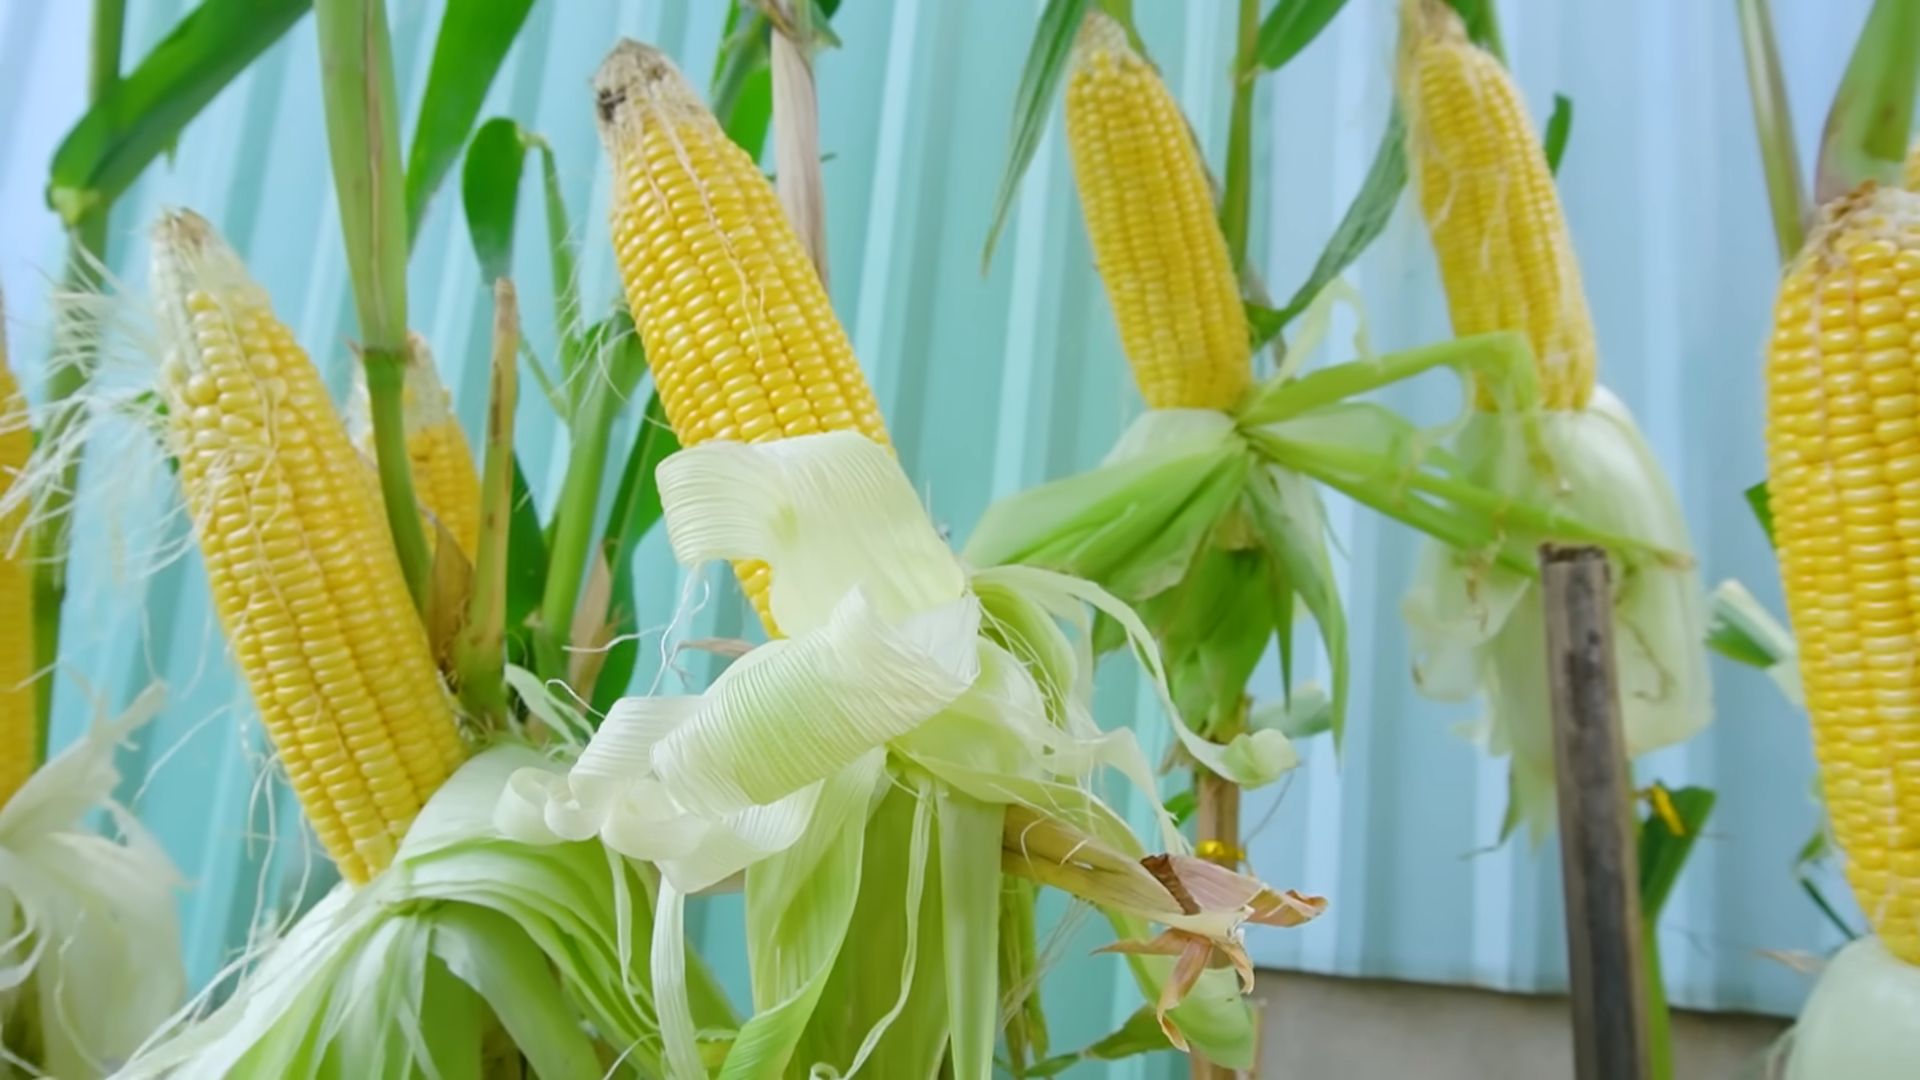
Harvesting Your Corn
The moment we’ve all been waiting for! Harvesting your homegrown corn is one of the most rewarding experiences.
1. Timing:
* Corn is typically ready to harvest about 60-90 days after planting, depending on the variety.
* The silks on the ears will turn brown and dry when the corn is ready to harvest.
* You can also feel the ears to check for plump kernels.
2. Harvesting:
* To harvest the corn, grasp the ear firmly and twist it downward.
* The ear should snap off easily from the stalk.
* Peel back the husks and check the kernels to make sure they are plump and milky.
3. Enjoying Your Harvest:
* Freshly harvested corn is best enjoyed immediately.
* You can grill it, boil it, roast it, or use it in your favorite recipes.
* If you have more corn than you can eat, you can freeze it for later use.
Troubleshooting
Even with the best planning, things can sometimes go wrong. Here are a few common problems you might encounter and how to fix them:
* Poor Germination: Make sure your seeds are fresh and viable. Also, ensure the soil is warm enough for germination.
* Yellowing Leaves: This could be a sign of nutrient deficiency, especially nitrogen. Side-dress the plants with a nitrogen-rich fertilizer.
* Stunted Growth: This could be due to a lack of sunlight, water, or nutrients. Make sure the plants are getting enough of all three.
* Pest Infestation: Inspect the plants regularly and take action promptly if you notice any signs of infestation. Use organic pest control methods if possible.
* Poor Pollination: Hand-pollinate the plants
Conclusion
So, there you have it! Planting corn in bags isn’t just a quirky gardening experiment; it’s a game-changer for anyone looking to enjoy fresh, homegrown corn, regardless of space constraints or soil quality. We’ve walked you through the simple steps, highlighting the benefits of this method, and hopefully, dispelled any initial doubts you might have had.
Why is this a must-try? Because it democratizes corn cultivation! Imagine, delicious, sweet corn kernels, bursting with flavor, grown right on your balcony, patio, or even a sunny driveway. No more relying solely on supermarket produce, often shipped from miles away and lacking that peak-season freshness. This method puts the power of homegrown goodness directly into your hands.
Beyond the convenience and accessibility, planting corn in bags offers superior control over the growing environment. You can tailor the soil mix to perfectly suit corn’s needs, ensuring optimal drainage and nutrient availability. Plus, the mobility of the bags allows you to chase the sun, maximizing sunlight exposure for robust growth and plump ears.
Ready to take your corn growing to the next level? Consider these variations:
* **Succession Planting:** Plant new bags every few weeks to extend your harvest season. This ensures a continuous supply of fresh corn throughout the summer.
* **Companion Planting:** Interplant your corn with beneficial companions like beans or squash. Beans fix nitrogen in the soil, enriching it for the corn, while squash provides ground cover, suppressing weeds and retaining moisture. Marigolds can also be added to deter pests.
* **Fertilizer Experimentation:** Try different types of fertilizers, both organic and synthetic, to see which yields the best results in your specific environment. Keep detailed records of your experiments to refine your approach over time.
* **Different Corn Varieties:** Experiment with different varieties of corn. Some are better suited for container growing than others. Look for shorter-stalked varieties or those specifically bred for smaller spaces.
But the real magic happens when you get your hands dirty and experience the joy of nurturing a plant from seed to harvest. The satisfaction of biting into a freshly picked ear of corn that you grew yourself is simply unparalleled.
We wholeheartedly encourage you to give planting corn in bags a try. It’s an incredibly rewarding experience, and we’re confident you’ll be amazed by the results. Don’t be afraid to experiment, adapt the techniques to your specific circumstances, and most importantly, have fun!
Once you’ve harvested your bounty, we’d love to hear about your experience. Share your photos, tips, and any challenges you encountered in the comments below. Let’s build a community of bag-planting corn enthusiasts and learn from each other’s successes and failures. Together, we can unlock the secrets to growing the best darn corn, one bag at a time!
Frequently Asked Questions (FAQ)
What type of bag is best for planting corn?
The ideal bag for planting corn is a durable, breathable container that holds at least 10-15 gallons of soil. Woven polypropylene grow bags are an excellent choice because they allow for good drainage and aeration, preventing the roots from becoming waterlogged. Fabric pots are also a good option. Avoid using plastic bags, as they can trap moisture and lead to root rot. Ensure the bag has drainage holes to prevent water from pooling at the bottom. You can also repurpose large feed sacks or burlap bags, but make sure they are clean and free of any harmful chemicals.
How many corn seeds should I plant in each bag?
It’s generally recommended to plant 3-4 corn seeds per bag. Corn is wind-pollinated, so planting multiple plants together increases the chances of successful pollination and kernel development. Once the seedlings emerge and are a few inches tall, thin them to the strongest 2-3 plants per bag. This ensures that each plant has enough space, nutrients, and sunlight to thrive. Don’t be afraid to remove the weaker seedlings; it’s better to have a few healthy plants than several crowded ones.
What kind of soil mix should I use for planting corn in bags?
Corn thrives in well-draining, nutrient-rich soil. A good soil mix for planting corn in bags consists of equal parts:
* **Topsoil:** Provides a base for the soil structure.
* **Compost:** Adds organic matter, improves drainage, and provides essential nutrients.
* **Peat Moss or Coco Coir:** Helps retain moisture and improve aeration.
* **Perlite or Vermiculite:** Enhances drainage and prevents soil compaction.
You can also add a slow-release fertilizer to the soil mix to provide a steady supply of nutrients throughout the growing season. Avoid using heavy clay soil, as it can become waterlogged and hinder root development.
How often should I water corn planted in bags?
Corn planted in bags requires consistent watering, especially during hot and dry weather. Check the soil moisture regularly by sticking your finger a few inches into the soil. If the soil feels dry to the touch, it’s time to water. Water deeply until the water drains out of the bottom of the bag. Avoid overwatering, as this can lead to root rot. As a general guideline, water every 1-3 days, depending on the weather conditions. During periods of heavy rain, you may need to reduce watering frequency.
How much sunlight does corn need when planted in bags?
Corn needs at least 6-8 hours of direct sunlight per day to thrive. Choose a location for your bags that receives ample sunlight throughout the day. If you live in a particularly hot climate, you may need to provide some afternoon shade to prevent the plants from overheating. If you don’t have a sunny spot, you can supplement with grow lights. Rotate the bags periodically to ensure that all sides of the plants receive equal sunlight exposure.
How do I pollinate corn planted in bags?
Corn is wind-pollinated, meaning that pollen from the tassels (the male flowers at the top of the plant) needs to reach the silks (the female flowers that emerge from the developing ears). In a small space like a bag, pollination may not occur naturally. To ensure successful pollination, you can hand-pollinate the corn. Gently shake the tassels to release pollen, and then brush the pollen onto the silks. Repeat this process every day for several days, especially during the morning hours when the pollen is most viable. You can also collect pollen in a container and then use a small brush to apply it to the silks.
What are some common pests and diseases that affect corn planted in bags?
Common pests that can affect corn include corn earworms, aphids, and spider mites. Diseases include corn smut and fungal leaf spots. Regularly inspect your plants for signs of pests or diseases. If you find any, take action immediately. For pests, you can use insecticidal soap, neem oil, or introduce beneficial insects like ladybugs. For diseases, remove infected leaves and improve air circulation around the plants. Avoid overhead watering, as this can create a favorable environment for fungal diseases.
When is corn ready to harvest when planted in bags?
Corn is typically ready to harvest about 60-100 days after planting, depending on the variety. The silks will turn brown and dry, and the ears will feel plump and full. To check for ripeness, peel back a portion of the husk and puncture a kernel with your fingernail. If the liquid that comes out is milky, the corn is ready to harvest. If the liquid is clear, the corn needs more time to mature. If the liquid is doughy, the corn is overripe. Harvest the corn by twisting the ear and pulling it downward.
Can I reuse the soil from the bags after harvesting the corn?
Yes, you can reuse the soil from the bags after harvesting the corn, but it’s important to replenish the nutrients that the corn plants have used. Remove any remaining plant debris from the soil and add fresh compost, aged manure, or a slow-release fertilizer. You can also amend the soil with other organic matter, such as leaf mold or shredded bark. Consider rotating crops in the bags to prevent the buildup of soilborne diseases and pests.
Is planting corn in bags a good way to save space?
Absolutely! Planting corn in bags is an excellent way to save space, especially if you have a small garden, balcony, or patio. The bags can be placed close together, maximizing the use of available space. This method allows you to grow corn even if you don’t have access to a traditional garden plot. It’s a great option for urban gardeners or anyone who wants to enjoy fresh, homegrown corn without taking up a lot of room.

Leave a Comment