
Propagate fast growing plants in June? Absolutely! And I’m here to tell you it’s easier than you think. Forget spending a fortune at the garden center – you can multiply your favorite plants with a few simple tricks and a little bit of patience.
For centuries, gardeners have shared secrets for propagating plants, passing down knowledge through generations. Think of it as a time-honored tradition, a way to connect with nature and ensure the longevity of beloved species. While the methods have evolved, the core principle remains the same: harnessing the plant’s natural ability to reproduce.
June is the perfect time to propagate fast growing plants because they’re bursting with energy and actively growing. This means they’ll root more quickly and establish themselves faster. Imagine having a garden overflowing with your favorite blooms and foliage, all thanks to your own efforts! Plus, propagating your own plants is incredibly rewarding and a fantastic way to save money. Who wouldn’t want more plants for free? This DIY guide will give you the confidence and knowledge to successfully propagate your fast-growing favorites this June. Let’s get started!
Propagating Fast-Growing Plants in June: A DIY Guide
Hey there, fellow plant enthusiasts! June is the perfect time to get your hands dirty and multiply your favorite fast-growing plants. The warmer weather and longer days provide ideal conditions for successful propagation. I’m going to walk you through some easy and effective methods to expand your plant collection without breaking the bank. Let’s get started!
Understanding Propagation Basics
Before we dive into the specifics, let’s cover some fundamental concepts. Propagation is simply the process of creating new plants from existing ones. There are several techniques, but we’ll focus on the most beginner-friendly options: stem cuttings, leaf cuttings, and division.
* Stem Cuttings: This involves taking a section of a stem and encouraging it to grow roots. It’s a super common and reliable method for many plants.
* Leaf Cuttings: Some plants can be propagated from just a single leaf! This is a fun and rewarding technique, especially for succulents and certain houseplants.
* Division: This method involves separating a plant into multiple smaller plants, each with its own root system. It’s ideal for plants that grow in clumps or have multiple stems.
Materials You’ll Need
To ensure a smooth propagation process, gather these essential materials:
* Sharp, Clean Pruning Shears or Knife: This is crucial for making clean cuts that minimize the risk of infection. I always sterilize my tools with rubbing alcohol before and after each use.
* Rooting Hormone (Optional): While not always necessary, rooting hormone can significantly speed up root development, especially for plants that are a bit more challenging to propagate.
* Potting Mix: Use a well-draining potting mix specifically formulated for starting seeds or cuttings. Avoid using garden soil, as it can be too heavy and may contain pathogens.
* Small Pots or Containers: Choose pots that are appropriately sized for your cuttings or divisions. I like to use small plastic pots or even recycled yogurt containers with drainage holes.
* Watering Can or Spray Bottle: Gentle watering is key to keeping your cuttings hydrated without overwatering them.
* Clear Plastic Bags or Humidity Dome (Optional): Creating a humid environment can help cuttings root faster by reducing moisture loss.
* Labels and a Pen: Don’t forget to label your cuttings with the plant name and date! This will help you keep track of your progress.
Propagating from Stem Cuttings
This is my go-to method for propagating many fast-growing plants like Pothos, Tradescantia, and Coleus.
1. Select a Healthy Stem: Choose a healthy stem with several leaves or nodes (the points where leaves emerge). Avoid stems that are flowering or have signs of disease.
2. Make the Cut: Using your clean pruning shears or knife, make a clean cut just below a node. The cutting should be about 4-6 inches long.
3. Remove Lower Leaves: Remove the leaves from the bottom 1-2 inches of the cutting. This will prevent them from rotting when they’re buried in the soil.
4. Apply Rooting Hormone (Optional): Dip the cut end of the stem in rooting hormone powder or liquid. Tap off any excess.
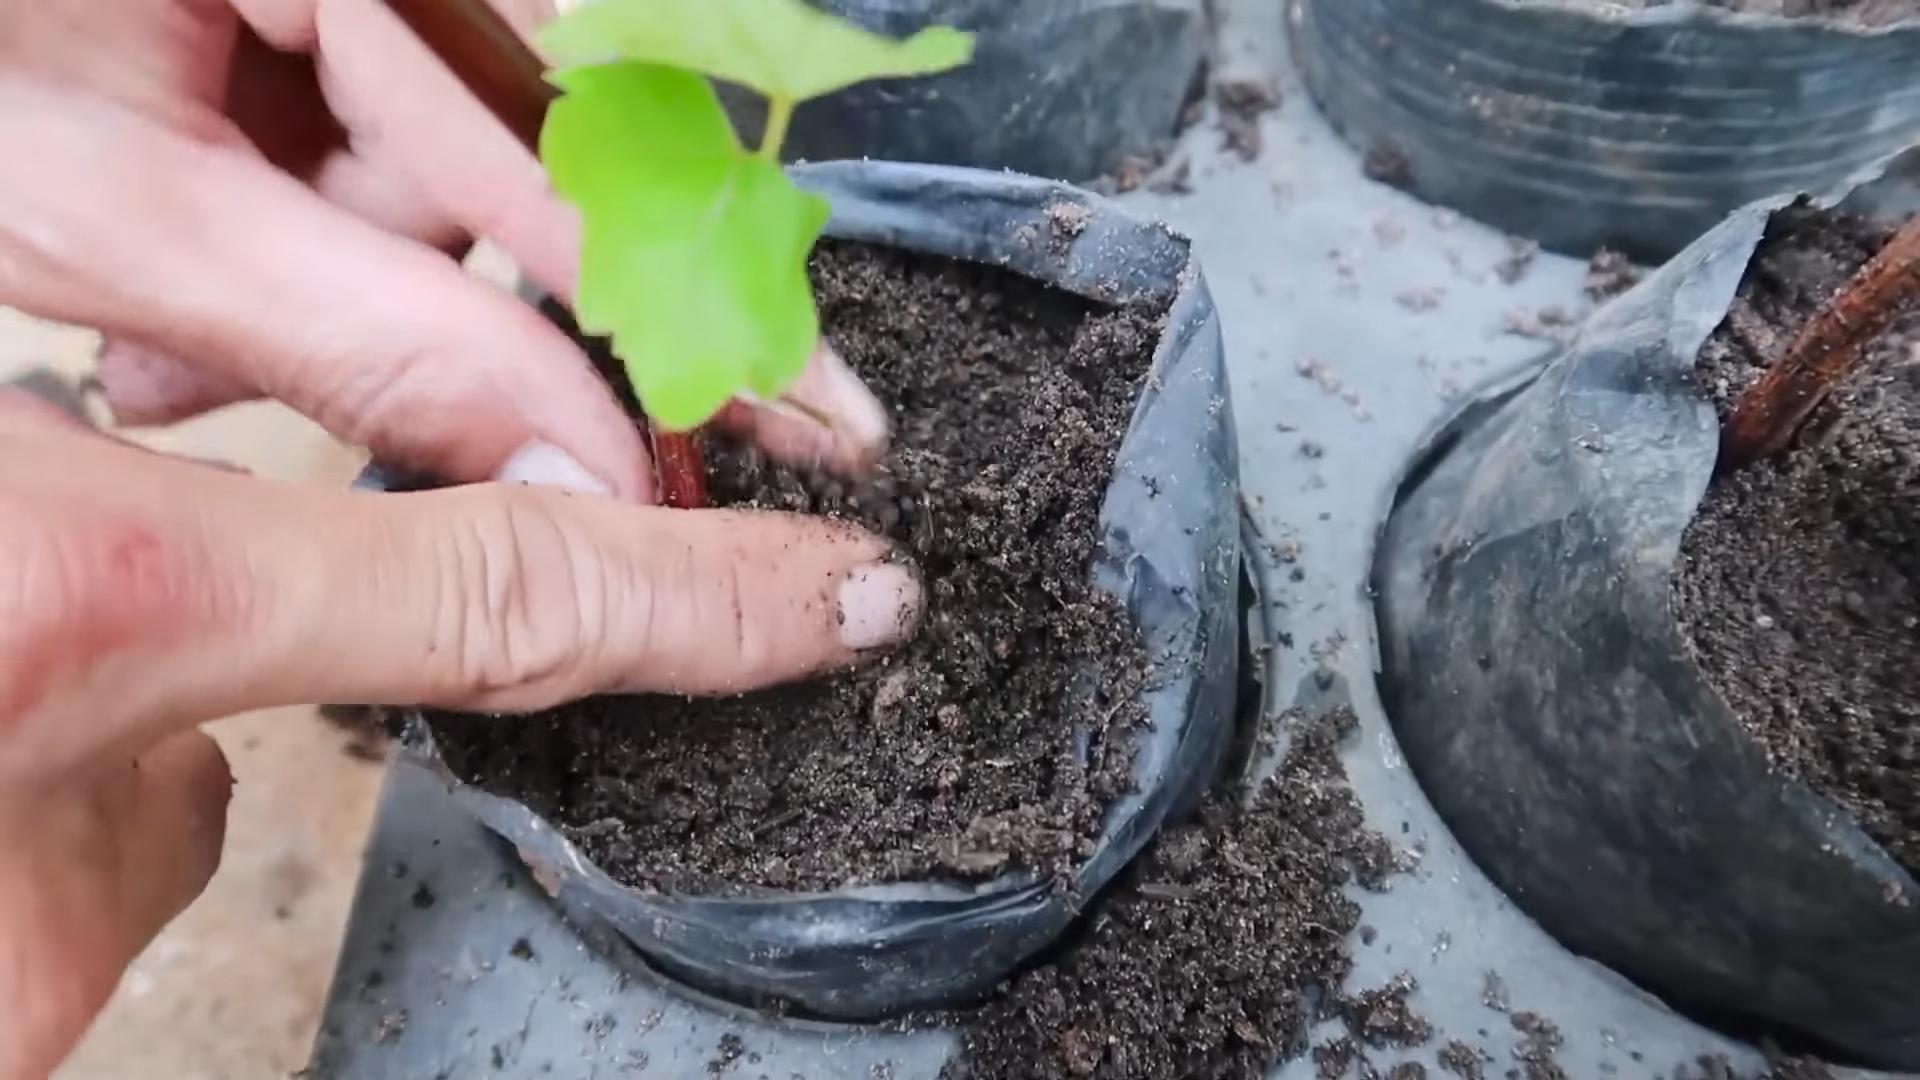
5. Plant the Cutting: Insert the cutting into a small pot filled with moist potting mix. Make sure the nodes where you removed the leaves are buried in the soil.
6. Water Gently: Water the cutting gently until the soil is evenly moist.
7. Create a Humid Environment (Optional): Place the pot inside a clear plastic bag or under a humidity dome to create a humid environment. Make sure to leave some ventilation to prevent mold growth.
8. Provide Bright, Indirect Light: Place the cutting in a location with bright, indirect light. Avoid direct sunlight, which can scorch the leaves.
9. Monitor and Water: Check the soil moisture regularly and water when the top inch feels dry. Remove the plastic bag or humidity dome for a few hours each day to allow for air circulation.
10. Check for Roots: After a few weeks, gently tug on the cutting to see if it has developed roots. If you feel resistance, it means roots have formed!
11. Transplant (Optional): Once the cutting has a well-established root system, you can transplant it into a larger pot.
Propagating from Leaf Cuttings
This method is perfect for succulents like Echeveria and Sedum, as well as some houseplants like Sansevieria (Snake Plant).
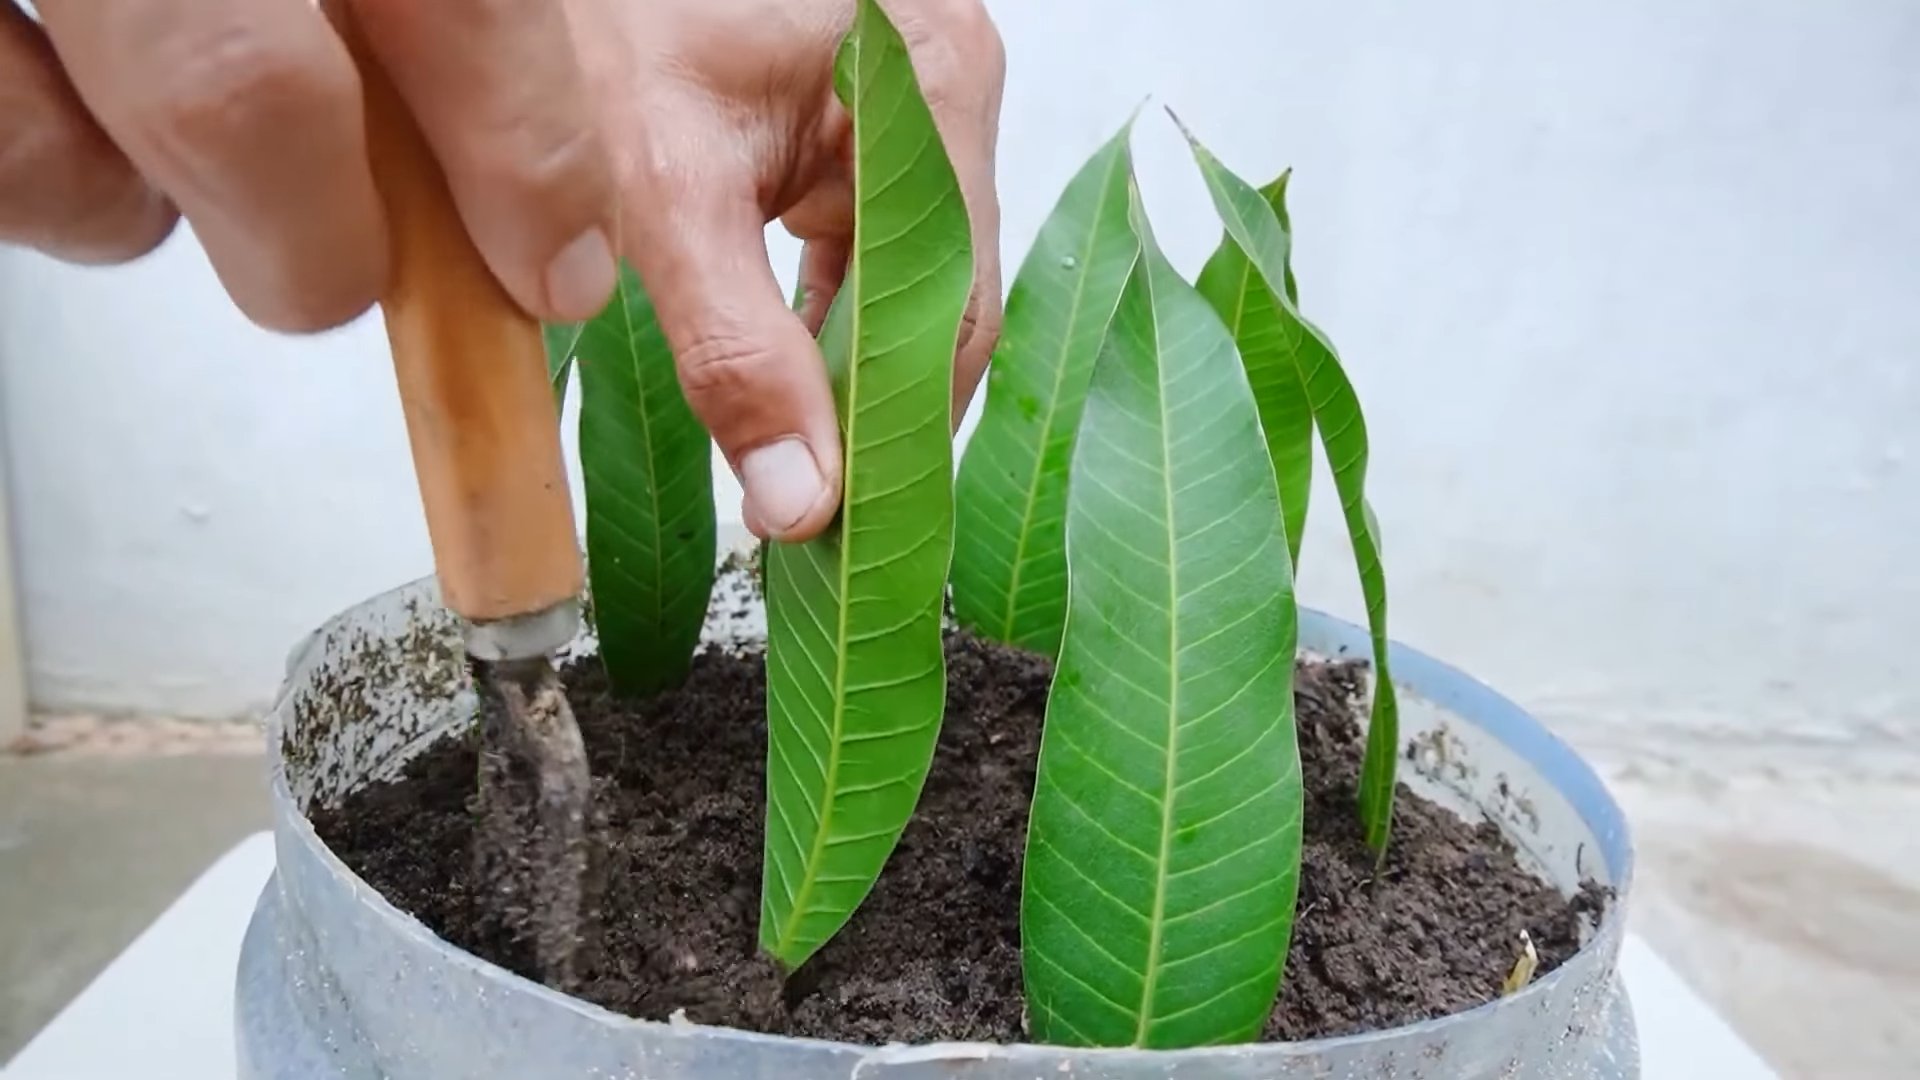
1. Select a Healthy Leaf: Choose a healthy, mature leaf from the parent plant. Avoid leaves that are damaged or discolored.
2. Detach the Leaf: Gently detach the leaf from the stem. For succulents, you can usually just twist the leaf off. For other plants, you may need to use a clean knife to make a clean cut.
3. Allow the Cut End to Callus: Place the leaf on a paper towel in a dry, well-ventilated location for a few days. This allows the cut end to callus over, which helps prevent rot.
4. Plant the Leaf (Method 1: Laying on Soil): Lay the calloused end of the leaf on top of moist potting mix. You can gently press it into the soil to ensure good contact.
5. Plant the Leaf (Method 2: Inserting into Soil): Insert the calloused end of the leaf into moist potting mix, burying it about 1/4 inch deep.
6. Water Gently: Water the leaf gently until the soil is evenly moist.
7. Provide Bright, Indirect Light: Place the leaf in a location with bright, indirect light.
8. Monitor and Water: Check the soil moisture regularly and water when the top inch feels dry.
9. Wait for Roots and New Growth: It may take several weeks or even months for roots and new plantlets to emerge. Be patient!
10. Transplant (Optional): Once the new plantlets are large enough, you can transplant them into individual pots.
Propagating by Division
This method is ideal for plants that grow in clumps or have multiple stems, such as ZZ Plants, Peace Lilies, and Snake Plants.
1. Prepare the Parent Plant: Water the parent plant thoroughly a day or two before dividing it. This will help loosen the soil and make it easier to separate the roots.
2. Remove the Plant from its Pot: Gently remove the plant from its pot. If the roots are tightly bound, you may need to use a knife to loosen them around the edges of the pot.
3. Separate the Plant: Carefully separate the plant into multiple smaller plants, each with its own root system. You can use your hands or a clean knife to gently tease apart the roots. Make sure each division has a good amount of roots and foliage.
4. Pot the Divisions: Plant each division in a separate pot filled with fresh potting mix.
5. Water Thoroughly: Water the divisions thoroughly until the soil is evenly moist.
6. Provide Bright, Indirect Light: Place the divisions in a location with bright, indirect light.
7. Monitor and Water: Check the soil moisture regularly and water when the top inch feels dry.
8. Fertilize (Optional): After a few weeks, you can start fertilizing the divisions with a balanced liquid fertilizer.
Tips for Success
Here are some additional tips to help you succeed with plant propagation:
* Use Clean Tools: Always use clean pruning shears or knives to prevent the spread of disease.
* Choose Healthy Plants: Start with healthy, vigorous plants for the best results.
* Provide Adequate Light: Most cuttings and divisions need bright, indirect light to thrive.
* Maintain Proper Moisture: Keep the soil consistently moist, but avoid overwatering.
* Be Patient: Propagation can take time, so don’t get discouraged if you don’t see results immediately.
* Experiment: Try different propagation methods to see what works best for your plants.
* Research Specific Plant Needs: Some plants have specific propagation requirements, so do your research before you start.
* Don’t Give Up: Not all cuttings or divisions will be successful, but don’t let that discourage you. Keep practicing, and you’ll eventually get the hang of it!
Troubleshooting Common Problems
Even with the best efforts, you might encounter some challenges during propagation. Here are some common problems and how to address them:
* Cuttings Rotting: This is usually caused by overwatering or poor drainage. Make sure your potting mix is well-draining and avoid letting the cuttings sit in standing water.
* Cuttings Not Rooting: This could be due to a variety of factors, including insufficient light, low humidity, or using cuttings that are too old or damaged. Try providing more light, increasing humidity, and using fresh,
Conclusion
So, there you have it! Mastering the art of propagating fast-growing plants in June is not just a gardening hack; it’s a gateway to a flourishing, vibrant garden, all fueled by your own efforts and ingenuity. We’ve explored the optimal timing, the best methods, and the essential care tips to ensure your success. But why is this DIY trick a must-try?
Firstly, it’s incredibly cost-effective. Instead of constantly purchasing new plants, you can multiply your existing collection exponentially, all from a single parent plant. Imagine transforming a single vine of your favorite climbing flower into a lush, cascading curtain of blooms, all without spending a fortune. Secondly, it’s deeply rewarding. There’s an unparalleled satisfaction in nurturing a new plant from a simple cutting, witnessing its growth, and knowing that you played an integral role in its creation. It connects you to the natural world in a profound way.
Furthermore, propagating fast-growing plants in June allows you to customize your garden to your exact preferences. Do you want more of that stunning shade-loving fern? Or perhaps you’d like to create a living privacy screen with a fast-growing vine? Propagation gives you the power to shape your outdoor space according to your vision.
But the benefits don’t stop there. Propagating also allows you to preserve your favorite plants. If you have a particularly beautiful or sentimental plant, propagating it ensures that its lineage continues, even if the original plant eventually fades. It’s a way to safeguard your garden’s legacy.
Now, let’s talk about variations. While we’ve focused on general techniques, remember that different plants may respond better to specific methods. For example, some plants might thrive with stem cuttings in water, while others might prefer layering or division. Don’t be afraid to experiment and see what works best for your particular plants. You can also try using different rooting hormones to accelerate the process or varying the humidity levels to create the ideal environment for root development. Consider using a propagation dome or a DIY humidity tent to boost your success rate, especially in drier climates.
Another exciting variation is to propagate different varieties of the same plant and create unique combinations in your garden. Imagine a tapestry of different colored petunias, all propagated from your own cuttings! The possibilities are truly endless.
Propagating fast-growing plants in June is more than just a gardening task; it’s an adventure. It’s a chance to learn, to experiment, and to connect with the natural world in a meaningful way. So, grab your pruners, gather your supplies, and get ready to embark on this exciting journey.
We are confident that you’ll find this DIY trick to be both enjoyable and rewarding. But don’t just take our word for it. We encourage you to try it for yourself and see the amazing results firsthand. And most importantly, we want to hear about your experience! Share your successes, your challenges, and your tips with us in the comments below. Let’s create a community of passionate propagators, sharing our knowledge and inspiring each other to grow even more beautiful gardens. Happy propagating!
FAQ
What exactly does “propagating” mean?
Propagation is simply the process of creating new plants from existing ones. It’s like making copies of your favorite plants! There are several methods, including taking cuttings, layering, division, and even growing from seeds. In the context of this article, we’re primarily focusing on vegetative propagation, which involves using parts of the parent plant (like stems or leaves) to create new, independent plants.
Why is June specifically a good time to propagate fast-growing plants?
June is often considered an ideal time for propagation because many plants are actively growing during this period. The warmer temperatures and longer daylight hours provide the energy and resources needed for successful root development. Plants are generally more vigorous in June, making them more likely to root quickly and establish themselves as new plants. The increased humidity in many regions during June also helps to prevent cuttings from drying out before they can root.
What are some examples of fast-growing plants that are easy to propagate in June?
Many popular garden plants are easy to propagate in June. Some excellent choices include:
* **Herbs:** Mint, basil, rosemary, and lavender are all relatively easy to propagate from stem cuttings.
* **Vines:** Ivy, clematis, and honeysuckle can be propagated through layering or stem cuttings.
* **Flowers:** Petunias, geraniums, and impatiens are often propagated from stem cuttings.
* **Shrubs:** Hydrangeas, roses, and butterfly bushes can be propagated through various methods, including stem cuttings and layering.
* **Succulents:** Many succulents, like sedum and echeveria, can be easily propagated from leaf cuttings.
What kind of rooting hormone should I use? Is it necessary?
Rooting hormone contains auxins, which are plant hormones that stimulate root growth. While not always essential, using rooting hormone can significantly increase your success rate, especially with plants that are more difficult to root. You can find rooting hormone in powder or liquid form at most garden centers. Follow the instructions on the product label for proper application. If you prefer a natural alternative, you can try using honey or willow water, which also contain rooting compounds.
How long does it take for cuttings to root?
The time it takes for cuttings to root can vary depending on the plant species, the propagation method, and the environmental conditions. Generally, you can expect to see roots developing within 2-4 weeks. However, some plants may root faster, while others may take longer. Be patient and monitor your cuttings regularly for signs of root growth.
How do I know when the cuttings are ready to be transplanted?
You’ll know your cuttings are ready to be transplanted when they have developed a healthy root system. Look for roots that are at least an inch or two long and have several branches. Gently tug on the cutting; if it resists, it’s likely well-rooted.
What kind of soil should I use for transplanting the rooted cuttings?
Use a well-draining potting mix that is specifically formulated for young plants. Avoid using garden soil, as it can be too heavy and may contain pathogens that can harm the delicate roots. A mix of peat moss, perlite, and vermiculite is a good option.
How often should I water the newly transplanted cuttings?
Water the newly transplanted cuttings regularly to keep the soil consistently moist, but not waterlogged. Avoid letting the soil dry out completely, as this can stress the young plants. However, also avoid overwatering, as this can lead to root rot. Check the soil moisture regularly and water when the top inch feels dry to the touch.
What if my cuttings don’t root?
Not all cuttings will root successfully, and that’s perfectly normal. Don’t be discouraged if some of your attempts fail. Review your propagation technique, ensure you’re providing the right conditions (humidity, light, temperature), and try again. Sometimes, it just takes a little practice and experimentation to find what works best for you and your plants.
Can I propagate plants indoors?
Yes, you can propagate plants indoors, especially if you provide the right conditions. Ensure your cuttings receive adequate light, either from a sunny window or a grow light. Maintain a consistent temperature and humidity level. A propagation dome or humidity tent can be helpful for creating a humid environment.
What are some common mistakes to avoid when propagating plants?
Some common mistakes to avoid include:
* Using dull or dirty pruning tools.
* Taking cuttings from unhealthy or stressed plants.
* Allowing cuttings to dry out before they root.
* Overwatering or underwatering cuttings.
* Exposing cuttings to direct sunlight.
* Transplanting cuttings too soon.
How do I prevent fungal diseases when propagating?
To prevent fungal diseases, use sterile pruning tools and a clean propagation medium. Avoid overcrowding cuttings, as this can increase humidity and create a favorable environment for fungal growth. Provide good air circulation around the cuttings. You can also use a fungicide if necessary, but be sure to follow the instructions on the product label.
Is it possible to propagate from leaves instead of stems?
Yes, some plants, particularly succulents and some houseplants like snake plants and African violets, can be propagated from leaf cuttings. The process involves placing the leaf (or a portion of it) on a suitable propagation medium and allowing it to develop roots and new plantlets.
What do I do with my newly propagated plants in the winter?
If you propagate plants late in the season, you may need to overwinter them indoors. Provide them with adequate light, water, and humidity. Gradually acclimate them to outdoor conditions in the spring before transplanting them into the garden.
Leave a Comment