
Recycle plastic pots cucumbers – sounds like a mouthful, right? But trust me, it’s the secret weapon you need to unlock a bountiful cucumber harvest while being kind to our planet! Have you ever wondered what to do with all those plastic pots cluttering your shed after a season of vibrant blooms? Well, I’m here to tell you they’re not trash; they’re treasure, especially when it comes to growing delicious, crunchy cucumbers.
For generations, gardeners have sought innovative ways to maximize their yields and minimize waste. From ancient composting techniques to modern hydroponics, the spirit of resourcefulness has always been at the heart of gardening. Today, we’re tapping into that same spirit by repurposing something readily available – plastic pots – to nurture one of summer’s most refreshing treats.
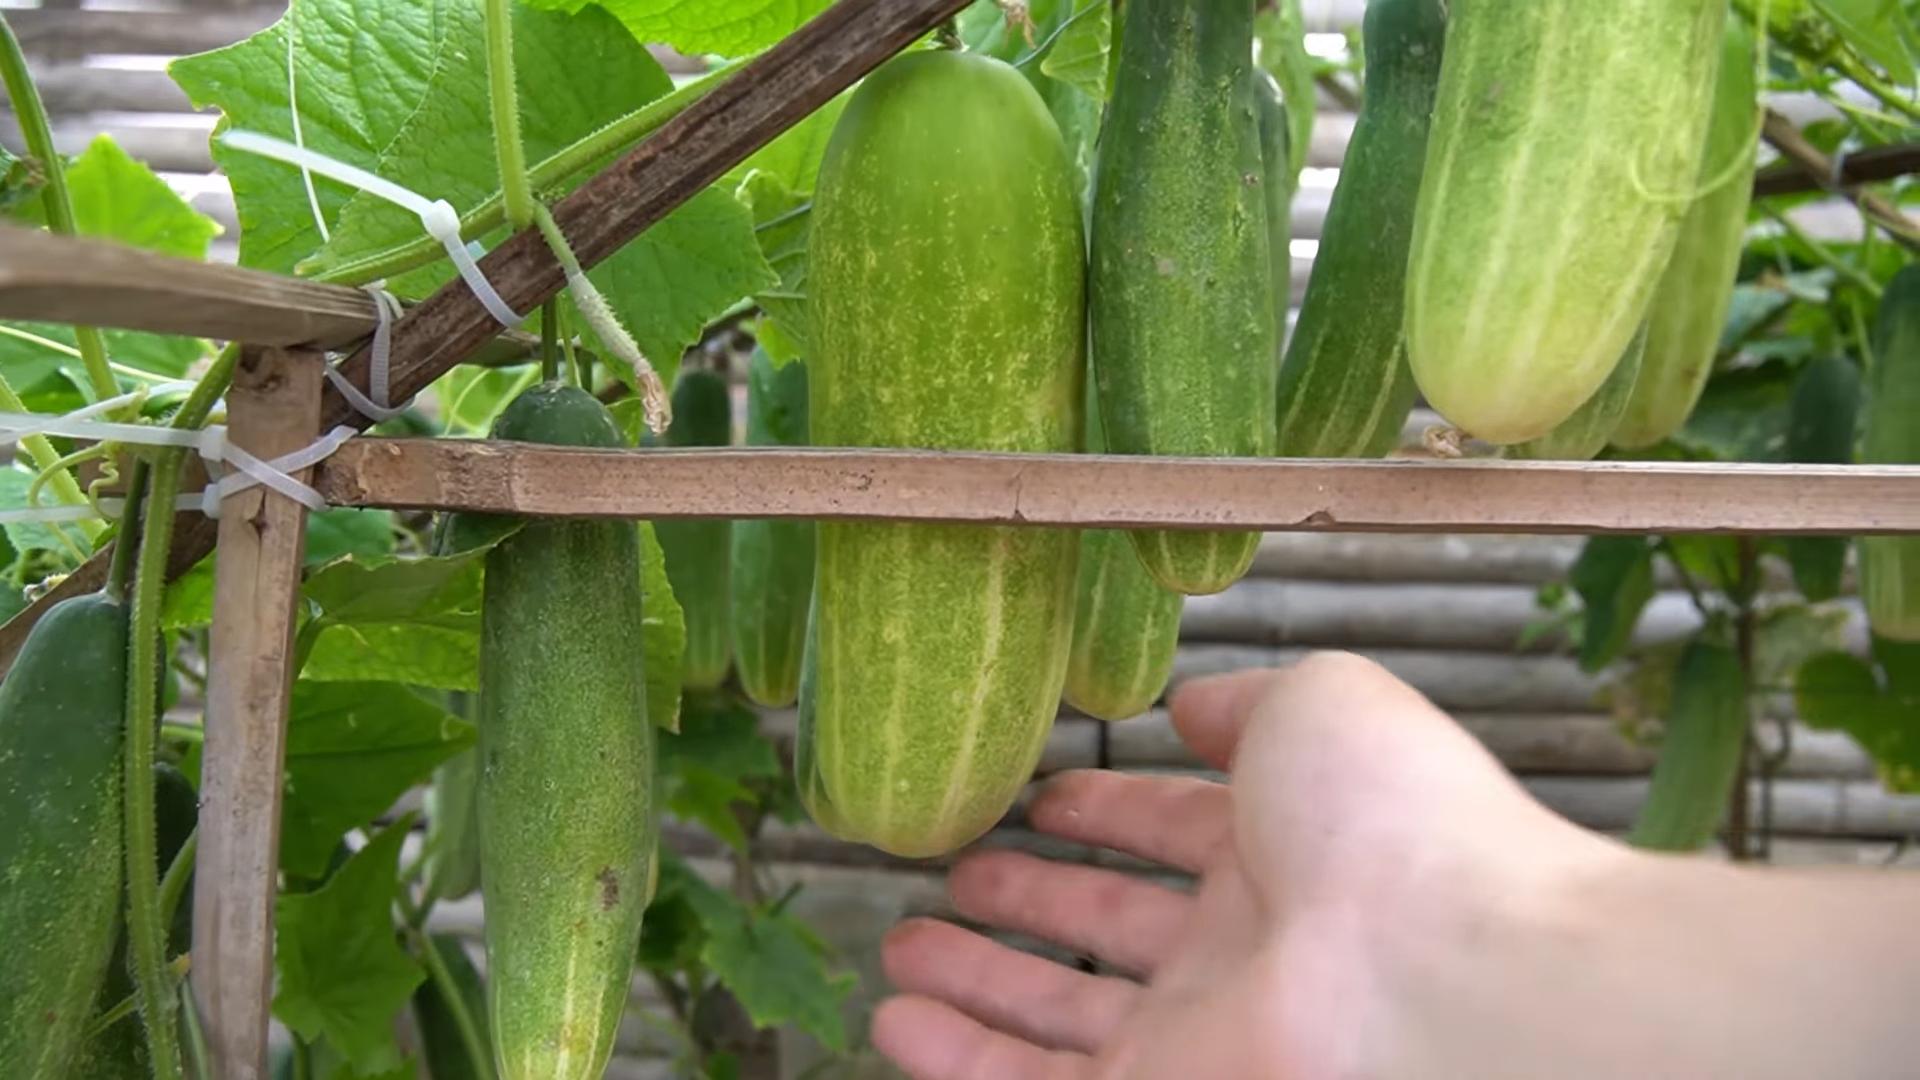
Why should you bother with this DIY trick? Because growing cucumbers can be tricky! They need specific conditions to thrive, and starting them in recycled plastic pots gives you a head start. You can control the soil, moisture, and temperature, ensuring your cucumber seedlings get the best possible foundation. Plus, it’s a fantastic way to reduce plastic waste and save money. Who doesn’t love a win-win? So, let’s dive in and discover how to recycle plastic pots cucumbers into a thriving garden!
Transforming Plastic Cucumber Containers into a Vertical Herb Garden
Hey there, fellow DIY enthusiasts! Are you drowning in those plastic containers that cucumbers come in? I know I was! Instead of tossing them in the recycling bin (which is still a good option!), let’s give them a new life as a charming and space-saving vertical herb garden. This project is super easy, budget-friendly, and a fantastic way to add some fresh herbs to your kitchen. Plus, it’s a great way to teach kids about gardening and sustainability. Let’s get started!
What You’ll Need:
Before we dive in, gather your supplies. Here’s what you’ll need:
* Plastic Cucumber Containers: The star of the show! Aim for at least 3-5 containers for a decent-sized vertical garden. Make sure they are clean and dry.
* Potting Soil: Choose a good quality potting mix that drains well.
* Herb Seedlings or Seeds: Select your favorite herbs! Basil, mint, parsley, thyme, oregano, and chives are all great options.
* Drill with Drill Bits: You’ll need a drill bit large enough to create drainage holes and another for creating holes for hanging.
* Scissors or Utility Knife: For trimming and cutting the containers.
* Measuring Tape or Ruler: For accurate measurements.
* Marker or Pen: For marking drill points.
* Strong Rope, Twine, or Chain: For hanging the containers. Choose something weather-resistant if you plan to keep your garden outdoors.
* S-Hooks (Optional): These can make hanging the containers easier.
* Gloves (Optional): To keep your hands clean.
* Watering Can or Hose: For watering your herbs.
* Gravel or Small Stones (Optional): To improve drainage.
Preparing the Cucumber Containers
This is where we get our hands dirty (well, maybe not if you’re wearing gloves!). We need to modify the containers to make them suitable for planting and hanging.
1. Clean the Containers: Make sure your cucumber containers are thoroughly cleaned with soap and water. Remove any labels or sticky residue. Dry them completely before proceeding. This will prevent any mold or bacteria growth.
2. Drill Drainage Holes: This is crucial for preventing root rot. Using your drill and a suitable drill bit (around 1/4 inch should be good), drill several drainage holes in the bottom of each container. I usually aim for 4-5 holes per container, evenly spaced.
3. Drill Hanging Holes: Now, we need to create holes for hanging the containers. Decide where you want to position the holes. I recommend drilling two holes on opposite sides of the container, near the top rim. Make sure the holes are large enough to accommodate your rope, twine, or chain. Use a drill bit that’s slightly larger than the diameter of your chosen hanging material.
4. Smooth the Edges: After drilling, the edges of the holes might be a bit rough. Use your scissors or utility knife to carefully smooth them out. This will prevent the rope or twine from fraying and make the containers look neater.
Planting Your Herbs
Now for the fun part – planting! This is where your herb garden starts to take shape.
1. Add Drainage Layer (Optional): If you live in an area with heavy rainfall or tend to overwater, consider adding a layer of gravel or small stones to the bottom of each container. This will improve drainage and prevent the soil from becoming waterlogged.
2. Fill with Potting Soil: Fill each container with potting soil, leaving about an inch of space at the top. Gently pat down the soil to remove any air pockets.
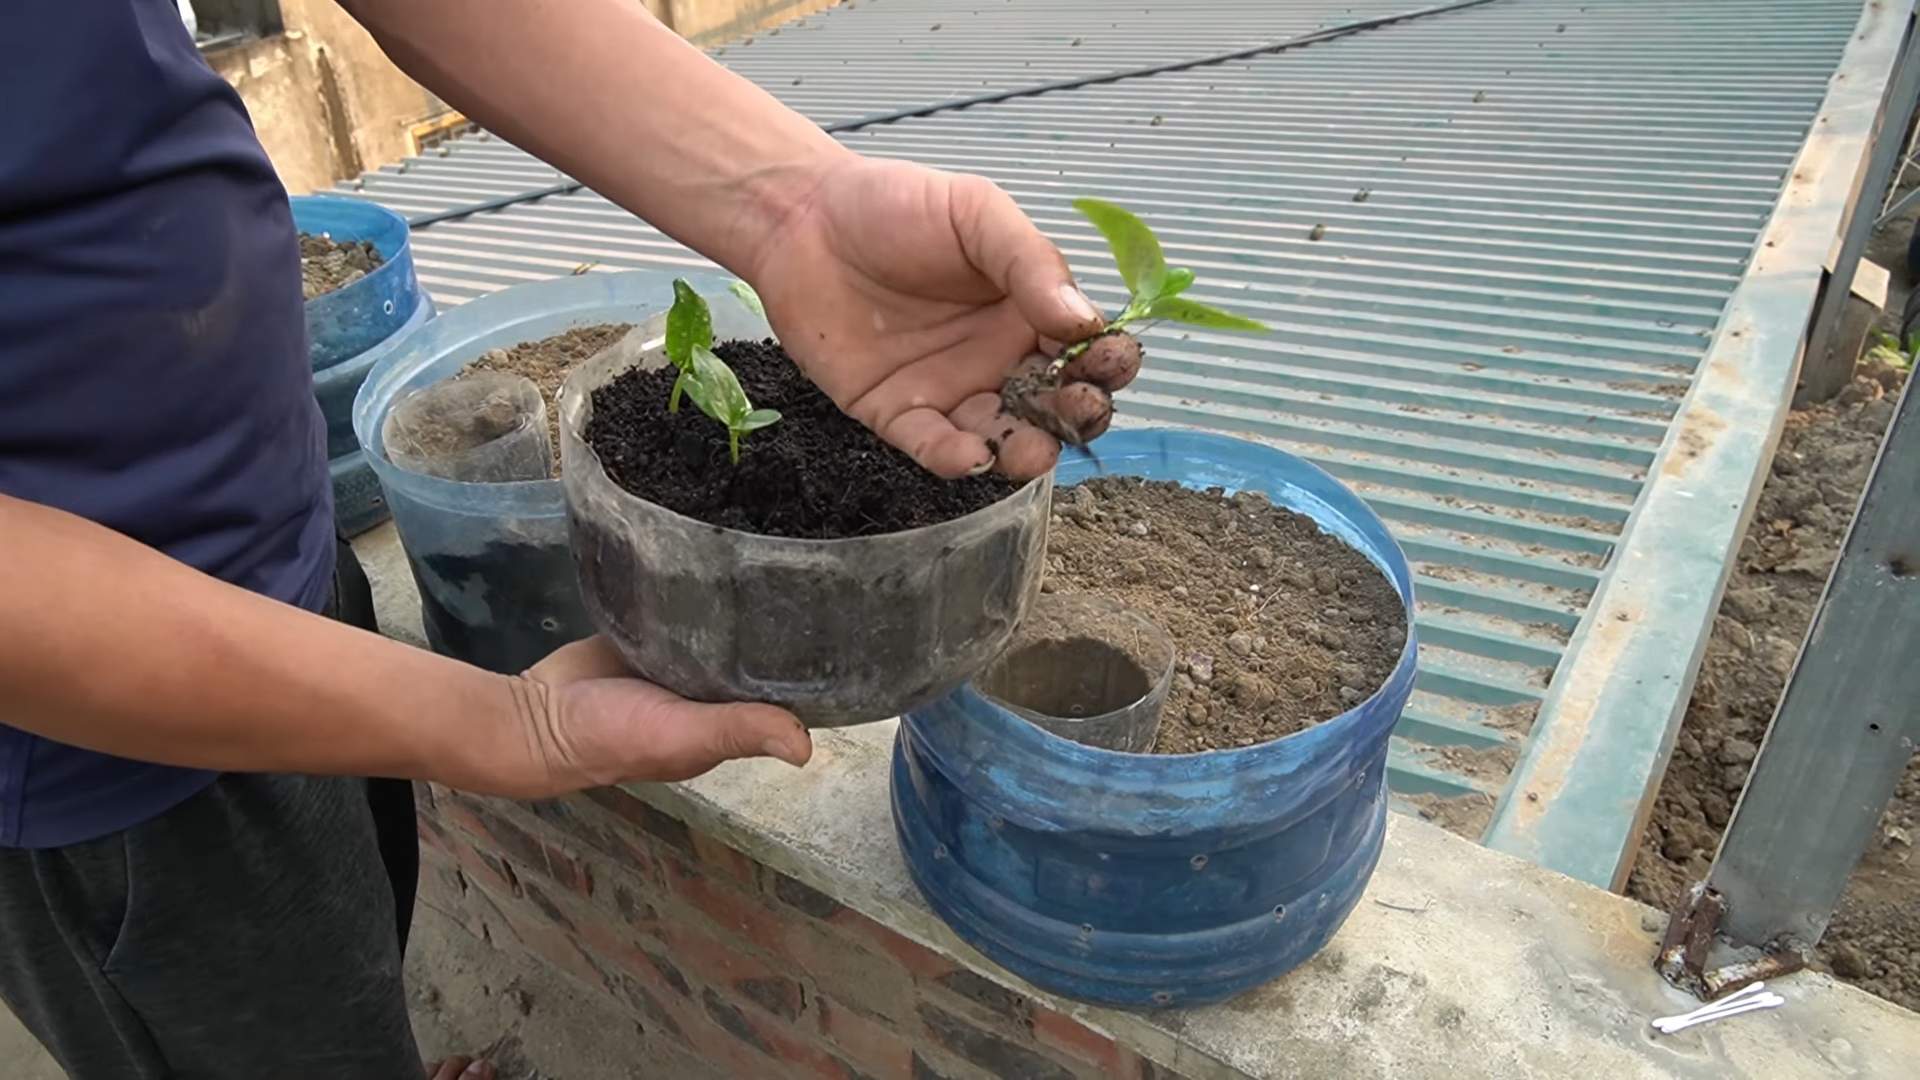
3. Plant Your Herbs: If you’re using seedlings, carefully remove them from their nursery pots and gently loosen the roots. Dig a small hole in the soil and place the seedling in the hole. Cover the roots with soil and gently pat it down. If you’re using seeds, follow the instructions on the seed packet for planting depth and spacing.
4. Water Thoroughly: After planting, water your herbs thoroughly until the water drains out of the drainage holes. This will help settle the soil and encourage root growth.
Assembling Your Vertical Garden
Time to put it all together and create your vertical masterpiece!
1. Cut Your Rope, Twine, or Chain: Determine the desired length of your vertical garden. Cut your rope, twine, or chain into equal lengths, allowing for some extra length for tying knots or attaching S-hooks. The length will depend on how far apart you want to space the containers.
2. Thread the Rope Through the Holes: Thread the rope, twine, or chain through the hanging holes in each container. Start with the bottom container and work your way up. Make sure the containers are evenly spaced and securely attached.
3. Secure the Containers: Tie knots or use S-hooks to secure the containers to the rope, twine, or chain. Make sure the knots are tight and the S-hooks are securely closed. You want to ensure that the containers won’t slip or fall.
4. Hang Your Vertical Garden: Find a suitable location to hang your vertical garden. A sunny spot near your kitchen window or on your patio is ideal. Make sure the hanging point is strong enough to support the weight of the containers and soil. Use a sturdy hook or bracket to hang the garden.
Caring for Your Herb Garden
Now that your vertical herb garden is complete, it’s important to provide proper care to ensure your herbs thrive.
1. Watering: Water your herbs regularly, especially during hot and dry weather. Check the soil moisture by sticking your finger into the soil. If the top inch of soil feels dry, it’s time to water. Avoid overwatering, as this can lead to root rot.
2. Sunlight: Most herbs need at least 6 hours of sunlight per day. Place your vertical garden in a sunny location or supplement with grow lights if needed.
3. Fertilizing: Feed your herbs with a balanced liquid fertilizer every few weeks. Follow the instructions on the fertilizer label.
4. Pruning: Prune your herbs regularly to encourage bushier growth and prevent them from becoming leggy. Pinch off the tips of the stems to promote branching.
5. Pest Control: Keep an eye out for pests, such as aphids or spider mites. If you notice any pests, treat them with an organic insecticide or insecticidal soap.
6. Harvesting: Harvest your herbs as needed. Simply snip off the leaves or stems with scissors. Regular harvesting will encourage new growth.
Tips and Tricks for Success
Here are a few extra tips to help you create a thriving vertical herb garden:
* Choose the Right Herbs: Consider the amount of sunlight your garden will receive and choose herbs that are well-suited to those conditions.
* Use Quality Potting Soil: Don’t skimp on the potting soil. A good quality potting mix will provide the nutrients and drainage your herbs need to thrive.
* Don’t Overcrowd: Give your herbs enough space to grow. Don’t overcrowd the containers.
* Rotate Your Containers: If your vertical garden is in a location with uneven sunlight, rotate the containers regularly to ensure that all the herbs receive adequate light.
* Monitor for Pests and Diseases: Regularly inspect your herbs for pests and diseases. Early detection and treatment can prevent serious problems.
* Enjoy Your Harvest: Use your fresh herbs to add flavor to your meals. There’s nothing quite like the taste of homegrown herbs!
This project is not only a fun and rewarding DIY activity, but it’s also a sustainable way to recycle plastic containers and grow your own fresh herbs. I hope you enjoy creating your own vertical herb garden! Happy gardening!
Conclusion
So, there you have it! Transforming those discarded plastic pots into thriving cucumber planters is not just a clever recycling project; it’s a game-changer for your gardening experience. We’ve shown you how to give these pots a new lease on life, turning what was once waste into a valuable resource for growing delicious, homegrown cucumbers.
Why is this DIY trick a must-try? Because it’s sustainable, cost-effective, and incredibly rewarding. You’re reducing plastic waste, saving money on expensive planters, and enjoying the satisfaction of nurturing your own food from seed to harvest. Plus, the improved drainage and aeration you create with this method can lead to healthier, more productive cucumber plants.
But the beauty of this project lies in its adaptability. Feel free to experiment with different sizes of plastic pots to accommodate various cucumber varieties. Consider adding a trellis or support structure directly into the pot for vining cucumbers, providing them with the necessary vertical space to flourish. You can also customize the soil mix to suit your specific climate and growing conditions. For example, if you live in a particularly hot and dry area, adding water-retaining crystals to the soil can help keep your cucumber plants hydrated.
Don’t be afraid to get creative with the aesthetics, either. Paint the pots with vibrant colors, add decorative stones, or even create a mosaic design to personalize your cucumber planters and make them a beautiful addition to your garden or balcony. You can even involve your kids in the decorating process, turning it into a fun and educational family activity.
The possibilities are endless! The key is to embrace the spirit of DIY and make this project your own.
We wholeheartedly encourage you to try this simple yet effective DIY trick for growing cucumbers. It’s a fantastic way to reduce your environmental impact, save money, and enjoy the unparalleled taste of homegrown produce. And most importantly, it’s a testament to the power of resourcefulness and creativity.
Once you’ve given it a try, we’d love to hear about your experience! Share your photos, tips, and variations in the comments below. Let’s create a community of resourceful gardeners who are passionate about sustainable practices and delicious cucumbers. Your insights could inspire others to embark on their own DIY gardening journey. Let’s all work together to make the world a greener place, one recycled plastic pot and one delicious cucumber at a time. Remember, growing your own food is not just a hobby; it’s a statement. It’s a statement that you care about the environment, your health, and the future of our planet. So, grab those plastic pots, get your hands dirty, and start growing your own cucumbers today! You won’t regret it. This **DIY cucumber** planter is a game changer.
Frequently Asked Questions (FAQ)
1. What types of plastic pots are best suited for this DIY project?
Ideally, you should use sturdy, food-grade plastic pots. Look for pots that are relatively thick and free from cracks or damage. Avoid using pots that have previously contained harsh chemicals or pesticides, as these could contaminate your soil and affect the health of your cucumber plants. Pots that are labeled with recycling symbols like #2 (HDPE) or #5 (PP) are generally considered safe for gardening. Also, consider the size of the pot in relation to the type of cucumber you plan to grow. Bush varieties will need smaller pots than vining varieties.
2. How do I prepare the plastic pots before planting cucumbers?
First, thoroughly clean the pots with warm, soapy water to remove any dirt, debris, or residue. Rinse them well to ensure no soap remains. If the pots have drainage holes, make sure they are not blocked. If they don’t have drainage holes, you’ll need to drill some to prevent waterlogging. A good rule of thumb is to drill at least four to five holes, each about 1/4 inch in diameter, evenly spaced around the bottom of the pot. This will ensure proper drainage and prevent root rot.
3. What kind of soil should I use for growing cucumbers in recycled plastic pots?
Cucumbers thrive in well-draining, nutrient-rich soil. A good option is to use a mix of equal parts compost, potting soil, and perlite or vermiculite. Compost provides essential nutrients, potting soil provides structure and support, and perlite or vermiculite improves drainage and aeration. You can also add a slow-release fertilizer to the soil mix to provide a steady supply of nutrients throughout the growing season. Avoid using garden soil, as it can be too heavy and compact, which can hinder root growth.
4. How often should I water my cucumber plants in recycled plastic pots?
Cucumbers need consistent moisture, especially during hot weather. Water deeply whenever the top inch of soil feels dry to the touch. Avoid overwatering, as this can lead to root rot. The frequency of watering will depend on factors such as the weather, the size of the pot, and the type of soil you’re using. A good way to check if your cucumber plants need water is to stick your finger into the soil. If it feels dry, it’s time to water.
5. How much sunlight do cucumbers need when grown in recycled plastic pots?
Cucumbers need at least 6-8 hours of direct sunlight per day to thrive. Choose a location that receives plenty of sunlight throughout the day. If you live in a particularly hot climate, you may need to provide some afternoon shade to prevent the plants from overheating. You can also use shade cloth to protect your cucumber plants from intense sunlight.
6. How do I support vining cucumber varieties grown in recycled plastic pots?
Vining cucumber varieties need a trellis or other support structure to climb on. You can insert a trellis directly into the pot or place the pot near a fence or wall that the cucumbers can climb. Make sure the trellis is sturdy enough to support the weight of the mature cucumber plants. You can also use twine or plant ties to help train the vines to climb the trellis.
7. What are some common pests and diseases that affect cucumbers, and how can I prevent them?
Common pests that affect cucumbers include aphids, cucumber beetles, and squash bugs. Common diseases include powdery mildew and downy mildew. To prevent these problems, practice good garden hygiene, such as removing weeds and debris from around the plants. You can also use insecticidal soap or neem oil to control pests and fungicides to prevent diseases. Ensure good air circulation around the plants to reduce the risk of fungal diseases.
8. Can I grow other vegetables or herbs in the same recycled plastic pot as my cucumbers?
While it’s possible to companion plant with cucumbers, it’s generally best to give them their own pot, especially if you’re using a smaller recycled plastic pot. Cucumbers need plenty of space for their roots to grow, and overcrowding can reduce their yield. If you do choose to companion plant, select plants that have similar growing requirements and won’t compete with the cucumbers for nutrients or sunlight. Good companion plants for cucumbers include marigolds, nasturtiums, and basil.
9. How do I harvest cucumbers grown in recycled plastic pots?
Harvest cucumbers when they are the desired size and color. Use a sharp knife or pruning shears to cut the cucumbers from the vine, leaving a small stem attached. Avoid pulling the cucumbers off the vine, as this can damage the plant. Harvest cucumbers regularly to encourage continued production.
10. What can I do with the recycled plastic pots after the cucumber growing season is over?
After the cucumber growing season is over, you can clean the pots and store them for future use. You can also use them to grow other vegetables, herbs, or flowers. If the pots are damaged or no longer usable, you can recycle them if your local recycling program accepts them. Alternatively, you can repurpose them for other gardening projects, such as starting seeds or creating a miniature garden.
Leave a Comment