
Grow Juicy Tomatoes Home – that’s the dream, isn’t it? Imagine biting into a sun-warmed, bursting-with-flavor tomato, grown right in your own backyard! Forget those bland, store-bought imitations; we’re talking about the real deal, the kind of tomato that makes your taste buds sing. But let’s be honest, sometimes achieving that perfect tomato harvest feels more like a battle than a blissful gardening experience.
For centuries, cultivating tomatoes has been a cherished tradition, dating back to their origins in South America. From humble beginnings to becoming a global culinary staple, tomatoes have captured our hearts (and stomachs!). But even with generations of knowledge, getting those plump, juicy fruits can still be tricky. Pests, diseases, and unpredictable weather can all throw a wrench in your plans.
That’s where these DIY tricks and hacks come in! I’m here to share some simple, yet effective, methods to help you grow juicy tomatoes home, even if you’re a beginner gardener. We’ll tackle common problems, explore clever solutions, and unlock the secrets to a bountiful tomato harvest. Because let’s face it, everyone deserves to experience the joy of growing their own delicious, homegrown tomatoes. So, grab your gardening gloves, and let’s get started!
DIY: Unlock the Secret to Growing the Juiciest Tomatoes at Home
Okay, tomato lovers, gather ’round! I’m about to share my tried-and-true method for growing the most unbelievably juicy and flavorful tomatoes you’ve ever tasted. Forget those bland, store-bought imposters – we’re talking homegrown goodness that will make your summer salads sing! This isn’t just about throwing some seeds in the ground; it’s about creating the perfect environment for your tomato plants to thrive. So, let’s get our hands dirty!
Choosing the Right Tomato Variety
Before we even think about soil, we need to pick the right tomato variety. This is crucial! Different tomatoes have different needs and flavors.
* Consider your climate: Some varieties are heat-tolerant, while others prefer cooler temperatures. Check your local growing zone to make the best choice.
* Think about your space: Determinate tomatoes grow to a certain size and produce all their fruit at once, making them great for smaller gardens or containers. Indeterminate tomatoes keep growing and producing fruit throughout the season, requiring more space and support.
* Flavor preferences: Do you love sweet cherry tomatoes? Or maybe you prefer the tangy taste of a beefsteak? Research different varieties and choose ones that appeal to your taste buds. I personally love ‘Early Girl’ for its early harvest and reliable flavor, and ‘Brandywine’ for its incredible taste, even though it takes a bit longer to mature.
Getting Started: Seed Starting or Seedlings?
You have two options here: starting from seeds or buying seedlings. Both have their pros and cons.
* Starting from seeds: This gives you more control over the variety and can be more cost-effective. However, it requires more time and effort, and you’ll need a dedicated space with good lighting.
* Buying seedlings: This is the easier option, especially for beginners. You can skip the seed-starting process and get a head start on the growing season. Just make sure to choose healthy-looking seedlings with strong stems and no signs of disease.
Phase 1: Seed Starting (If You Choose This Route)
If you’re going the seed route, here’s what you need to do:
1. Gather your supplies: You’ll need seed starting trays or small pots, seed starting mix (not regular potting soil!), tomato seeds, a spray bottle, and a heat mat (optional, but helpful).
2. Sow the seeds: Moisten the seed starting mix and fill the trays or pots. Plant the seeds about ¼ inch deep and gently cover them with soil.
3. Water carefully: Use a spray bottle to mist the soil. You want to keep it moist but not soggy.
4. Provide warmth and light: Place the trays or pots on a heat mat (if using) and under grow lights or in a sunny window. Tomato seeds need warmth to germinate.
5. Wait for germination: It usually takes about 7-14 days for the seeds to germinate.
6. Thin the seedlings: Once the seedlings have their first true leaves (the second set of leaves), thin them out so that only the strongest seedling remains in each cell or pot.
Phase 2: Preparing the Soil
Tomatoes are heavy feeders, so rich, well-draining soil is essential.
1. Choose the right location: Tomatoes need at least 6-8 hours of sunlight per day. Pick a spot in your garden that gets plenty of sun.
2. Test your soil: A soil test will tell you the pH level and nutrient content of your soil. Tomatoes prefer a slightly acidic soil with a pH of 6.0-6.8. You can buy a soil testing kit at most garden centers.
3. Amend the soil: Based on your soil test results, amend the soil with compost, aged manure, or other organic matter. This will improve drainage, add nutrients, and help retain moisture. I like to add a generous amount of compost and some bone meal for extra phosphorus, which promotes strong root growth.
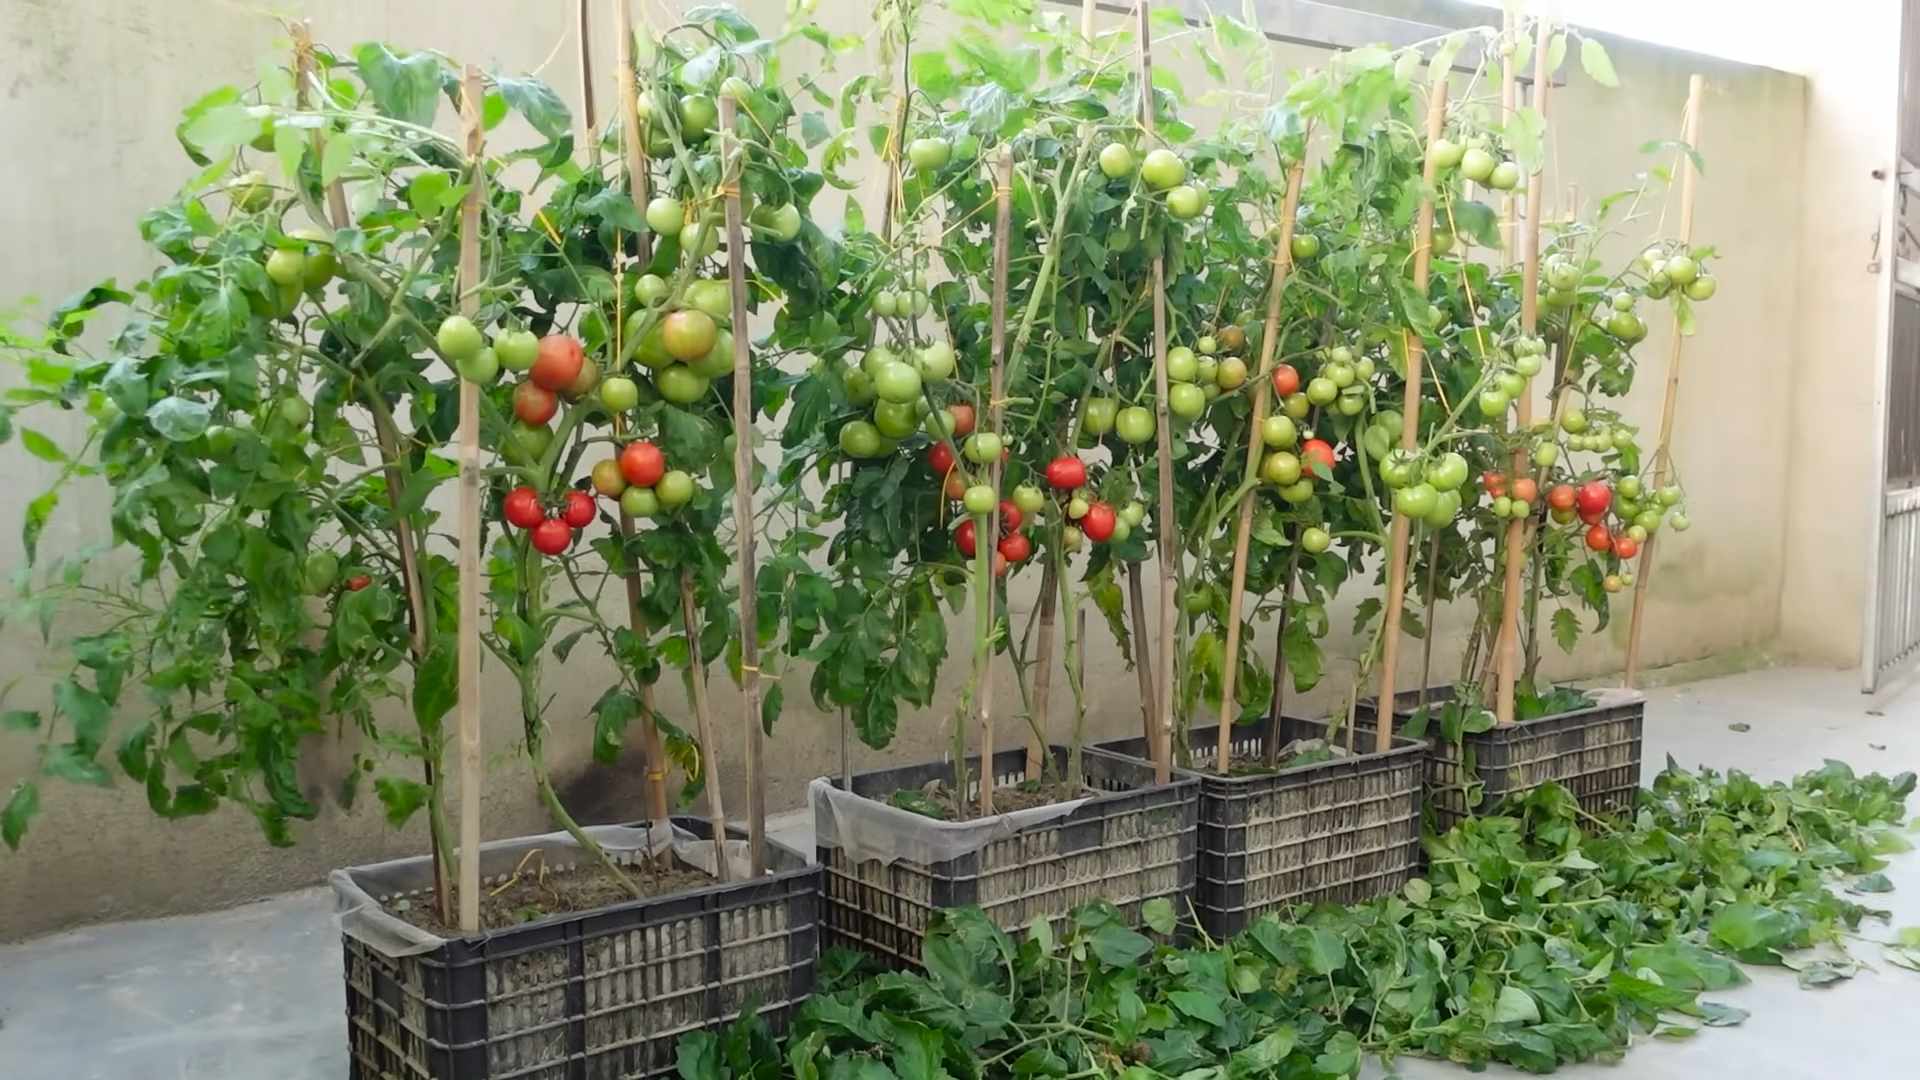
4. Ensure good drainage: Tomatoes hate sitting in waterlogged soil. If your soil is heavy clay, consider adding sand or perlite to improve drainage. You can also grow tomatoes in raised beds or containers to ensure good drainage.
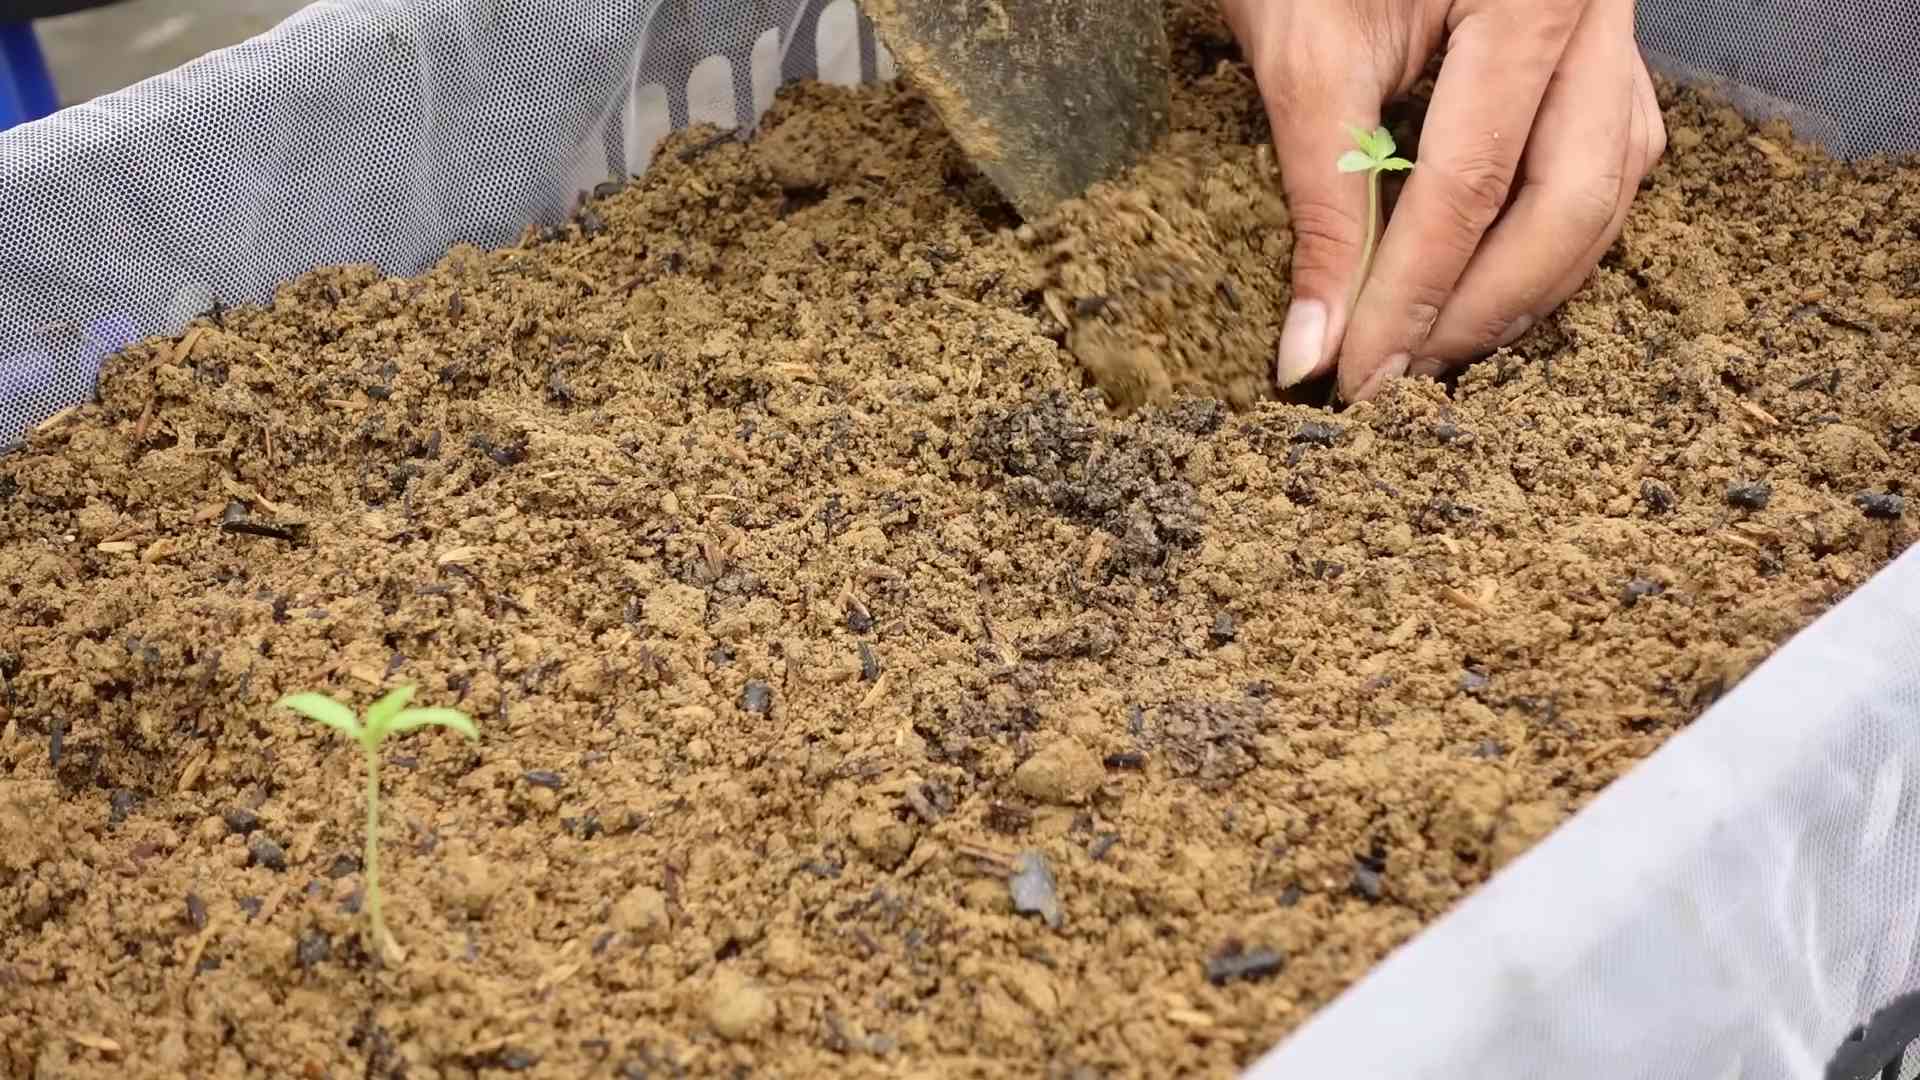
Phase 3: Transplanting Your Tomato Plants
Whether you started from seeds or bought seedlings, it’s time to transplant them into their permanent home.
1. Harden off your seedlings: If you started your own seeds indoors, you need to gradually acclimate them to outdoor conditions before transplanting. This process is called hardening off. Start by placing the seedlings outdoors in a sheltered location for a few hours each day, gradually increasing the amount of time they spend outside over the course of a week or two.
2. Choose a cloudy day: Transplanting on a cloudy day will help prevent the seedlings from getting stressed by the sun.
3. Dig a hole: Dig a hole that is deep enough to bury the stem of the tomato plant up to the first set of leaves. This will encourage the plant to develop more roots along the buried stem, resulting in a stronger, healthier plant.
4. Add fertilizer: Place a small amount of slow-release tomato fertilizer in the bottom of the hole. This will provide the plant with a steady supply of nutrients as it grows.
5. Plant the seedling: Gently remove the seedling from its container and place it in the hole. Backfill with soil and gently firm it around the base of the plant.
6. Water thoroughly: Water the newly transplanted seedling thoroughly to help it settle in.
7. Add mulch: Apply a layer of mulch around the base of the plant to help retain moisture, suppress weeds, and regulate soil temperature. I like to use straw or shredded leaves.
Phase 4: Caring for Your Tomato Plants
Now comes the ongoing care that will ensure a bountiful harvest.
1. Water regularly: Tomatoes need consistent watering, especially during hot, dry weather. Water deeply and infrequently, rather than shallowly and frequently. Aim to water at the base of the plant to avoid wetting the leaves, which can lead to disease.
2. Fertilize regularly: Tomatoes are heavy feeders and need regular fertilization to produce abundant fruit. Use a tomato-specific fertilizer according to the package directions. I like to fertilize every two weeks.
3. Provide support: Indeterminate tomato varieties need support to keep them from sprawling on the ground. Use stakes, cages, or trellises to support the plants. I prefer using tomato cages because they are easy to install and provide good support.
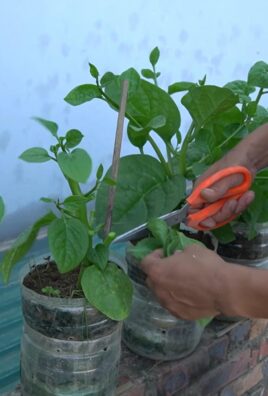
4. Prune your tomato plants: Pruning helps to improve air circulation, reduce disease, and encourage fruit production. Remove suckers (the small shoots that grow between the main stem and the branches) regularly.
5. Watch out for pests and diseases: Tomatoes are susceptible to a variety of pests and diseases. Inspect your plants regularly for signs of trouble and take action promptly. Common pests include aphids, tomato hornworms, and whiteflies. Common diseases include early blight, late blight, and blossom end rot.
6. Blossom End Rot Prevention: This is a common problem where the bottom of the tomato turns black and leathery. It’s usually caused by calcium deficiency due to inconsistent watering. Make sure you water consistently and consider adding calcium to the soil (bone meal works well).
7. Hand Pollination (If Needed): Sometimes, especially in enclosed spaces like greenhouses, tomatoes might need a little help with pollination. Gently shake the flower clusters or use a small brush to transfer pollen from one flower to another.
Phase 5: Harvesting Your Tomatoes
The moment we’ve all been waiting for!
1. Harvest when ripe: Tomatoes are ripe when they are fully colored and slightly soft to the touch. Gently twist the tomato off the vine.
2. Store properly: Store ripe tomatoes at room temperature. Refrigerating them can affect their flavor and texture.
3. Enjoy your harvest: Use your homegrown tomatoes in salads, sauces, sandwiches, or enjoy them fresh off the vine.
Troubleshooting Common Tomato Problems
Even with the best care, you might encounter some problems along the way. Here are a few common issues and how to address them:
* Yellowing leaves: This can be caused by a variety of factors, including nutrient deficiencies, overwatering, or underwatering. Check your soil and adjust your watering and fertilizing accordingly.
* Curling leaves: This can be caused by heat stress, pests, or diseases. Provide shade during the hottest part of the day and inspect your plants for pests and diseases.
* Cracked tomatoes: This is usually caused by inconsistent watering. Water regularly and deeply to prevent cracking.
* Lack of fruit: This can be caused by poor pollination, lack of sunlight, or nutrient deficiencies. Hand-pollinate your plants, ensure they are getting enough sunlight, and fertilize regularly.
Extra Tips for Super Juicy Tomatoes
* Bury the stem deep: As mentioned before,
Conclusion
So, there you have it! Growing juicy tomatoes at home doesn’t have to be a frustrating endeavor. By implementing this simple yet effective DIY trick, you’re setting yourself up for a season of plump, flavorful, and truly satisfying tomatoes. We’ve walked you through the process, highlighting the benefits of this method, and hopefully, demystified any concerns you might have had about achieving that perfect homegrown tomato taste.
This isn’t just about saving money (though that’s certainly a perk!). It’s about taking control of your food, understanding where it comes from, and experiencing the unparalleled joy of biting into a tomato you nurtured from seedling to ripeness. There’s a certain magic in that, a connection to nature that’s hard to replicate.
But don’t just take our word for it. The real proof is in the pudding – or, in this case, the tomato sauce! We wholeheartedly encourage you to give this DIY trick a try. You might be surprised at how much of a difference it makes.
Ready to elevate your tomato game?
Consider these variations to personalize your approach:
* **Experiment with different soil amendments:** While we’ve suggested a specific mix, feel free to tailor it to your local soil conditions. Adding compost tea or worm castings can further boost nutrient availability.
* **Explore companion planting:** Marigolds, basil, and other herbs can deter pests and attract beneficial insects, creating a healthier environment for your tomato plants.
* **Adjust watering based on weather:** During hot, dry spells, your tomatoes will need more frequent watering. Conversely, reduce watering during periods of heavy rain to prevent root rot.
* **Try different tomato varieties:** This DIY trick works wonders for all types of tomatoes, from cherry tomatoes to beefsteaks. Experiment with different varieties to find your favorites. Heirloom tomatoes often benefit greatly from this method.
Remember, gardening is a journey of learning and experimentation. Don’t be afraid to tweak the process to suit your specific needs and preferences. The most important thing is to have fun and enjoy the process of nurturing your tomato plants.
We’re confident that this DIY trick will help you grow juicy tomatoes at home like never before. But we also want to hear about your experiences! Share your results, tips, and challenges in the comments below. Let’s create a community of tomato enthusiasts who are passionate about growing the best possible tomatoes. Your insights could help other gardeners achieve their tomato-growing dreams. So, get your hands dirty, embrace the process, and prepare to be amazed by the delicious rewards of your labor. Happy gardening!
Frequently Asked Questions (FAQ)
Q: What exactly does this DIY trick entail, and why is it so effective for growing juicy tomatoes?
A: This DIY trick typically involves amending your soil with specific nutrients and ensuring proper drainage to promote healthy root development and fruit production. Often, it includes adding ingredients like Epsom salts (magnesium sulfate) for enhanced nutrient uptake and bone meal (phosphorus) for strong root growth. The effectiveness stems from providing the tomato plants with the precise nutrients they need at critical stages of their growth, leading to juicier, more flavorful tomatoes. Proper drainage prevents root rot, a common problem that can hinder nutrient absorption and overall plant health.
Q: I’m a beginner gardener. Is this DIY trick too complicated for me?
A: Absolutely not! This trick is designed to be simple and accessible for gardeners of all skill levels. We’ve broken down the steps into easy-to-follow instructions. The key is to follow the guidelines carefully and don’t be afraid to ask questions. Start with a small number of plants to gain confidence, and you’ll be surprised at how easy it is to achieve impressive results. There are many online resources and local gardening groups that can provide additional support and guidance.
Q: What if I don’t have access to all the ingredients mentioned in the DIY trick? Are there any substitutes I can use?
A: While the recommended ingredients are ideal, there are substitutes you can consider. For example, if you don’t have bone meal, you can use rock phosphate or a phosphorus-rich fertilizer. If Epsom salts are unavailable, a general-purpose fertilizer with magnesium can be used, but be mindful of the dosage. Compost is always a great addition and can partially compensate for other amendments. The most important thing is to ensure your soil has a good balance of nutrients and drains well.
Q: How often should I water my tomato plants after implementing this DIY trick?
A: Watering frequency depends on several factors, including the weather, soil type, and the size of your plants. As a general rule, water deeply and less frequently, allowing the soil to dry out slightly between waterings. Check the soil moisture by sticking your finger about an inch deep. If it feels dry, it’s time to water. Avoid overwatering, as this can lead to root rot. During hot, dry periods, you may need to water daily, while during cooler, wetter periods, you may only need to water every few days.
Q: My tomato plants are already established. Can I still use this DIY trick, or is it only effective for new plants?
A: You can definitely still use this DIY trick for established tomato plants, although the results might not be as dramatic as with new plants. Gently work the soil around the base of the plants and incorporate the recommended amendments. Be careful not to damage the roots. Water thoroughly after applying the amendments. You can also use liquid fertilizers or compost tea to provide a nutrient boost to established plants.
Q: I’ve heard that Epsom salts can be harmful to tomato plants if used incorrectly. Is this true?
A: While Epsom salts can be beneficial, it’s important to use them in moderation. Overuse can lead to magnesium toxicity, which can inhibit the uptake of other essential nutrients. Follow the recommended dosage carefully and avoid applying Epsom salts too frequently. If you notice any signs of nutrient imbalance, such as yellowing leaves or stunted growth, reduce or discontinue the use of Epsom salts. A soil test can help determine if your soil is deficient in magnesium.
Q: What are some common signs that my tomato plants are not getting enough nutrients, and how can this DIY trick help address those issues?
A: Common signs of nutrient deficiencies in tomato plants include yellowing leaves (especially between the veins), stunted growth, blossom end rot (a dark, leathery spot on the bottom of the tomato), and poor fruit production. This DIY trick helps address these issues by providing a balanced supply of essential nutrients, such as nitrogen, phosphorus, potassium, magnesium, and calcium. By ensuring your plants have access to these nutrients, you can prevent deficiencies and promote healthy growth and fruit development.
Q: How long does it typically take to see results after implementing this DIY trick?
A: The time it takes to see results can vary depending on the age and health of your plants, as well as the environmental conditions. However, you should typically start to see improvements within a few weeks. New growth will be healthier and more vigorous, and existing leaves may become greener. You may also notice an increase in flower production and fruit set. Be patient and continue to monitor your plants closely.
Q: Can this DIY trick be used for growing tomatoes in containers?
A: Yes, this DIY trick is perfectly suitable for growing tomatoes in containers. In fact, it can be even more beneficial for container-grown tomatoes, as they rely entirely on you for their nutrient supply. Use a high-quality potting mix and amend it with the recommended ingredients. Ensure your containers have good drainage to prevent waterlogging. Container-grown tomatoes may require more frequent watering and fertilization than those grown in the ground.
Q: What are some common pests and diseases that affect tomato plants, and how can I prevent them?
A: Common pests that affect tomato plants include aphids, whiteflies, tomato hornworms, and spider mites. Common diseases include early blight, late blight, and blossom end rot. To prevent these problems, choose disease-resistant varieties, practice good sanitation (remove fallen leaves and debris), provide adequate spacing between plants, and water at the base of the plants to avoid wetting the foliage. Companion planting with herbs like basil and marigolds can also help deter pests. Regularly inspect your plants for signs of pests or diseases and take action promptly if you notice any problems. Organic pest control methods, such as insecticidal soap or neem oil, can be effective for managing pests.
Leave a Comment