
Restore old pans and breathe new life into your kitchen essentials! Are your trusty frying pans looking a little worse for wear? Scratched, stained, and losing their non-stick magic? Don’t toss them out just yet! Before you rush to replace them, I’m here to share some amazing DIY tricks that will have your old pans looking and performing like new again.
For generations, resourceful cooks have relied on clever techniques to extend the life of their cookware. From using simple household ingredients to employing time-tested cleaning methods, restoring pans has always been a part of kitchen culture. Think about your grandmother’s cast iron skillet, lovingly seasoned and passed down through the family – a testament to the power of proper care and restoration!
In today’s world, where sustainability and saving money are more important than ever, learning how to restore old pans is a game-changer. Not only will you reduce waste by keeping perfectly good cookware out of landfills, but you’ll also save a significant amount of money by avoiding the expense of buying new pans. Plus, there’s a certain satisfaction that comes from taking something old and making it new again. So, grab your worn-out pans, and let’s get started on this rewarding DIY project!
Revive Your Rusty Pans: A DIY Restoration Guide
Hey there, fellow home chefs! Are you staring at a collection of beloved pans that have seen better days? Don’t toss them just yet! With a little elbow grease and some common household items, you can bring those rusty, burnt, and generally sad-looking pans back to life. I’m going to walk you through my tried-and-true method for restoring old pans, saving you money and giving you that satisfying feeling of accomplishment.
What You’ll Need
Before we dive in, let’s gather our supplies. Having everything on hand will make the process much smoother.
* **Baking Soda:** This is our main cleaning agent. It’s abrasive enough to scrub away grime but gentle enough not to damage most pan surfaces.
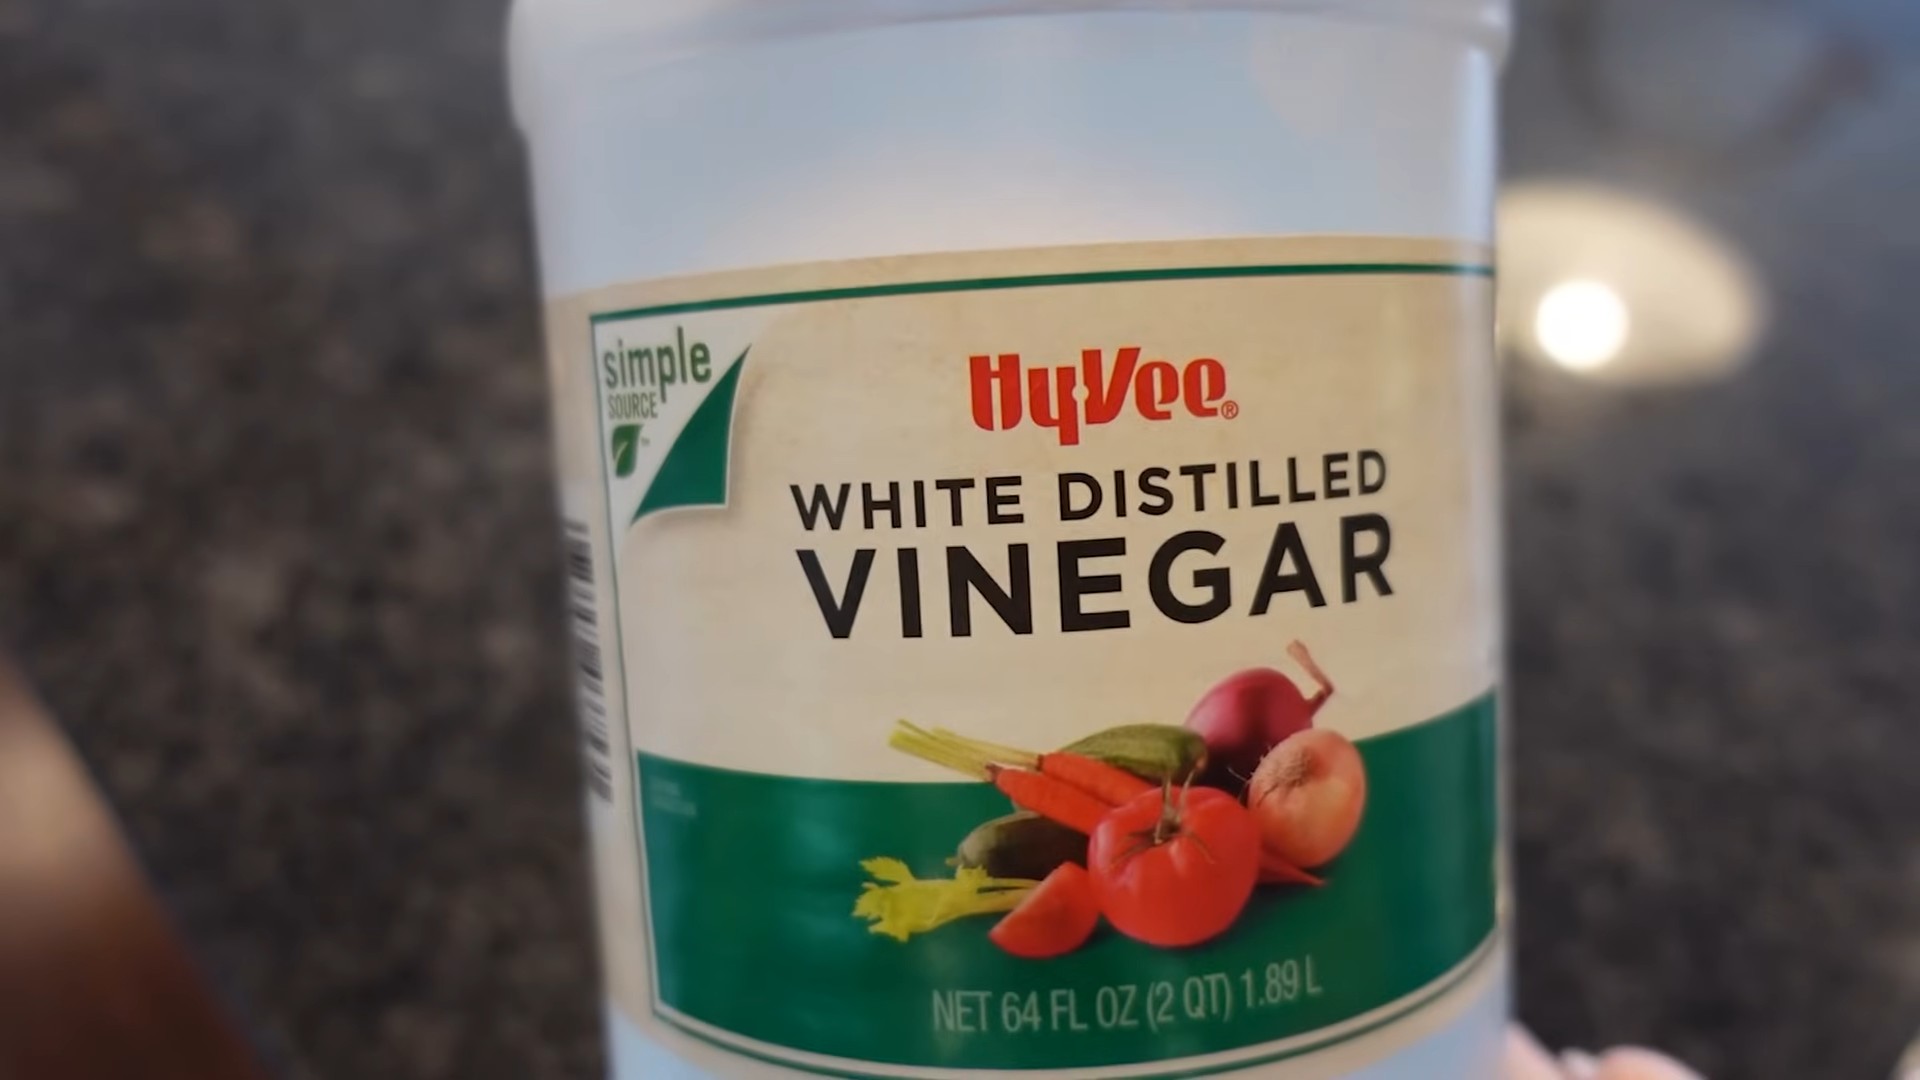
* **White Vinegar:** The acid in vinegar helps to loosen stubborn stains and rust.
* **Dish Soap:** For general cleaning and degreasing.
* **Salt (Coarse):** Acts as an extra abrasive for tough spots. Table salt works in a pinch, but coarse salt is more effective.
* **Steel Wool or Scrubbing Pads:** Choose the appropriate grade for your pan’s material. Avoid steel wool on non-stick surfaces!
* **Gloves:** Protect your hands from harsh chemicals and scrubbing.
* **Old Towels or Rags:** For wiping and drying.
* **Large Sink or Tub:** You’ll need a space to soak and scrub your pans.
* **Optional: Oven Cleaner (Heavy-Duty Cases):** Use with extreme caution and proper ventilation.
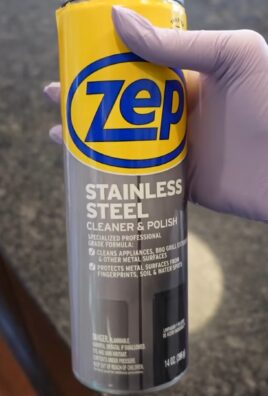
* **Optional: Bar Keeper’s Friend:** A great all-around cleaner for stainless steel and other surfaces.
* **Optional: Lemon Juice:** Another natural acid that can help with stains.
* **Optional: Drill with Scrubbing Attachment:** For those extra stubborn areas, this can save you a lot of time and effort.
Assessing the Damage
Before you start scrubbing, take a good look at your pans. What kind of material are they made of? What kind of damage are you dealing with? This will help you choose the right cleaning methods and avoid damaging your pans.
* **Rust:** Reddish-brown discoloration, often found on cast iron or steel pans.
* **Burnt Food:** Black, crusty residue that’s difficult to remove.
* **Grease Buildup:** Sticky, oily residue that accumulates over time.
* **Discoloration:** Staining or fading of the pan’s surface.
* **Scratches:** Minor scratches are usually unavoidable, but deep scratches can affect the pan’s performance.
Step-by-Step Restoration Process
Alright, let’s get to the fun part! Here’s my step-by-step guide to restoring your old pans:
1. **Initial Cleaning:** Start by washing the pan with warm, soapy water. This will remove loose debris and grease, making the rest of the cleaning process easier. Use a non-abrasive sponge or cloth for this step. Rinse thoroughly and dry.
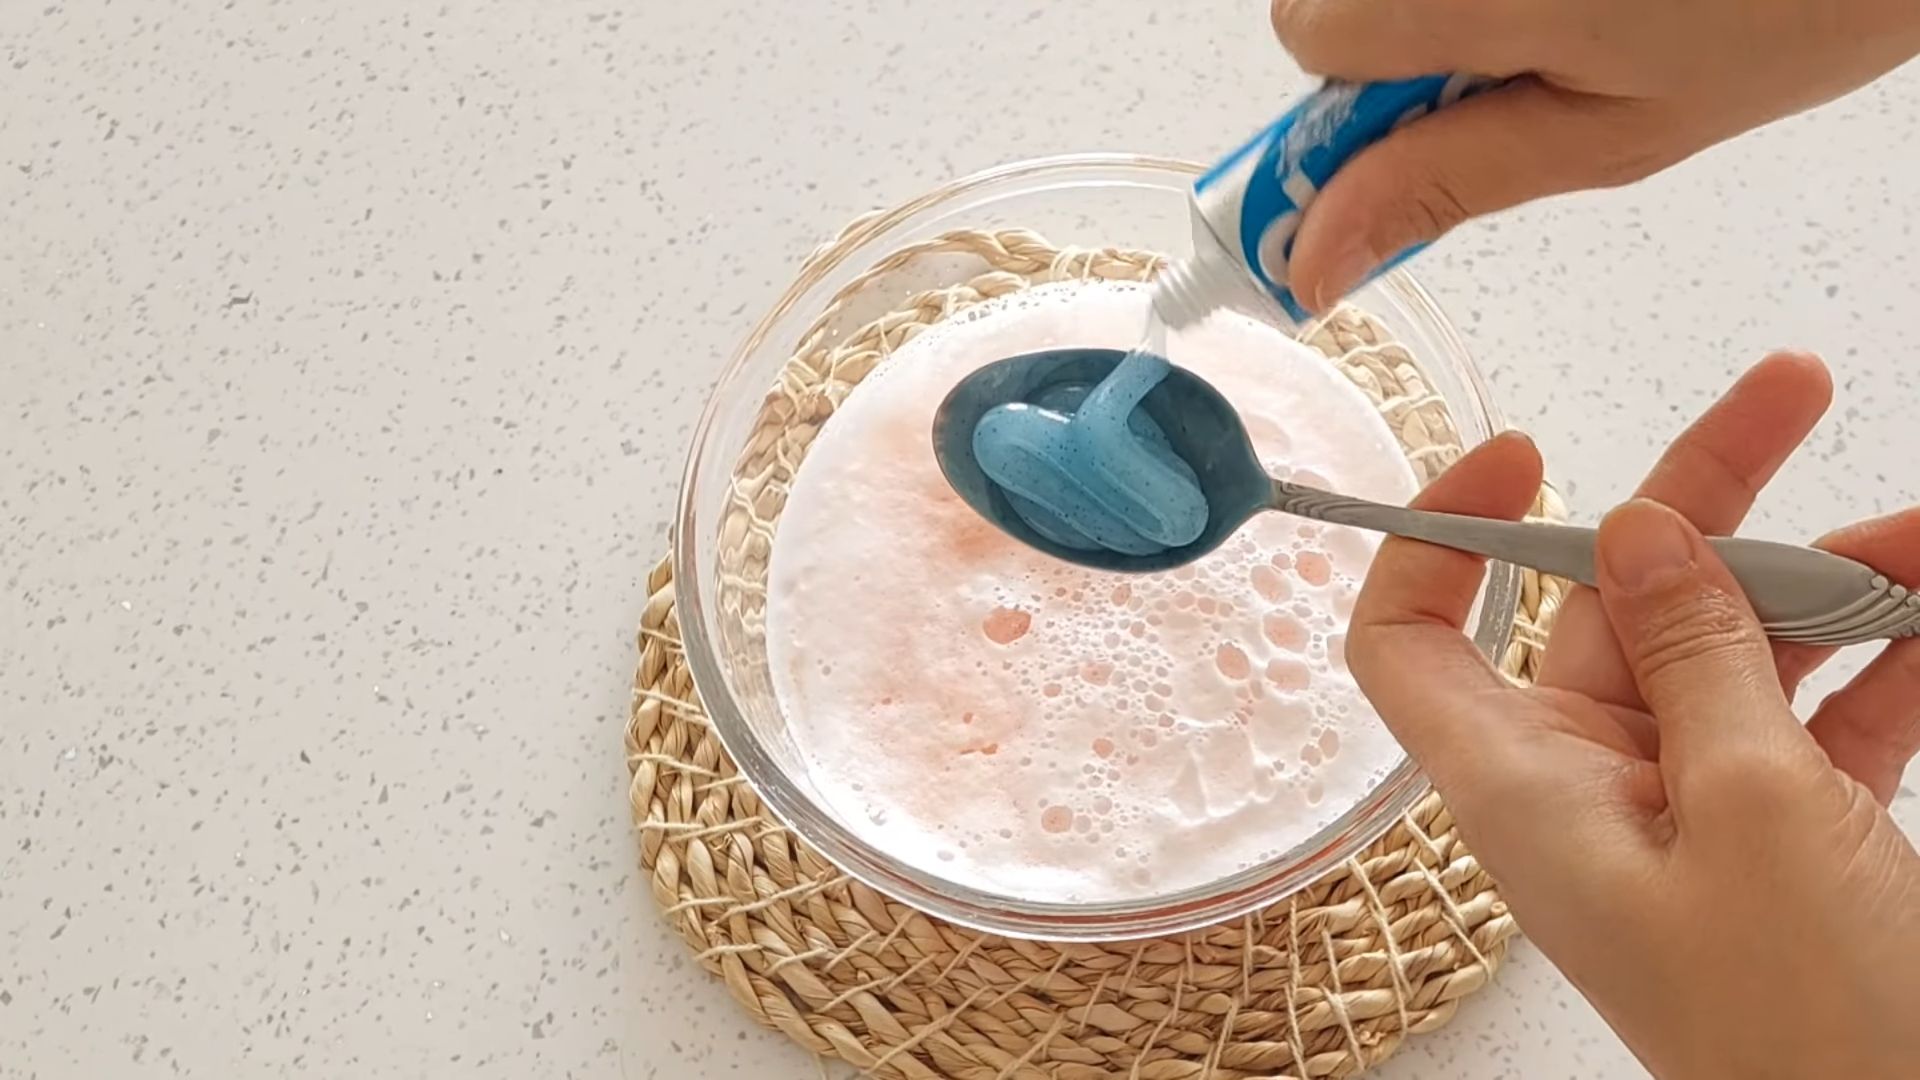
2. **Baking Soda Paste:** Make a paste of baking soda and water. The consistency should be thick enough to spread easily but not too runny. Apply the paste to the affected areas of the pan.
3. **Vinegar Power:** Pour white vinegar over the baking soda paste. You’ll see it fizz and bubble – that’s a good sign! The vinegar is reacting with the baking soda to loosen the grime. Let the mixture sit for at least 30 minutes, or even longer for heavily soiled pans. I often let it sit overnight for really tough cases.
4. **Scrubbing Time:** Put on your gloves and grab your scrubbing pad or steel wool (remember to avoid steel wool on non-stick!). Start scrubbing the pan, focusing on the areas with rust, burnt food, or grease buildup. Apply firm, even pressure. For stubborn spots, try adding a sprinkle of coarse salt to the baking soda paste for extra abrasion.
5. **Rinse and Repeat:** Rinse the pan thoroughly with warm water. If you’re still seeing stubborn stains or rust, repeat steps 2-4. Sometimes it takes a few rounds of scrubbing to get the pan completely clean.
6. **Dealing with Burnt Food:** If you’re dealing with heavily burnt food, try this method: Fill the pan with water and add a cup of white vinegar. Bring the mixture to a boil on the stovetop. Then, remove the pan from the heat and add a few tablespoons of baking soda. Let it sit for 30 minutes, then scrub as usual.
7. **Tackling Rust:** For rust removal, you can also try using lemon juice. Cut a lemon in half and rub the cut side over the rusted areas. The citric acid in the lemon will help to dissolve the rust. Let it sit for 15-20 minutes, then scrub with a steel wool pad.
8. **Heavy-Duty Cleaning (Oven Cleaner):** If the baking soda and vinegar method isn’t cutting it, you can try using oven cleaner. This is a more aggressive approach, so use it with caution. Always wear gloves and eye protection, and work in a well-ventilated area. Spray the oven cleaner onto the affected areas of the pan and let it sit for the recommended time (usually 20-30 minutes). Then, scrub thoroughly and rinse with plenty of water. Make sure to remove all traces of the oven cleaner before using the pan for cooking.
9. **Polishing (Optional):** Once the pan is clean, you can polish it to restore its shine. For stainless steel pans, I like to use Bar Keeper’s Friend. It’s a great all-around cleaner and polisher that will leave your pans looking like new. Follow the instructions on the product label.
10. **Drying and Seasoning (Cast Iron):** After cleaning, it’s crucial to dry your pans thoroughly to prevent rust from returning. For cast iron pans, you’ll need to re-season them after cleaning. To season a cast iron pan, coat it with a thin layer of oil (vegetable oil, canola oil, or flaxseed oil work well). Then, bake the pan in a preheated oven at 350 degrees Fahrenheit for one hour. Let the pan cool completely in the oven. This will create a protective layer that prevents rust and makes the pan non-stick.
Using a Drill with Scrubbing Attachment
For those really stubborn areas, especially on larger pans or those with intricate designs, a drill with a scrubbing attachment can be a lifesaver. You can find these attachments at most hardware stores.
1. **Prepare the Pan:** Follow steps 1-3 above (initial cleaning, baking soda paste, and vinegar soak).
2. **Attach the Scrubbing Pad:** Secure the scrubbing attachment to your drill. Make sure it’s firmly attached.
3. **Start Scrubbing:** Apply gentle pressure and move the drill in a circular motion over the affected areas. Be careful not to apply too much pressure, as this could damage the pan’s surface.
4. **Rinse and Inspect:** Rinse the pan thoroughly and inspect your work. Repeat as needed.
5. **Final Cleaning:** Finish with a hand scrubbing using a regular scrubbing pad to ensure all residue is removed.
Specific Pan Types and Considerations
* **Non-Stick Pans:** Be extra gentle when cleaning non-stick pans. Avoid using steel wool or abrasive cleaners, as these can damage the non-stick coating. Stick to non-abrasive sponges and mild dish soap. If food is stuck on, try soaking the pan in warm, soapy water for a longer period of time.
* **Stainless Steel Pans:** Stainless steel pans are generally durable and easy to clean. You can use steel wool or scrubbing pads to remove stubborn stains. Bar Keeper’s Friend is a great option for polishing stainless steel.
* **Cast Iron Pans:** Cast iron pans require special care to prevent rust. Always dry them thoroughly after washing and re-season them regularly. Avoid using soap on cast iron pans unless absolutely necessary, as it can strip away the seasoning.
* **Copper Pans:** Copper pans are beautiful but can be prone to tarnishing. You can use a copper cleaner to restore their shine. Be careful not to scratch the copper surface.
Maintaining Your Restored Pans
Once you’ve restored your pans, you’ll want to keep them looking their best. Here are a few tips for maintaining your restored pans:
* **Wash your pans after each use.** Don’t let food residue sit on the pan for too long, as this can make it harder to clean.
* **Use the appropriate cleaning tools.** Avoid using abrasive cleaners or steel wool on non-stick surfaces.
* **Dry your pans thoroughly after washing.** This is especially important for cast iron pans.
* **Store your pans properly.** Avoid stacking pans on top of each other, as this can scratch the surfaces. Use pan protectors or hang your pans on a rack.
* **Re-season cast iron pans regularly.** This will help to maintain their non-stick properties and prevent rust.
By following these tips, you can keep your restored pans looking great for years to come. Good luck, and happy
Conclusion
So, there you have it! Reviving your beloved, yet battle-scarred, cookware doesn’t require a trip to the store or a hefty investment in new pots and pans. This simple, effective DIY trick to restore old pans is a game-changer for anyone who values sustainability, frugality, and the satisfaction of breathing new life into cherished items.
Why is this a must-try? Because it’s more than just cleaning; it’s about reclaiming. It’s about rescuing those pans from the brink of being discarded and giving them a second chance to shine. Think of the money you’ll save by not replacing them! Think of the environmental impact you’ll reduce by keeping them out of landfills! And think of the joy you’ll experience as you witness the transformation firsthand.
But the beauty of this method lies not only in its effectiveness but also in its adaptability. Feel free to experiment with variations to suit your specific needs and preferences. For instance, if you’re dealing with particularly stubborn stains, consider adding a tablespoon of baking soda to the paste for extra scrubbing power. Or, if you prefer a more natural approach, you can substitute the dish soap with a few drops of essential oils like lemon or tea tree for their antibacterial and degreasing properties. For cast iron pans, ensure you re-season them after cleaning to maintain their non-stick surface and prevent rusting.
Remember, the key is patience and persistence. Some pans may require multiple applications and a bit of elbow grease, but the results are well worth the effort. You’ll be amazed at how much grime and buildup can be removed, revealing the gleaming surface underneath.
We’re confident that this DIY trick will become your go-to solution for restoring your old pans and keeping them looking their best for years to come. It’s a simple, cost-effective, and environmentally friendly way to extend the lifespan of your cookware and reduce waste.
Now, it’s your turn! We encourage you to give this method a try and see the incredible results for yourself. Don’t be afraid to experiment with different variations and find what works best for you. And most importantly, we want to hear about your experience! Share your before-and-after photos, tips, and tricks in the comments below. Let’s create a community of resourceful home cooks who are passionate about restoring their old pans and making the most of what they have. Let us know if you found this method helpful to restore old pans.
Frequently Asked Questions (FAQ)
Q: What types of pans can I restore using this method?
A: This method is generally safe and effective for restoring a wide variety of pans, including stainless steel, aluminum, ceramic, and even some non-stick pans (though proceed with caution on non-stick surfaces, as abrasive scrubbing can damage the coating). It’s particularly effective for removing burnt-on food, grease, and discoloration. However, it’s always a good idea to test a small, inconspicuous area first to ensure that the method doesn’t damage the pan’s surface. For cast iron pans, this method can be used, but re-seasoning is crucial afterward to prevent rust and maintain the non-stick properties. Avoid using this method on copper pans, as it may scratch or tarnish the finish.
Q: What if I don’t have cream of tartar? Can I use a substitute?
A: Yes, you can substitute cream of tartar with other acidic ingredients, although the results may vary slightly. A good alternative is baking soda combined with lemon juice or white vinegar. Mix equal parts baking soda and lemon juice (or vinegar) to form a paste, and then follow the same steps as outlined in the method. Another option is to use a commercial cleaning product specifically designed for removing burnt-on food, but be sure to follow the manufacturer’s instructions carefully and wear gloves to protect your hands. However, cream of tartar is generally the most effective and gentle option for restoring pans without causing damage.
Q: How often should I restore my pans using this method?
A: The frequency of restoring your pans depends on how often you use them and how well you maintain them. For pans that are used frequently and tend to accumulate burnt-on food and grease, you may need to restore them every few months. For pans that are used less often or are cleaned thoroughly after each use, you may only need to restore them once or twice a year. A good rule of thumb is to restore your pans whenever you notice a significant buildup of grime or discoloration that cannot be removed with regular cleaning. Regular cleaning and proper maintenance can help extend the lifespan of your pans and reduce the need for frequent restoration.
Q: Can this method remove scratches from my pans?
A: Unfortunately, this method is primarily designed to remove burnt-on food, grease, and discoloration, and it will not remove scratches from your pans. Scratches are physical damage to the surface of the pan and cannot be removed with cleaning solutions. However, restoring your pans using this method can help improve their overall appearance and make them look newer, even if they still have some scratches. To minimize scratches, avoid using abrasive cleaning tools and harsh chemicals, and always use non-scratch cookware utensils.
Q: Is this method safe for non-stick pans?
A: While this method can be used on non-stick pans, it’s important to proceed with caution. Abrasive scrubbing can damage the non-stick coating, reducing its effectiveness and potentially releasing harmful chemicals. If you choose to use this method on a non-stick pan, use a very gentle scrubbing motion and avoid using abrasive cleaning tools. You can also try using a milder cleaning solution, such as a mixture of warm water and dish soap, before resorting to the cream of tartar paste. Alternatively, you can try boiling water with a bit of baking soda in the pan to loosen the burnt-on food. If the non-stick coating is already damaged, it’s best to replace the pan to avoid potential health risks.
Q: How do I prevent my pans from getting so dirty in the first place?
A: Preventing your pans from getting excessively dirty is key to reducing the need for frequent restoration. Here are some tips to help you keep your pans clean and in good condition:
* Clean your pans immediately after use: Don’t let food and grease sit on the pan for extended periods, as this will make them harder to remove later.
* Use the right amount of heat: Overheating your pans can cause food to burn and stick, making them more difficult to clean.
* Use the appropriate cooking oil or spray: Using enough oil or spray can help prevent food from sticking to the pan.
* Avoid using metal utensils: Metal utensils can scratch the surface of your pans, making them more prone to sticking and burning.
* Store your pans properly: Avoid stacking your pans on top of each other, as this can scratch the surfaces. Use pan protectors or hang your pans to prevent damage.
* Regularly clean the exterior of your pans: Grease and grime can accumulate on the exterior of your pans over time, making them look dirty and unappealing.
Q: Can I use this method to clean the bottom of my burnt pots?
A: Absolutely! This method is highly effective for cleaning the burnt bottoms of pots and pans. The combination of cream of tartar, dish soap, and gentle scrubbing helps to loosen and remove the stubborn burnt-on residue. For particularly stubborn cases, you may need to repeat the process or let the paste sit for a longer period before scrubbing. Remember to use a non-abrasive scrubbing pad to avoid scratching the surface of the pot.
Q: What safety precautions should I take when restoring my pans?
A: While this method is generally safe, it’s always a good idea to take some basic safety precautions:
* Wear gloves: Wearing gloves will protect your hands from the cleaning solution and prevent them from becoming dry or irritated.
* Work in a well-ventilated area: This will help prevent you from inhaling any fumes from the cleaning solution.
* Avoid getting the cleaning solution in your eyes: If you do get the cleaning solution in your eyes, rinse them immediately with plenty of water.
* Keep the cleaning solution out of reach of children and pets: This will prevent accidental ingestion or contact.
* Test the cleaning solution on a small, inconspicuous area first: This will ensure that the method doesn’t damage the pan’s surface.
Q: Where can I buy cream of tartar?
A: Cream of tartar is readily available at most grocery stores and supermarkets. You can typically find it in the baking aisle, near the spices and other baking ingredients. It’s also available online from various retailers. It’s a common ingredient used in baking, so it should be easy to find.
Q: My pan is severely burnt. Will this method still work?
A: For severely burnt pans, this method may still work, but it may require more effort and patience. You might need to repeat the process several times and let the paste sit for a longer period before scrubbing. You can also try adding a tablespoon of baking soda to the paste for extra cleaning power. If the burnt-on food is extremely stubborn, you may need to use a more aggressive cleaning method, such as boiling water with baking soda or using a commercial oven
Leave a Comment