
Harvesting Broccoli: Your Guide to a Bountiful Home Garden
Harvesting broccoli might seem straightforward, but there’s a real art to getting the most delicious and tender florets from your homegrown plants. I’ve always loved the satisfaction of picking fresh vegetables from my own garden, and nothing beats the taste of homegrown broccoli. This article is your complete guide to mastering the art of harvesting broccoli, ensuring you enjoy a plentiful harvest all season long.
For centuries, broccoli has been a staple in many cultures, prized not only for its nutritional value but also its versatility in the kitchen. From ancient Roman times to modern-day culinary creations, this humble vegetable has held a special place on our plates. But knowing when and how to harvest broccoli makes all the difference between a delicious meal and a disappointing one.
Why bother with all this fuss over harvesting broccoli yourself? Well, let me tell you, there’s nothing quite like the taste of freshly picked broccoli. Store-bought broccoli often travels long distances and sits in warehouses, resulting in a loss of flavor and nutrients. By harvesting your own broccoli, you’re guaranteed peak freshness, maximum flavor, and the satisfaction of knowing exactly where your food comes from. Plus, it’s incredibly rewarding to see your hard work pay off with a bountiful harvest!
Ready to learn the secrets to harvesting perfect broccoli? Let’s get started!
Amazing Sponge Hacks to Transform Your Cleaning Routine
Sponges. We all use them, but are we using them to their full potential? I bet not! Sponges are incredibly versatile, and with a few clever tricks, you can unlock a whole new level of cleaning power and efficiency. Let’s dive into some amazing sponge hacks that will leave your home sparkling and your cleaning routine streamlined.
Section 1: Prepping Your Sponges for Maximum Efficiency
- Choose the right sponge: Not all sponges are created equal! For tough scrubbing, a cellulose sponge is your best bet. For delicate surfaces, opt for a softer, melamine sponge. I personally keep both on hand.
- Clean your sponges properly: This is crucial! After each use, rinse your sponge thoroughly under hot, running water. Squeeze out as much excess water as possible. This prevents bacteria from breeding.
- Sanitize regularly: To keep your sponges truly clean, sanitize them at least once a week. You can do this by microwaving a damp sponge for one to two minutes (make sure it’s damp, not soaking wet!), or by soaking it in a bleach solution (one part bleach to ten parts water) for five minutes. Always rinse thoroughly afterwards.
- Replace frequently: Even with proper cleaning, sponges need replacing. Aim to replace your sponges every two to three weeks, or sooner if they start to smell or show signs of significant wear and tear. This is key to maintaining a hygienic cleaning routine.
Section 2: Sponge Hacks for Sparkling Clean Surfaces
- Tackling tough grease: For stubborn grease on your stovetop or oven, sprinkle baking soda onto the greasy area, then dampen a sponge and scrub vigorously. The baking soda acts as a natural abrasive, helping to lift the grease. Rinse thoroughly afterward.
- Cleaning delicate surfaces: Melamine sponges are perfect for cleaning delicate surfaces like glass and mirrors without scratching. Simply dampen the sponge and gently wipe the surface. For extra shine, follow up with a clean, dry cloth.
- Removing crayon marks from walls: Crayon marks on walls can be a nightmare, but a damp sponge can work wonders! Gently rub the sponge over the crayon marks, and they should lift right off. For stubborn marks, try adding a little dish soap to the sponge.
- Cleaning grout: Grout can be notoriously difficult to clean, but a sponge can help! Mix a solution of equal parts water and white vinegar, then apply it to the grout with a sponge. Let it sit for a few minutes, then scrub with the sponge. Rinse thoroughly with clean water.
- Removing scuff marks from floors: Scuff marks on hardwood or tile floors can be easily removed with a damp sponge and a little elbow grease. Simply dampen the sponge and gently rub the scuff marks until they disappear. For stubborn marks, try adding a small amount of floor cleaner to the sponge.
- Cleaning your shower head: Fill a plastic bag with white vinegar, then secure it around your shower head using a rubber band. Let it sit for at least an hour, or overnight for best results. Then, use a sponge to scrub away any mineral deposits. The vinegar will dissolve the buildup, making it easy to remove.
Section 3: Beyond Cleaning: Creative Sponge Uses
- DIY sponge paint rollers: Cut a sponge into smaller pieces and attach them to a dowel or paint roller handle using rubber bands. This creates a unique textured effect for painting. Perfect for smaller projects or adding interesting details.
- Sponge painting: Use sponges to create unique patterns and textures when painting walls or furniture. Experiment with different sponge shapes and techniques to achieve different effects. This is a great way to add personality to your home decor.
- Cleaning your keyboard: Use a slightly damp sponge to gently clean the crevices of your keyboard. Make sure to squeeze out excess water to avoid damaging the electronics. This is a much more effective method than using compressed air.
- Cleaning your car interior: A damp sponge is perfect for cleaning the interior of your car, especially the dashboard and door panels. Use a separate sponge for each area to avoid cross-contamination. For stubborn stains, try adding a little car interior cleaner to the sponge.
- Washing delicate items: Use a soft sponge to gently wash delicate items like lingerie or sweaters. Avoid harsh scrubbing, and rinse thoroughly with cool water. This helps to prevent damage and maintain the quality of your clothes.
- Applying polish: Use a soft sponge to apply furniture polish or car wax. The sponge helps to distribute the product evenly and prevents streaks. This is a much more efficient method than using a cloth.
- Cleaning pet messes: A damp sponge is perfect for quickly cleaning up pet messes, especially on hard surfaces. Make sure to rinse the sponge thoroughly after each use to prevent the spread of bacteria.
- Gardening helper: Use a sponge to gently wipe away dirt and debris from delicate plants. This is a much gentler method than using a cloth, and it helps to prevent damage to the plants.
Section 4: Troubleshooting Common Sponge Issues
- Sponge smells bad: If your sponge smells bad, it’s time to replace it! Even with proper cleaning, sponges can eventually harbor bacteria that cause unpleasant odors. Don’t try to salvage a smelly sponge – it’s a breeding ground for germs.
- Sponge is too hard: If your sponge is too hard, it might be time to replace it. Hard sponges can scratch surfaces and are less effective at cleaning. Look for softer sponges made from cellulose or melamine.
- Sponge is falling apart: If your sponge is falling apart, it’s definitely time to replace it! A damaged sponge is less effective at cleaning and can leave behind debris. Always use a fresh, intact sponge for best results.
Remember, a clean sponge is a happy sponge! By following these tips and tricks, you can keep your sponges in top condition and unlock their full cleaning potential. Happy cleaning!
Conclusion
So there you have it – a comprehensive guide to harvesting your own broccoli! This DIY approach to harvesting isn’t just about saving money; it’s about connecting with your food in a deeper, more meaningful way. By learning the art of harvesting broccoli, you gain control over the quality and freshness of your produce, ensuring that every floret is bursting with flavor. You’ll be amazed at the difference between store-bought broccoli and the broccoli you’ve carefully harvested yourself. The vibrant green color, the crisp texture, and the intense, slightly sweet flavor are all testaments to the superior quality of homegrown produce. This DIY harvesting trick is a must-try for anyone who appreciates fresh, flavorful food and wants to experience the satisfaction of growing and harvesting their own vegetables.
Beyond the basic techniques outlined above, there are several ways to customize your broccoli harvesting experience. Experiment with different harvesting times to see how it affects the flavor and texture. Early morning harvesting, for instance, can help retain moisture and crispness. Consider trying different varieties of broccoli – from the classic green to the purple sprouting varieties – to expand your culinary horizons. You can also explore different cooking methods to showcase the unique qualities of your homegrown broccoli. From steaming and roasting to stir-frying and adding it to soups and salads, the possibilities are endless!
Don’t be afraid to experiment and find what works best for you and your garden. The beauty of homegrown broccoli is its versatility. Whether you’re a seasoned gardener or a complete beginner, this simple DIY harvesting method is accessible to everyone. It’s a rewarding experience that connects you to the land and provides you with incredibly fresh, delicious broccoli. So, grab your knife, head to your garden, and start harvesting! Share your harvesting experiences and delicious broccoli recipes with us – we’d love to hear from you and see the amazing results of your efforts. Let’s celebrate the joy of homegrown food together!
Remember, the key to successful broccoli harvesting is understanding the plant’s growth cycle and using the right techniques. By following these simple steps, you can ensure a bountiful harvest and enjoy the freshest, most flavorful broccoli you’ve ever tasted. Embrace the DIY spirit, and discover the joy of harvesting your own broccoli!
Frequently Asked Questions (FAQs)
How often should I harvest broccoli?
The frequency of harvesting broccoli depends on the variety and the growing conditions. Generally, you should harvest broccoli heads when they are firm and tightly closed, typically around 60-70 days after planting. Once you harvest the main head, you can often harvest smaller side shoots that develop later. Regular harvesting encourages the plant to produce more side shoots, extending the harvest period.
What should I do with the broccoli after harvesting?
After harvesting, it’s crucial to handle your broccoli gently to prevent bruising. Store it in a plastic bag in the refrigerator to maintain freshness. For optimal quality, consume your freshly harvested broccoli within a few days. You can also blanch and freeze your broccoli for longer storage, preserving its nutrients and flavor.
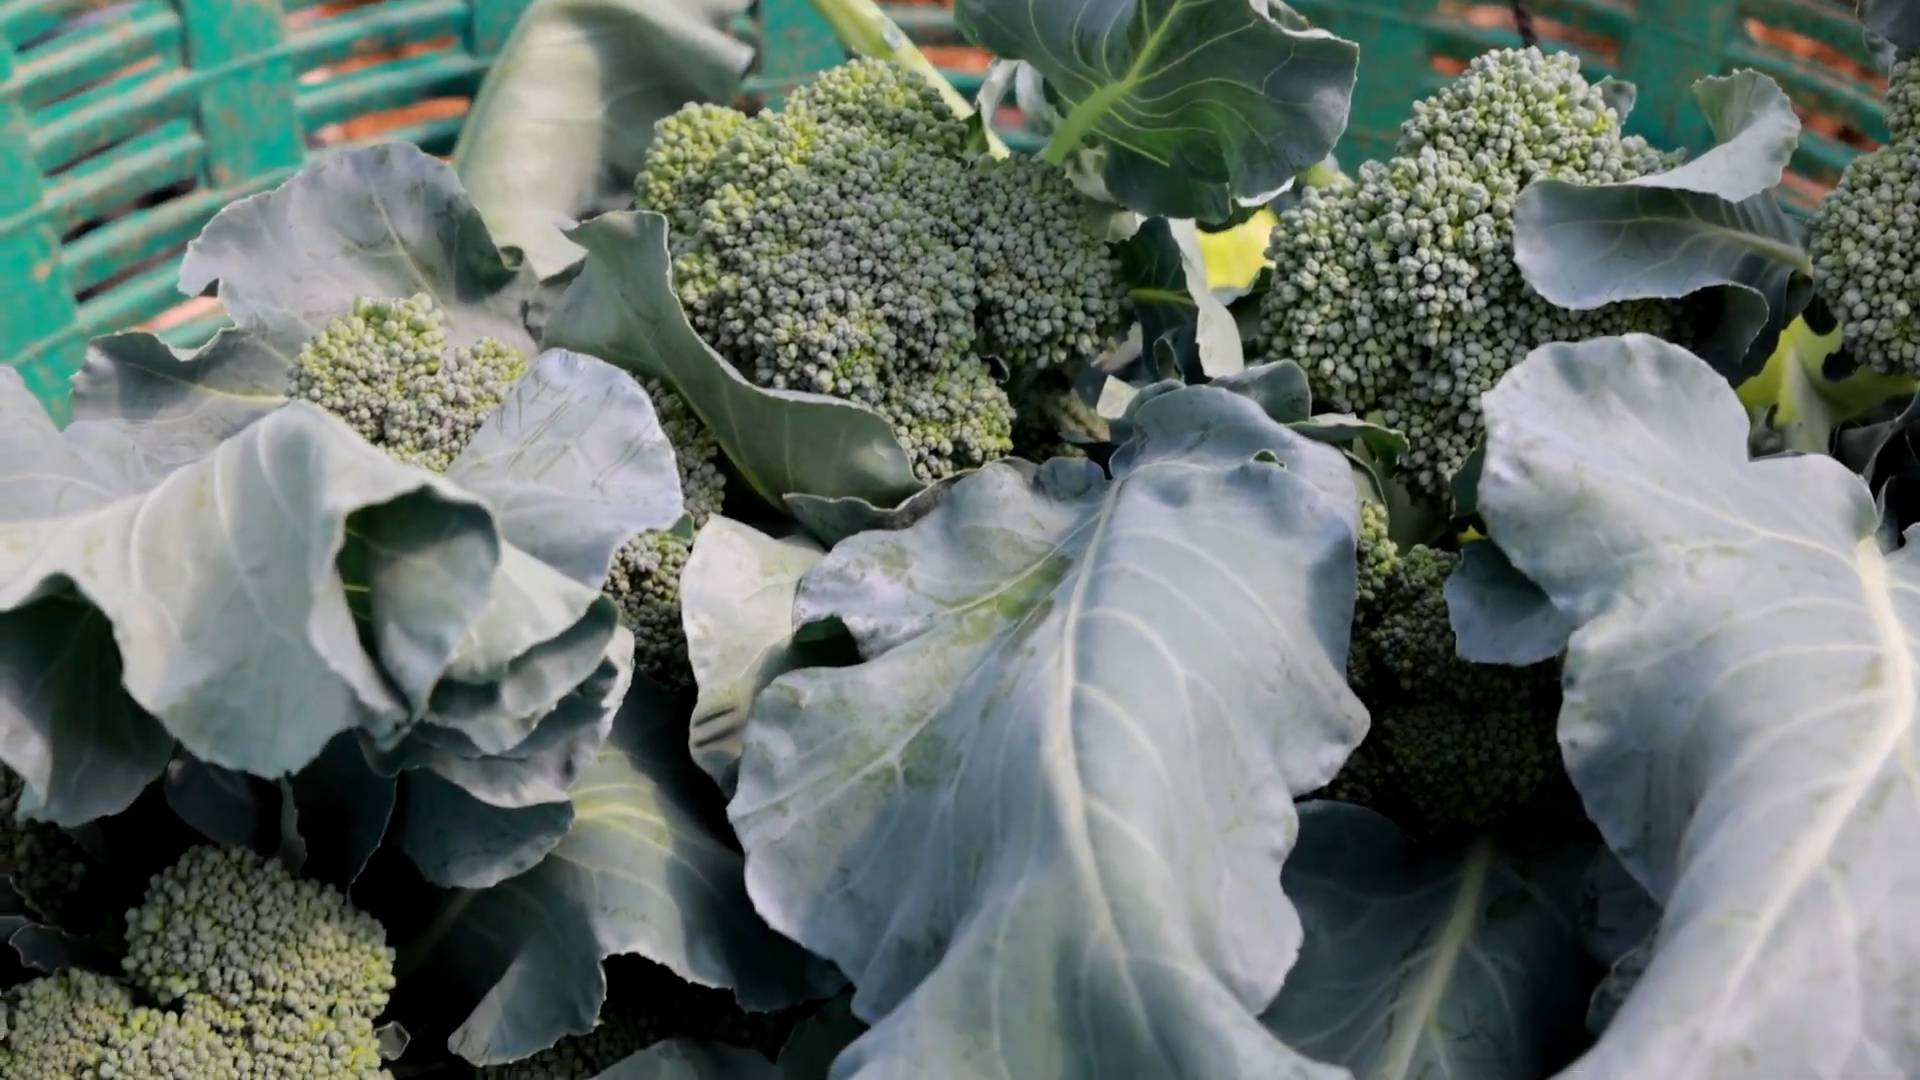
What are the signs of a ready-to-harvest broccoli head?
A mature broccoli head is usually dark green and firm to the touch. The florets should be tightly closed and compact. Avoid harvesting heads that are loose, yellowing, or showing signs of insect damage. The best time to harvest is typically in the early morning after the dew has dried.
Can I harvest broccoli in any weather?
While you can harvest broccoli in most weather conditions, it’s best to avoid harvesting during extreme heat or rain. Harvesting in the early morning or late evening, when temperatures are cooler, helps to maintain the broccoli’s freshness and quality. Avoid harvesting when the broccoli is wet, as this can increase the risk of disease.
What should I do if my broccoli heads are small?
Small broccoli heads can be due to several factors, including insufficient sunlight, poor soil conditions, or inadequate watering. Ensure your broccoli plants receive at least six hours of sunlight per day and are planted in well-drained soil. Consistent watering is also crucial for optimal growth. Consider using fertilizer to provide essential nutrients. Some broccoli varieties naturally produce smaller heads than others.
My broccoli plants have yellowing leaves. What’s wrong?
Yellowing leaves can indicate several problems, including nutrient deficiencies, pest infestations, or diseases. Check your soil for nutrient levels and consider using fertilizer if needed. Inspect the plants for pests and diseases and take appropriate action if necessary. Overwatering or underwatering can also cause yellowing leaves, so ensure your plants receive the right amount of water.
What are some creative ways to use my homegrown broccoli?
The possibilities are endless! You can steam, roast, stir-fry, or grill your broccoli. Add it to soups, stews, pasta dishes, or salads. Try making broccoli cheese soup, broccoli and cheddar quiche, or roasted broccoli with garlic and parmesan cheese. Experiment with different seasonings and spices to find your favorite flavor combinations. The fresh flavor of homegrown broccoli elevates any dish!
How can I prevent pests and diseases in my broccoli plants?
Regularly inspect your broccoli plants for signs of pests and diseases. Practice crop rotation to prevent the buildup of pests and diseases in the soil. Use organic pest control methods, such as introducing beneficial insects or using insecticidal soap. Ensure proper spacing between plants to allow for good air circulation and reduce the risk of fungal diseases. Maintaining healthy soil conditions is also crucial for disease prevention.
We hope this comprehensive guide helps you enjoy the rewarding experience of harvesting broccoli. Happy gardening!

Leave a Comment