
Salt and Detergent Cleaning: Sounds like an odd combination, right? But trust me, this unexpected duo is about to become your new best friend when it comes to tackling tough cleaning challenges around your home. I know, I know, you’re probably thinking, “Another DIY cleaning hack? Do I really need this?” And the answer is a resounding YES!
For generations, resourceful homemakers have been experimenting with simple, readily available ingredients to keep their homes sparkling. Think about it – before the age of specialized cleaning products lining every supermarket aisle, people relied on ingenuity and common household staples. Salt, a symbol of purity and preservation in many cultures, and detergent, a modern marvel of grime-fighting power, combine to create a surprisingly effective cleaning solution.
Let’s face it, we all want a clean and healthy home, but who has the time (or the budget!) to spend hours scrubbing with harsh chemicals? That’s where this salt and detergent cleaning trick comes in. It’s a simple, affordable, and surprisingly effective way to tackle everything from stubborn stains on your kitchen counters to grimy buildup in your bathroom. I’m going to show you how to harness the power of these two ingredients to make your cleaning routine easier, faster, and more eco-friendly. Get ready to ditch the expensive cleaners and embrace the magic of salt and detergent!
DIY Power Cleaner: Salt and Detergent for Sparkling Results!
Hey everyone! I’m so excited to share this super simple, yet incredibly effective cleaning hack with you. I stumbled upon this combination of salt and detergent quite by accident, and let me tell you, it’s a game-changer! Forget those expensive, chemical-laden cleaners – this DIY solution is cheap, eco-friendly, and works wonders on a variety of surfaces. I’m talking grime, grease, stubborn stains… you name it!
This guide will walk you through exactly how I use this power cleaner, step-by-step. Get ready to be amazed!
What You’ll Need: The Essentials
Before we dive in, let’s gather our supplies. The beauty of this hack is that you probably already have everything you need!
* **Table Salt:** Plain old table salt is perfect. The abrasive texture is key to scrubbing away dirt and grime.
* **Dish Soap (Detergent):** Any dish soap will do, but I prefer using a grease-cutting formula for extra cleaning power.
* **Spray Bottle (Optional):** This is handy for applying the solution to larger surfaces.
* **Cleaning Cloths or Sponges:** Microfiber cloths are my go-to for streak-free cleaning.
* **Scrub Brush (Optional):** For tackling tougher stains and grout.
* **Gloves (Recommended):** While these ingredients are generally safe, gloves will protect your hands from prolonged exposure.
* **Water:** For diluting the solution, if needed.
* **Measuring Spoons (Optional):** For precise measurements, but I usually just eyeball it.
Mixing the Magic: Creating Your Cleaning Solution
This is where the magic happens! The ratio of salt to detergent can be adjusted depending on the cleaning task, but I’ll share my go-to recipe.
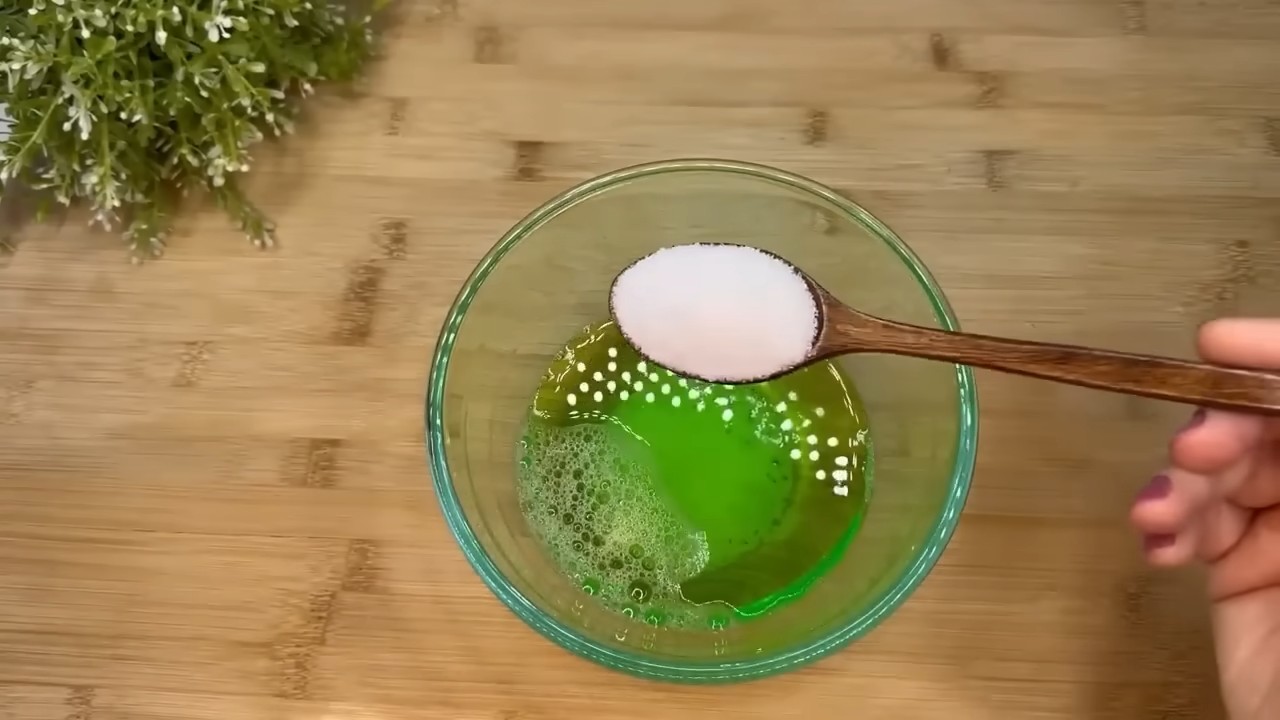
1. **Gather Your Ingredients:** Make sure you have your salt, dish soap, and a container for mixing. I usually use a small bowl or a measuring cup.
2. **Add the Salt:** Start with about 2 tablespoons of table salt. Remember, the salt acts as a gentle abrasive, so don’t be shy!
3. **Add the Dish Soap:** Now, add about 1 tablespoon of dish soap. I like to use a grease-cutting formula, but any dish soap will work.
4. **Mix it Up:** Use a spoon or your fingers (if you’re wearing gloves!) to mix the salt and dish soap together. You want to create a paste-like consistency. It should be thick enough to stick to surfaces but not too dry.
5. **Adjust the Consistency (If Needed):** If the mixture is too thick, add a few drops of water at a time until you reach the desired consistency. If it’s too runny, add a little more salt.
6. **Transfer to a Spray Bottle (Optional):** If you’re planning on cleaning larger surfaces, you can transfer the mixture to a spray bottle. You might need to add a little more water to make it sprayable.
Putting it to the Test: Cleaning Different Surfaces
Now for the fun part – putting our DIY cleaner to work! I’ve tested this solution on a variety of surfaces with amazing results. Here are some of my favorite applications:
Cleaning the Kitchen Sink
My kitchen sink is constantly battling food stains, grease, and hard water spots. This salt and detergent mixture is my secret weapon!
1. **Wet the Sink:** Start by wetting the entire surface of your kitchen sink with water.
2. **Apply the Paste:** Using a sponge or cleaning cloth, apply the salt and detergent paste to the sink. Make sure to cover all areas, including the drain and around the faucet.
3. **Scrub, Scrub, Scrub:** Now, put some elbow grease into it! Use a sponge or scrub brush to scrub the sink thoroughly. Pay extra attention to stubborn stains and areas with built-up grime. The salt will act as a gentle abrasive, helping to lift away dirt and debris.
4. **Rinse Thoroughly:** Once you’ve scrubbed the sink, rinse it thoroughly with water. Make sure to remove all traces of the salt and detergent mixture.
5. **Dry and Shine:** Finally, dry the sink with a clean microfiber cloth. This will help prevent water spots and leave your sink sparkling clean!
Tackling Grimy Grout
Grout can be a real pain to clean! It’s porous and easily absorbs dirt and grime. But don’t worry, this DIY cleaner can help!
1. **Prepare the Area:** Make sure the grout is dry. You can use a dry cloth to wipe away any excess moisture.
2. **Apply the Paste:** Using a small brush (an old toothbrush works great!), apply the salt and detergent paste directly to the grout lines.
3. **Let it Sit:** Allow the paste to sit on the grout for about 5-10 minutes. This will give the salt and detergent time to penetrate the grime and loosen it up.
4. **Scrub the Grout:** After letting it sit, use the brush to scrub the grout lines. You might need to apply a little pressure to remove stubborn stains.
5. **Rinse Thoroughly:** Rinse the grout with water. You can use a damp cloth or sponge to wipe away any remaining residue.
6. **Dry and Admire:** Dry the grout with a clean cloth. You’ll be amazed at how much brighter and cleaner your grout looks!
Cleaning Greasy Stovetops
Stovetops are magnets for grease and food splatters. This cleaner cuts through the grease like butter!
1. **Cool Down the Stovetop:** Make sure your stovetop is completely cool before you start cleaning.
2. **Apply the Paste:** Apply the salt and detergent paste to the greasy areas of the stovetop.
3. **Let it Sit (Briefly):** Let the paste sit for just a minute or two. Don’t let it dry out completely.
4. **Scrub Gently:** Use a non-abrasive sponge or cloth to gently scrub the stovetop. Avoid using harsh scrub brushes, as they can scratch the surface.
5. **Rinse and Wipe Clean:** Rinse the stovetop with a damp cloth to remove the paste and any remaining grease.
6. **Dry and Polish:** Dry the stovetop with a clean, dry cloth. This will leave it sparkling and streak-free.
Reviving Dingy Bathtubs
Bathtubs can accumulate soap scum, hard water stains, and other unsightly marks. This cleaner can help restore your tub to its former glory!
1. **Wet the Bathtub:** Wet the entire surface of the bathtub with water.
2. **Apply the Paste:** Apply the salt and detergent paste to the bathtub, focusing on areas with soap scum and stains.
3. **Scrub Thoroughly:** Use a sponge or scrub brush to scrub the bathtub thoroughly. Pay extra attention to the waterline and any areas with stubborn stains.
4. **Rinse Well:** Rinse the bathtub thoroughly with water to remove all traces of the salt and detergent mixture.
5. **Dry and Shine:** Dry the bathtub with a clean cloth. This will help prevent water spots and leave your tub looking sparkling clean.
Important Considerations and Safety Tips
While this DIY cleaner is generally safe and effective, there are a few things to keep in mind:
* **Test in an Inconspicuous Area:** Before using this cleaner on a large surface, test it in a small, inconspicuous area to make sure it doesn’t damage or discolor the material.
* **Avoid Abrasive Surfaces:** While the salt is a gentle abrasive, it can still scratch delicate surfaces like polished wood or certain types of plastic. Use caution when cleaning these materials.
* **Don’t Use on Natural Stone:** Avoid using this cleaner on natural stone surfaces like marble or granite, as the salt can etch the stone.
* **Wear Gloves:** While the ingredients are generally safe, prolonged exposure to dish soap can dry out your hands. Wearing gloves will protect your skin.
* **Rinse Thoroughly:** Always rinse surfaces thoroughly after cleaning to remove all traces of the salt and detergent mixture.
* **Storage:** I usually mix up a fresh batch each time I clean, but if you want to store it, keep it in a sealed container in a cool, dry place.
I hope you found this DIY cleaning hack helpful! I’ve been using it for years, and it’s saved me a ton of money on expensive cleaning products. Plus, I love knowing that I’m using a more eco-friendly and natural solution. Happy cleaning!
Conclusion
So, there you have it! This simple yet incredibly effective DIY cleaning trick using salt and detergent is a game-changer for anyone looking to tackle stubborn stains and grime around the house. Forget expensive, chemical-laden cleaners that promise the world but often fall short. This method is not only budget-friendly, utilizing ingredients you likely already have in your pantry and laundry room, but it’s also surprisingly powerful.
Why is this a must-try? Because it works! The abrasive nature of salt, combined with the degreasing and stain-lifting properties of detergent, creates a synergistic effect that cuts through grease, removes dried-on food, and even tackles those pesky hard water stains that seem impossible to get rid of. Think about it: no more endless scrubbing, no more lingering odors, and no more worrying about harsh chemicals damaging your surfaces. This DIY solution is a win-win-win!
But the beauty of this trick lies not only in its effectiveness but also in its versatility. Feel free to experiment with different types of salt. Coarse salt is fantastic for tougher jobs like cleaning oven racks or grill grates, while finer table salt is gentler on more delicate surfaces like stainless steel sinks. You can also adjust the type of detergent you use. For heavily soiled areas, a stronger laundry detergent might be necessary, while for lighter cleaning, a mild dish soap will suffice.
Consider adding a few drops of essential oil to the mixture for a pleasant scent. Lemon, tea tree, or lavender oil not only add a fresh fragrance but also boast their own antibacterial and antifungal properties, further enhancing the cleaning power of this DIY solution. Another variation involves pre-soaking heavily stained items in a salt and detergent solution before scrubbing. This allows the mixture to penetrate deep into the stain, making it even easier to remove.
This salt and detergent cleaning method is truly a versatile and effective solution for a multitude of cleaning challenges.
We are confident that once you try this DIY cleaning trick, you’ll be amazed by the results. It’s a simple, affordable, and effective way to keep your home sparkling clean without resorting to harsh chemicals. So, ditch the expensive cleaners and give this method a try. You won’t be disappointed!
We encourage you to try this simple yet effective cleaning solution and share your experience with us. Let us know what surfaces you cleaned, what variations you tried, and what results you achieved. Your feedback will not only help us improve this guide but also inspire others to embrace the power of DIY cleaning. Share your before-and-after photos on social media using #SaltAndDetergentClean and let’s create a community of happy, clean homes! We can’t wait to hear your success stories!
Frequently Asked Questions (FAQ)
Is this salt and detergent cleaning method safe for all surfaces?
While this method is generally safe for many surfaces, it’s always best to test it on an inconspicuous area first, especially on delicate or painted surfaces. Avoid using it on surfaces that are easily scratched, such as polished wood or certain types of plastic. The abrasiveness of the salt can potentially damage these materials. For surfaces like stainless steel, always scrub in the direction of the grain to prevent scratching. When in doubt, err on the side of caution and test before applying liberally.
What type of salt and detergent should I use?
The type of salt and detergent you use can be adjusted based on the cleaning task. For tough jobs like cleaning oven racks or grill grates, coarse salt (like kosher salt or sea salt) is ideal due to its increased abrasiveness. For more delicate surfaces, finer table salt is a better choice. As for detergent, laundry detergent is generally stronger and more effective for heavily soiled areas, while dish soap is suitable for lighter cleaning. Consider using a detergent that is free of dyes and fragrances, especially if you have sensitive skin or allergies. Experiment to find the combination that works best for your specific needs.
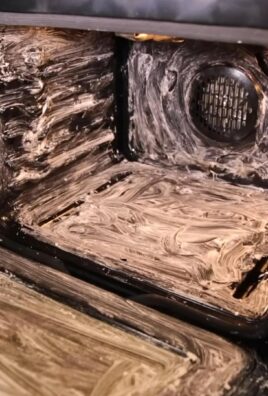
Can I use this method to clean my oven?
Yes, this salt and detergent cleaning method can be effective for cleaning your oven. However, it’s important to take precautions. First, remove any loose debris from the oven. Then, create a paste of salt and detergent and apply it to the interior surfaces of the oven, avoiding the heating elements. Let the paste sit for several hours or even overnight to loosen the baked-on grime. Finally, scrub the oven with a sponge or scrub brush and rinse thoroughly with water. Be prepared to put in some elbow grease, especially for heavily soiled ovens. For stubborn spots, you may need to repeat the process.
Will this method remove hard water stains?
Yes, the abrasive nature of salt combined with the cleaning power of detergent can be effective in removing hard water stains. For best results, create a paste of salt and detergent and apply it to the affected area. Let it sit for a few minutes to allow the mixture to penetrate the stain. Then, scrub the area with a sponge or cloth. For particularly stubborn hard water stains, you can add a small amount of vinegar to the paste to boost its cleaning power. Rinse thoroughly with water after scrubbing.
How do I prevent scratches when using this method?
To minimize the risk of scratching, always use a soft sponge or cloth when scrubbing. Avoid using abrasive scrub pads, especially on delicate surfaces. Also, be sure to rinse the surface thoroughly after scrubbing to remove any residual salt particles that could cause scratching. As mentioned earlier, always test the method on an inconspicuous area first to ensure it doesn’t damage the surface.
Can I use this method to clean my grout?
Yes, this method can be used to clean grout, but it may require some extra effort. Create a paste of salt and detergent and apply it to the grout lines. Let it sit for a few minutes to allow the mixture to penetrate the grime. Then, use a grout brush or an old toothbrush to scrub the grout lines. Rinse thoroughly with water after scrubbing. For heavily soiled grout, you may need to repeat the process or use a stronger detergent.
Is this method environmentally friendly?
Compared to many commercial cleaning products, this DIY method is generally considered more environmentally friendly, as it utilizes simple, readily available ingredients and avoids harsh chemicals. However, it’s important to choose detergents that are biodegradable and phosphate-free to minimize your environmental impact. Also, be mindful of the amount of water you use when rinsing.
How often should I use this cleaning method?
The frequency of using this cleaning method depends on your individual needs and the level of dirt and grime in your home. For general cleaning, you can use it as needed. For heavily soiled areas, you may need to use it more frequently. However, avoid overusing it, as excessive scrubbing can potentially damage surfaces.
What are some other uses for this salt and detergent cleaning method?
Besides the uses mentioned above, this method can also be used to clean:
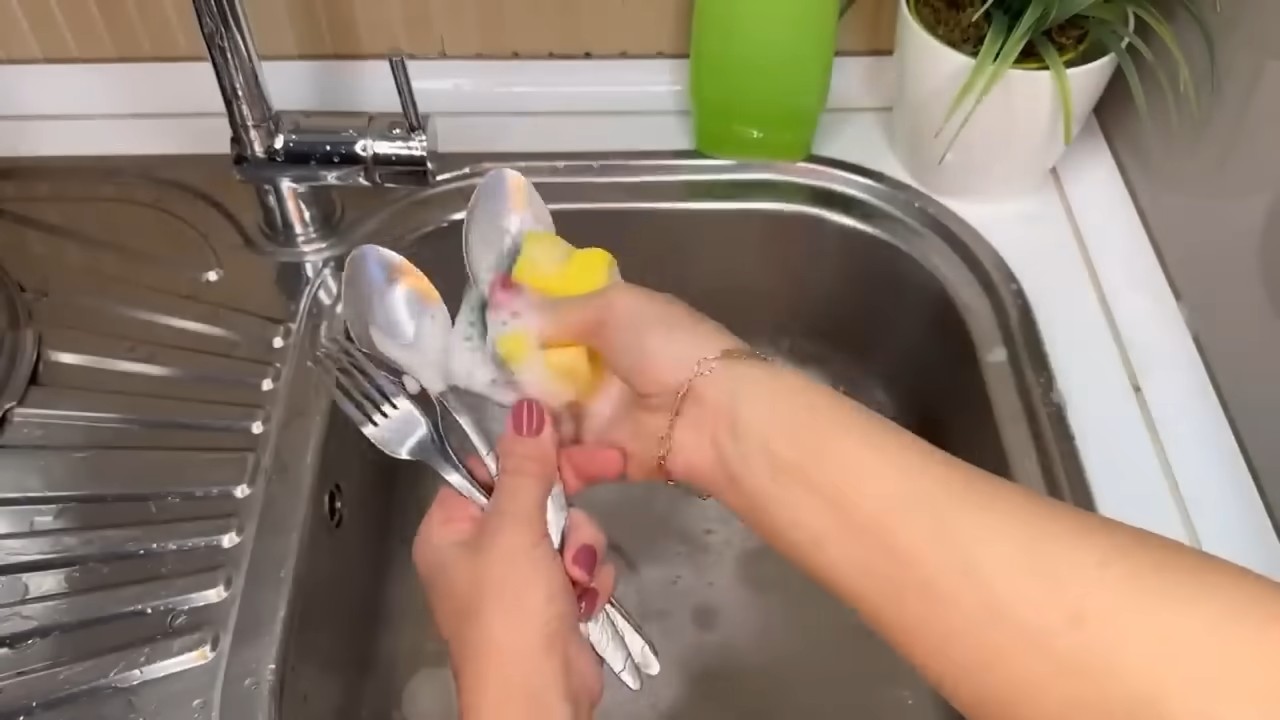
* Dirty pots and pans
* Shower doors and walls
* Outdoor furniture
* Car wheels
* Sneakers
The possibilities are endless! Just remember to always test on an inconspicuous area first and adjust the type of salt and detergent based on the cleaning task.
What if the salt and detergent mixture doesn’t remove the stain completely?
If the salt and detergent mixture doesn’t completely remove the stain, don’t give up! Try repeating the process, allowing the mixture to sit on the stain for a longer period of time. You can also try adding a small amount of vinegar or baking soda to the mixture to boost its cleaning power. For particularly stubborn stains, you may need to resort to a commercial stain remover, but hopefully, this DIY method will be enough to tackle most cleaning challenges.

Leave a Comment