
Salt and vinegar cleaning: it’s not just for chips anymore! Are you tired of harsh chemicals and expensive cleaning products cluttering your cupboards? Do you yearn for a simpler, more natural way to keep your home sparkling? Well, you’re in luck! For generations, resourceful homemakers have relied on the dynamic duo of salt and vinegar to tackle tough cleaning tasks, and I’m here to share their secrets with you.
The use of vinegar as a cleaning agent dates back centuries, with evidence suggesting ancient civilizations like the Egyptians and Romans utilized its acidic properties to disinfect and sanitize. Salt, a readily available and inexpensive mineral, has also been a staple in households for its preservative and abrasive qualities. Combining these two powerhouses creates a cleaning solution that’s both effective and eco-friendly.
In today’s world, where we’re increasingly conscious of the impact our choices have on the environment and our health, embracing salt and vinegar cleaning is more relevant than ever. This DIY approach not only saves you money but also reduces your exposure to potentially harmful chemicals found in commercial cleaners. Plus, it’s incredibly satisfying to create your own cleaning solutions and witness their effectiveness firsthand. So, let’s dive into some amazing DIY tricks and hacks that will transform the way you clean your home, using nothing more than salt, vinegar, and a little elbow grease!

DIY All-Purpose Cleaner: Harnessing the Power of Salt and Vinegar
Hey there, fellow DIY enthusiasts! I’m super excited to share one of my favorite cleaning hacks with you: a powerful, all-purpose cleaner made with just two ingredients you probably already have in your pantry – salt and vinegar! Forget those harsh chemicals and expensive store-bought cleaners. This solution is not only incredibly effective but also eco-friendly and budget-friendly. Let’s dive in!
Why Salt and Vinegar?
Before we get started, let’s talk about why this combination works so well. Vinegar, specifically white distilled vinegar, is a natural acid that’s fantastic for cutting through grease, grime, and hard water stains. It also has mild disinfectant properties. Salt, on the other hand, acts as a gentle abrasive, helping to scrub away stubborn messes without scratching surfaces. Together, they create a cleaning powerhouse!
What You’ll Need
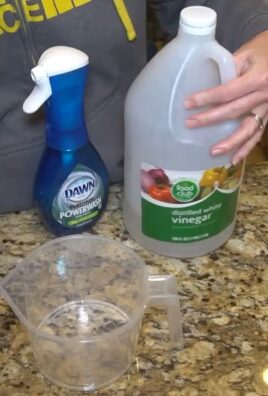
* White distilled vinegar
* Table salt (or coarse salt for extra scrubbing power)
* Spray bottle (a clean, empty one, of course!)
* Measuring cups and spoons
* Optional: Essential oils (for a pleasant scent – lemon, lavender, or tea tree are great choices)
* Optional: Cleaning cloths or sponges
General Guidelines
* Always test in an inconspicuous area first: Before applying the cleaner to a large surface, test it on a small, hidden spot to ensure it doesn’t damage or discolor the material.
* Avoid using on certain surfaces: This cleaner is generally safe for most surfaces, but avoid using it on marble, granite, waxed wood, aluminum, and cast iron. The acidity of the vinegar can damage these materials.
* Ventilate the area: Vinegar has a strong odor, so make sure to open windows or turn on a fan while cleaning.
* Store properly: Store the cleaner in a labeled spray bottle away from children and pets.
Making the Basic Salt and Vinegar Cleaner
This is the foundation of all the variations we’ll explore. It’s perfect for general cleaning tasks around the house.
1. Combine vinegar and salt: In a measuring cup, mix 1 cup of white distilled vinegar with 1/4 cup of salt. Stir well until the salt is mostly dissolved. Don’t worry if a little bit remains undissolved; it will dissolve further as it sits.
2. Pour into a spray bottle: Carefully pour the mixture into your clean spray bottle. A funnel can be helpful to avoid spills.
3. Add essential oils (optional): If you want to add a pleasant scent, add 10-20 drops of your favorite essential oil. Lemon and tea tree oil are particularly good choices for cleaning because they also have antibacterial properties.
4. Shake well: Secure the spray bottle lid and shake well to ensure the ingredients are thoroughly mixed.
5. Label the bottle: Clearly label the bottle with “Salt and Vinegar Cleaner” and the date you made it. This will help you keep track of what’s inside and when it was made.
Using the Basic Cleaner
1. Spray the surface: Spray the cleaner directly onto the surface you want to clean.
2. Let it sit: Allow the cleaner to sit for a few minutes to loosen dirt and grime. For tougher stains, you can let it sit for up to 10 minutes.
3. Wipe clean: Use a clean cloth or sponge to wipe the surface clean.
4. Rinse (optional): If desired, rinse the surface with water to remove any remaining residue. This is especially helpful for surfaces that come into contact with food.
5. Dry the surface: Use a clean, dry cloth to dry the surface.
Specific Cleaning Applications
Now, let’s get into some specific ways you can use this amazing cleaner around your home!
Cleaning Your Kitchen
The kitchen is a breeding ground for grease and grime, but fear not! Salt and vinegar are here to save the day.
* Countertops: Spray the cleaner on your countertops, let it sit for a few minutes, and wipe clean. Remember to avoid using it on granite or marble countertops.
* Sinks: Sprinkle some extra salt into the sink before spraying with the vinegar solution for extra scrubbing power. This is great for removing stubborn stains and water spots.
* Stovetop: For greasy stovetops, spray the cleaner and let it sit for a few minutes. Then, use a sponge or scrub brush to remove the grease. You may need to repeat this process for heavily soiled areas.
* Microwave: Heat a cup of water with a few tablespoons of the salt and vinegar cleaner in the microwave for a few minutes. The steam will loosen any stuck-on food, making it easy to wipe clean.
* Cutting boards: Sanitize your cutting boards by spraying them with the cleaner and letting it sit for a few minutes before rinsing.
Cleaning Your Bathroom
Bathrooms can be tough to clean, but salt and vinegar can tackle even the most stubborn bathroom messes.
* Shower and tub: Spray the cleaner on your shower and tub walls and let it sit for a few minutes. Then, use a scrub brush or sponge to remove soap scum and mildew.
* Toilet: Pour 1/2 cup of salt and vinegar cleaner into the toilet bowl and let it sit for at least 30 minutes (or even overnight) before scrubbing and flushing.
* Sink and faucet: Spray the cleaner on your sink and faucet to remove water spots and soap scum.
* Showerhead: To remove mineral buildup from your showerhead, soak it in a bag filled with the salt and vinegar cleaner for a few hours or overnight.
Cleaning Other Areas of Your Home
This cleaner isn’t just for the kitchen and bathroom! Here are some other ways you can use it around your home.
* Windows and mirrors: Mix equal parts salt and vinegar cleaner with water in a spray bottle. Spray the mixture on your windows and mirrors and wipe clean with a microfiber cloth for a streak-free shine.
* Floors: Add 1/2 cup of salt and vinegar cleaner to a bucket of warm water and use it to mop your floors. Be sure to test it on a small, inconspicuous area first to ensure it doesn’t damage the flooring. Avoid using it on waxed wood floors.
* Laundry: Add 1/2 cup of salt and vinegar cleaner to your washing machine as a natural fabric softener and odor eliminator.
* Removing hard water stains: Soak items with hard water stains in a solution of equal parts salt and vinegar cleaner and water.
Variations and Enhancements
Want to take your salt and vinegar cleaner to the next level? Here are a few variations and enhancements you can try.
* Infused Vinegar: Infuse your vinegar with citrus peels (lemon, orange, grapefruit) or herbs (lavender, rosemary, thyme) for a more fragrant and potent cleaner. Simply place the peels or herbs in a jar, cover with vinegar, and let it steep for a few weeks before straining and using.
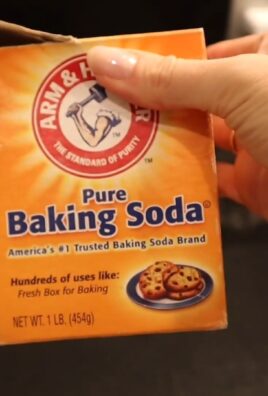
* Baking Soda Boost: For extra cleaning power, add a tablespoon of baking soda to your salt and vinegar cleaner. Be careful, as this will cause a fizzing reaction. Use this mixture for tough stains and grime.
* Dish Soap Addition: Add a squirt of dish soap to your salt and vinegar cleaner for extra grease-cutting power. This is especially helpful for cleaning stovetops and ovens.
* Borax Boost: For extra disinfecting power, add a tablespoon of borax to your salt and vinegar cleaner. This is a great option for cleaning bathrooms and other areas where germs are a concern.
Troubleshooting
* Strong Vinegar Smell: The vinegar smell can be strong, but it will dissipate quickly. You can also add essential oils to mask the odor.
* Residue: If you notice a residue after cleaning, try rinsing the surface with water or using a clean, damp cloth to wipe it down.
* Clogging Spray Bottle: If the salt clogs your spray bottle, try using a finer salt or straining the mixture before pouring it into the bottle.
Safety Precautions
* Keep out of reach of children and pets: Although this cleaner is made with natural ingredients, it’s still important to keep it out of reach of children and pets.
* Avoid contact with eyes: If the cleaner gets in your eyes, rinse immediately with plenty of water.
* Do not mix with bleach: Never mix salt and vinegar cleaner with bleach, as this can create toxic fumes.
Final Thoughts
I hope you’re as excited as I am about this simple yet effective cleaning solution! With just salt and vinegar, you can tackle a wide range of cleaning tasks around your home without harsh chemicals or expensive products. So, give it a try and see for yourself the amazing cleaning power of this dynamic duo! Happy cleaning!

Conclusion
So, there you have it! This simple yet incredibly effective salt and vinegar cleaning solution is a game-changer for anyone looking to ditch harsh chemicals and embrace a more natural and budget-friendly approach to keeping their home sparkling. We’ve explored how the acidic power of vinegar, combined with the abrasive action of salt, creates a dynamic duo capable of tackling everything from stubborn grime in your bathroom to baked-on messes in your kitchen.
But why is this DIY trick a must-try? Beyond the obvious cost savings and eco-friendly benefits, it’s about reclaiming control over the ingredients you bring into your home. You know exactly what’s in your cleaning solution – no hidden chemicals, no mysterious fragrances, just simple, readily available ingredients. This is particularly important for those with sensitivities or allergies, or for families with young children and pets.
Furthermore, the versatility of this salt and vinegar cleaning solution is truly remarkable. While we’ve highlighted some key applications, the possibilities are virtually endless. Feel free to experiment and adapt the recipe to suit your specific needs.
Here are a few suggestions and variations to get you started:
* Infused Vinegar: For a more pleasant scent, infuse your vinegar with citrus peels (lemon, orange, grapefruit) or herbs (lavender, rosemary) for a few weeks before mixing with salt. This will add a subtle fragrance to your cleaning solution.
* Essential Oil Boost: Add a few drops of your favorite essential oils (tea tree, eucalyptus, lavender) to the mixture for added antibacterial and antifungal properties, as well as a more potent scent. Be mindful of pet safety when using essential oils.
* Paste Power: For particularly stubborn stains, create a thicker paste by adding more salt to the vinegar. Apply the paste directly to the stain, let it sit for a few minutes, and then scrub gently.
* Gentle Abrasive: For delicate surfaces, use a finer grain of salt, such as sea salt or kosher salt, to minimize the risk of scratching.
* Vinegar Type: While white vinegar is the most common and readily available option, you can also experiment with apple cider vinegar for its slightly milder scent and added benefits.
We are confident that once you experience the cleaning power of this salt and vinegar cleaning solution, you’ll never look back. It’s a simple, effective, and sustainable way to keep your home clean and healthy.
Now, it’s your turn! We encourage you to give this DIY cleaning trick a try and see the amazing results for yourself. Don’t be afraid to experiment with different variations and find what works best for you.
And most importantly, we want to hear about your experience! Share your tips, tricks, and success stories in the comments below. Let’s build a community of eco-conscious cleaners who are passionate about creating a healthier and more sustainable home. What did you clean? What variations did you try? What were the results? Your feedback will help others discover the power of salt and vinegar cleaning and make their homes sparkle!
Frequently Asked Questions (FAQ)
Is salt and vinegar cleaning safe for all surfaces?
While salt and vinegar cleaning is generally safe and effective, it’s crucial to exercise caution on certain surfaces. Avoid using it on natural stone surfaces like marble, granite, and limestone, as the acidity of the vinegar can etch and damage them. Also, be careful when using it on waxed wood, as it can strip the wax finish. Always test the solution on an inconspicuous area first to ensure it doesn’t cause any discoloration or damage. For sensitive surfaces, dilute the vinegar with more water or use a gentler abrasive like baking soda instead of salt. When in doubt, consult the manufacturer’s recommendations for cleaning specific surfaces.
What type of vinegar and salt should I use?
For most cleaning purposes, white distilled vinegar is the best option due to its high acidity and lack of color, which minimizes the risk of staining. However, you can also use apple cider vinegar, which has a slightly milder scent and may offer additional benefits. As for salt, regular table salt works well for most cleaning tasks. However, for delicate surfaces, consider using a finer grain of salt, such as sea salt or kosher salt, to reduce the risk of scratching. Avoid using iodized salt, as the iodine can sometimes cause staining.
How do I store the salt and vinegar cleaning solution?
Store your salt and vinegar cleaning solution in a clean, airtight spray bottle or container. Label the container clearly to avoid confusion. Keep it out of reach of children and pets. The solution can be stored at room temperature for several months without losing its effectiveness. However, if you notice any changes in color, odor, or consistency, discard the solution and make a fresh batch.
Can I use this solution to clean my oven?
Yes, salt and vinegar cleaning can be effective for cleaning your oven, but it requires a bit more effort. First, remove any loose debris from the oven. Then, make a paste of salt and vinegar and apply it to the interior surfaces of the oven, avoiding the heating elements. Let the paste sit for several hours or overnight to loosen the baked-on grime. Finally, scrub the oven with a sponge or brush and wipe clean with a damp cloth. For particularly stubborn messes, you may need to repeat the process or use a specialized oven cleaner.
Does the vinegar smell linger after cleaning?
The strong smell of vinegar is a common concern, but it typically dissipates quickly after cleaning. To minimize the odor, ensure proper ventilation by opening windows or using a fan. You can also add a few drops of essential oils to the cleaning solution to mask the vinegar smell. Citrus oils like lemon and orange are particularly effective. Alternatively, you can wipe down the cleaned surfaces with a damp cloth and a few drops of your favorite essential oil after cleaning.
Can I use this solution to clean my toilet?
Yes, salt and vinegar cleaning can be used to clean your toilet. Pour a cup of vinegar into the toilet bowl and let it sit for at least 30 minutes, or preferably overnight. Then, sprinkle some salt into the bowl and scrub with a toilet brush. Flush the toilet to rinse. This method can help remove stains, mineral deposits, and odors. For stubborn stains, you can create a paste of salt and vinegar and apply it directly to the stain before scrubbing.
Is salt and vinegar cleaning effective against mold?
Vinegar is a known mold killer, and the addition of salt can enhance its effectiveness. To clean mold with salt and vinegar, spray the affected area with the solution and let it sit for at least an hour. Then, scrub the area with a brush or sponge and wipe clean with a damp cloth. Be sure to address the source of the moisture that is causing the mold growth to prevent it from returning. For severe mold infestations, it’s best to consult with a professional mold remediation service.
Can I use this solution on my car’s interior?
While vinegar can be used to clean some parts of your car’s interior, it’s important to exercise caution. Avoid using it on leather surfaces, as it can dry them out and cause cracking. Also, be careful when using it on vinyl or plastic surfaces, as it can potentially discolor them. Always test the solution on an inconspicuous area first. For most car interior cleaning, a mild soap and water solution is generally safer and more effective.
How often should I use this cleaning solution?
The frequency of using the salt and vinegar cleaning solution depends on your cleaning needs and preferences. For general cleaning, you can use it as often as you would use any other cleaning product. However, for sensitive surfaces, it’s best to use it sparingly and test it on an inconspicuous area first. Pay attention to how your surfaces react to the solution and adjust the frequency accordingly.
What are the benefits of using salt and vinegar cleaning compared to commercial cleaners?
The benefits of using salt and vinegar cleaning are numerous. It’s a cost-effective and eco-friendly alternative to commercial cleaners. It’s also a safer option for those with sensitivities or allergies, as it doesn’t contain harsh chemicals or artificial fragrances. Additionally, it’s a versatile cleaning solution that can be used on a variety of surfaces. By making your own cleaning solution, you have more control over the ingredients you bring into your home, promoting a healthier and more sustainable lifestyle.
Leave a Comment