
Strawberry Harvest Maximization – sounds like something only professional farmers worry about, right? Wrong! I’m here to tell you that even if you’re just growing a few strawberry plants in your backyard, you can significantly boost your yield with some clever DIY tricks. Imagine baskets overflowing with juicy, red strawberries, enough for pies, jams, and plenty of snacking!
For centuries, strawberries have been cherished not only for their delicious flavor but also for their vibrant color and symbolism. From ancient Roman gardens to medieval European feasts, strawberries have always held a special place. But maximizing their harvest? That’s where the real magic happens, and it’s something anyone can achieve.
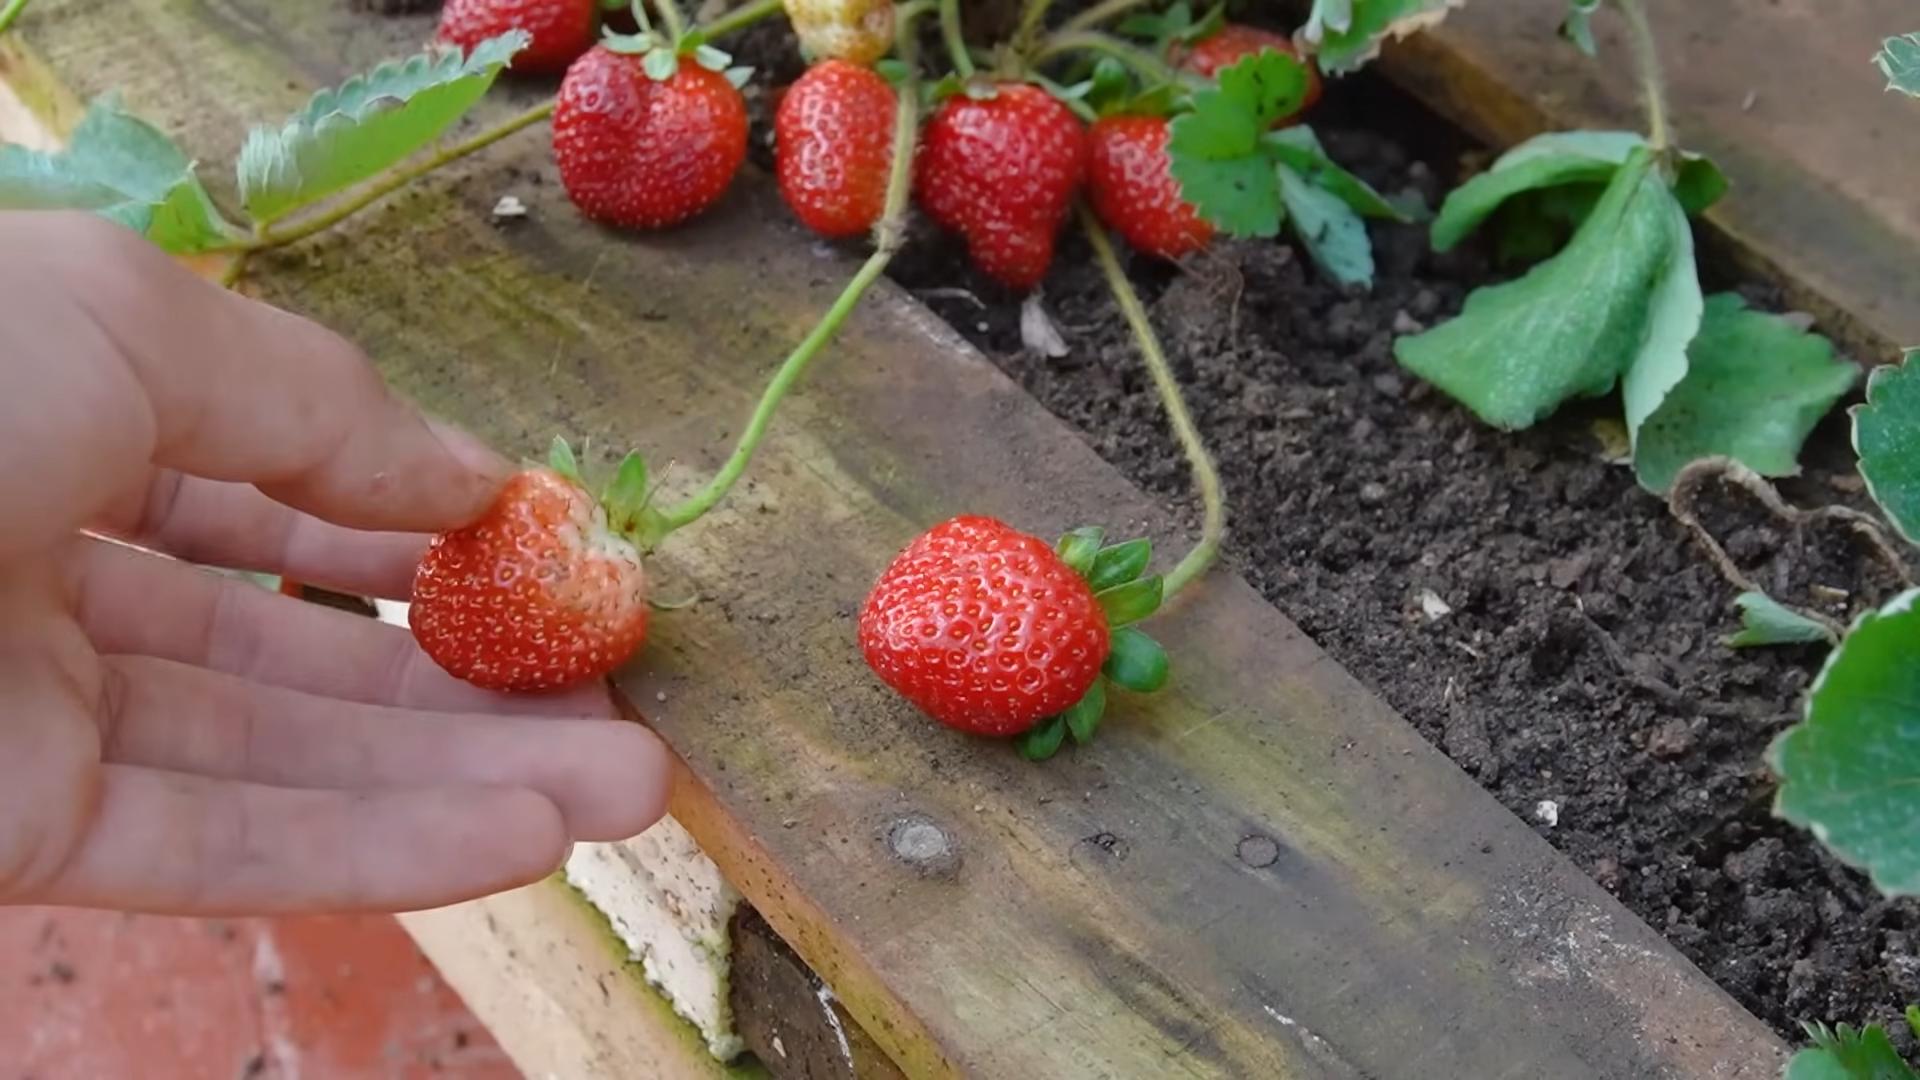
Let’s face it, store-bought strawberries can be expensive and often lack the intense flavor of homegrown ones. Plus, there’s nothing quite like the satisfaction of picking your own fruit. But what if your plants are only producing a handful of berries? That’s where these DIY hacks come in. I’m going to share simple, effective techniques that will help you unlock the full potential of your strawberry patch. These tips are designed to help you achieve Strawberry Harvest Maximization without breaking the bank or spending hours toiling in the garden. Get ready to enjoy a bumper crop of delicious strawberries this season!
Maximize Your Strawberry Harvest: A DIY Guide to Bumper Crops!
Okay, strawberry lovers, let’s talk about getting the absolute MOST out of your strawberry patch. I’m going to walk you through some tried-and-true DIY methods that have helped me consistently yield amazing harvests. We’re talking juicy, red, delicious strawberries galore! This isn’t just about planting; it’s about optimizing every stage of the growing process.
Understanding Strawberry Growth Habits
Before we dive into the DIY hacks, it’s crucial to understand how strawberries grow. This knowledge will help you tailor these techniques to your specific garden and climate.
* Types of Strawberries: There are three main types: June-bearing, everbearing, and day-neutral. June-bearing produce one large crop in the spring. Everbearing produce two or three crops throughout the spring, summer, and fall. Day-neutral produce fruit continuously throughout the growing season, regardless of day length. Knowing which type you have is essential for proper care and pruning.
* Runners: Strawberries send out runners (also called stolons), which are horizontal stems that root and form new plants. While runners are great for propagation, they can also divert energy away from fruit production.
* Sunlight: Strawberries need at least 6-8 hours of direct sunlight per day to thrive.
* Soil: They prefer slightly acidic soil (pH 5.5-6.5) that is well-draining and rich in organic matter.
* Watering: Consistent watering is crucial, especially during fruiting. Avoid overhead watering to prevent fungal diseases.
DIY Hack #1: Strawberry Tower Power!
Space is often a limiting factor for gardeners. A strawberry tower is a fantastic way to grow a lot of strawberries in a small area. Plus, it looks amazing!
Materials You’ll Need:
* A large plastic pot (at least 18 inches in diameter)
* Smaller plastic pots (various sizes, enough to fill the larger pot)
* Potting soil (a mix specifically for fruits and vegetables is ideal)
* Strawberry plants (choose the type that suits your climate)
* A drill with a hole saw attachment (optional, for drainage)
* Landscape fabric or burlap (optional, to line the smaller pots)
Step-by-Step Instructions:
1. Prepare the Large Pot: If your large pot doesn’t have drainage holes, drill several in the bottom. This is crucial to prevent waterlogging.
2. Line the Smaller Pots (Optional): Cut pieces of landscape fabric or burlap to line the inside of each smaller pot. This will help retain moisture and prevent soil from washing out.
3. Start Building the Tower: Place the largest of the smaller pots inside the large pot, centering it. Fill the space around the smaller pot with potting soil, packing it down firmly.
4. Add More Pots: Continue adding smaller pots, one on top of the other, filling the spaces between them with potting soil. Stagger the pots slightly to create a visually appealing tower.
5. Plant Your Strawberries: Once the tower is built, plant your strawberry plants in the smaller pots. Gently loosen the roots before planting and ensure the crown of the plant (where the stems meet the roots) is at soil level.
6. Water Thoroughly: Water the entire tower slowly and deeply until water drains from the bottom.
7. Place in a Sunny Location: Position your strawberry tower in a spot that receives at least 6-8 hours of direct sunlight per day.
8. Maintain and Enjoy: Water regularly, fertilize as needed (using a fertilizer specifically formulated for strawberries), and watch your tower flourish!
DIY Hack #2: The Magic of Strawberry Mulch
Mulch is your best friend when it comes to strawberry growing. It helps retain moisture, suppress weeds, and keep the berries clean. But not all mulches are created equal!
Choosing the Right Mulch:
* Straw: This is the classic choice for a reason. It’s readily available, inexpensive, and provides excellent insulation.
* Pine Needles: Another great option, especially if you have pine trees nearby. They’re acidic, which strawberries love, and they decompose slowly.
* Wood Chips: Use aged wood chips to avoid nitrogen depletion in the soil.
* Black Plastic: This is a good option for weed control and warming the soil, but it can also overheat in hot climates.
Applying the Mulch:
1. Prepare the Area: Weed your strawberry patch thoroughly.
2. Apply the Mulch: Spread a 2-3 inch layer of your chosen mulch around the strawberry plants, leaving a small space around the base of each plant to prevent rot.
3. Replenish as Needed: Mulch will decompose over time, so replenish it as needed to maintain a consistent layer.
DIY Hack #3: Pruning for Peak Performance
Pruning is essential for maximizing strawberry yields. It helps direct the plant’s energy towards fruit production rather than runner production.
Pruning June-Bearing Strawberries:
* After Harvest: Once your June-bearing strawberries have finished fruiting, mow or cut back all the foliage to about 1 inch above the crown. This may seem drastic, but it encourages new growth and helps prevent disease.
* Remove Runners: Throughout the growing season, regularly remove runners to prevent them from diverting energy away from fruit production.
Pruning Everbearing and Day-Neutral Strawberries:
* First Year: Remove all blossoms for the first 6 weeks after planting to encourage strong root development.
* Remove Runners: As with June-bearing strawberries, regularly remove runners.
* Dead or Diseased Foliage: Remove any dead or diseased foliage throughout the growing season.
Tools You’ll Need:
* Sharp pruning shears or scissors
* Gloves
Step-by-Step Instructions:
1. Identify Runners: Look for horizontal stems growing out from the main plant.
2. Cut Runners: Use your pruning shears or scissors to cut the runners as close to the main plant as possible.
3. Remove Dead or Diseased Foliage: Inspect your plants regularly for any dead or diseased leaves and remove them promptly.
DIY Hack #4: Homemade Strawberry Fertilizer
Commercial fertilizers can be expensive and contain harsh chemicals. Here’s a simple and effective DIY fertilizer recipe that your strawberries will love!
Ingredients:
* Epsom salts
* Compost tea
* Banana peels (dried and crushed)
* Eggshells (crushed)
Why These Ingredients?
* Epsom Salts: Provide magnesium, which is essential for chlorophyll production and overall plant health.
* Compost Tea: A nutrient-rich liquid fertilizer that provides a wide range of essential elements.
* Banana Peels: Rich in potassium, which is crucial for fruit development.
* Eggshells: Provide calcium, which helps prevent blossom-end rot and strengthens cell walls.
Mixing and Applying the Fertilizer:
1. Mix the Ingredients: In a large watering can, add 1 tablespoon of Epsom salts, 1 cup of compost tea, 1/2 cup of dried and crushed banana peels, and 1/4 cup of crushed eggshells.
2. Fill with Water: Fill the watering can with water.
3. Stir Well: Stir the mixture thoroughly to ensure all the ingredients are dissolved.
4. Apply to Plants: Water your strawberry plants with the fertilizer solution every 2-3 weeks during the growing season.
DIY Hack #5: Protecting Your Berries from Pests and Birds
Nothing is more frustrating than finding your ripe strawberries have been devoured by pests or birds. Here are some DIY solutions to protect your precious harvest.
Bird Netting:
* This is the most effective way to protect your strawberries from birds. Simply drape bird netting over your plants, making sure to secure it to the ground to prevent birds from getting underneath.
DIY Bird Scarers:
* Hang shiny objects, such as old CDs or aluminum foil strips, near your strawberry plants. The movement and reflection will scare away birds.
* Place plastic owls or hawks near your plants. Move them around occasionally to keep the birds from getting used to them.
Slug and Snail Control:
* Beer Traps: Bury shallow containers filled with beer near your strawberry plants. Slugs and snails will be attracted to the beer and drown.
* Copper Tape: Place copper tape around your raised beds or containers. Slugs and snails don’t like to cross copper.
* Diatomaceous Earth: Sprinkle diatomaceous earth around your strawberry plants. This natural powder is made from fossilized algae and is deadly to slugs and snails.
Insect Control:
* Neem Oil: This natural insecticide is effective against a wide range of pests

Conclusion
So, there you have it! This simple yet incredibly effective DIY trick for strawberry harvest maximization is a game-changer for any gardener, whether you’re a seasoned pro or just starting out. We’ve walked you through the process, highlighting the benefits of increased yield, healthier plants, and a significantly reduced risk of disease. But why is this method a must-try?
Simply put, it’s about working smarter, not harder. Instead of battling weeds, pests, and rot, you’re creating an environment where your strawberry plants can thrive. Imagine the satisfaction of harvesting baskets overflowing with juicy, ripe strawberries, knowing that you played a direct role in their abundance. This isn’t just about growing strawberries; it’s about cultivating a thriving ecosystem in your backyard.
Beyond the core method we’ve outlined, there’s plenty of room for experimentation and personalization. Consider these variations to tailor the technique to your specific needs and preferences:
* Mulch Alternatives: While straw is a classic choice, you can also use pine needles, wood chips, or even shredded leaves as mulch. Each material offers slightly different benefits in terms of moisture retention, weed suppression, and nutrient contribution. Experiment to see which works best in your climate and soil conditions.
* Vertical Growing: If you’re short on space, consider adapting this method to vertical strawberry planters. This not only maximizes your growing area but also provides excellent air circulation, further reducing the risk of fungal diseases.
* Companion Planting: Enhance your strawberry patch by incorporating companion plants like basil, thyme, or marigolds. These plants can help deter pests, attract beneficial insects, and even improve the flavor of your strawberries.
* Row Covers: For added protection against frost, pests, and birds, consider using row covers. These lightweight fabrics can be easily draped over your strawberry plants, creating a mini-greenhouse effect and extending your growing season.
The key takeaway is that this DIY trick is adaptable and forgiving. Don’t be afraid to experiment and find what works best for you. The most important thing is to create a supportive environment for your strawberry plants to flourish.
We are confident that by implementing this technique, you’ll see a significant improvement in your strawberry harvest. But don’t just take our word for it – try it out for yourself! We encourage you to embark on this gardening adventure and witness the remarkable results firsthand.
And most importantly, we want to hear about your experience! Share your photos, tips, and stories in the comments section below. Let’s build a community of strawberry enthusiasts who are passionate about maximizing their harvests and enjoying the fruits (literally!) of their labor. What challenges did you face? What successes did you achieve? What variations did you try? Your feedback will not only help other gardeners but also contribute to our collective knowledge of strawberry harvest maximization. Happy gardening!
Frequently Asked Questions (FAQ)
Q: What type of strawberries work best with this method?
A: This method is generally effective for all types of strawberries, including June-bearing, everbearing, and day-neutral varieties. However, the specific needs of each variety may vary slightly. June-bearing strawberries, which produce a large crop in a short period, will benefit greatly from the increased yield potential of this method. Everbearing and day-neutral varieties, which produce fruit throughout the growing season, will appreciate the consistent moisture and nutrient availability provided by the mulch. Consider the specific characteristics of your chosen variety when implementing this technique.
Q: How often should I water my strawberry plants when using this method?
A: The frequency of watering will depend on several factors, including your climate, soil type, and the type of mulch you’re using. Generally, you should aim to keep the soil consistently moist but not waterlogged. Check the soil moisture level regularly by inserting your finger into the soil near the base of the plants. If the top inch of soil feels dry, it’s time to water. In hot, dry weather, you may need to water daily, while in cooler, wetter weather, you may only need to water every few days. Using a soaker hose or drip irrigation system can help deliver water directly to the roots of the plants, minimizing water waste and reducing the risk of fungal diseases.
Q: What kind of fertilizer should I use for my strawberry plants?
A: Strawberries benefit from a balanced fertilizer that provides essential nutrients for growth and fruit production. A fertilizer with an N-P-K ratio of 10-10-10 or 12-12-12 is a good starting point. However, it’s important to consider your soil type and the specific needs of your strawberry variety. Conduct a soil test to determine any nutrient deficiencies and adjust your fertilizer accordingly. Organic fertilizers, such as compost, aged manure, or fish emulsion, are also excellent choices for strawberries. Apply fertilizer in the spring before the plants begin to bloom and again after the first harvest. Avoid over-fertilizing, as this can lead to excessive vegetative growth and reduced fruit production.
Q: How do I prevent pests and diseases from affecting my strawberry plants?
A: Prevention is key when it comes to pests and diseases in strawberry plants. Start by selecting disease-resistant varieties and planting them in well-drained soil with good air circulation. Regularly inspect your plants for signs of pests or diseases, such as aphids, spider mites, slugs, or fungal infections. Remove any infected leaves or fruit promptly to prevent the spread of disease. Encourage beneficial insects, such as ladybugs and lacewings, to prey on pests. Use organic pest control methods, such as insecticidal soap or neem oil, if necessary. Proper watering and fertilization can also help strengthen your plants and make them more resistant to pests and diseases.
Q: Can I use this method in containers or raised beds?
A: Absolutely! This method is easily adaptable to containers and raised beds. In fact, growing strawberries in containers or raised beds can offer several advantages, such as better drainage, easier weed control, and the ability to move the plants to a more favorable location. When using containers, choose a pot that is at least 12 inches in diameter and has drainage holes. Use a high-quality potting mix that is well-draining and rich in organic matter. In raised beds, ensure that the soil is well-drained and amended with compost or other organic materials. Follow the same mulching and watering guidelines as you would for in-ground planting.
Q: How do I overwinter my strawberry plants?
A: Overwintering strawberry plants is essential for ensuring a bountiful harvest the following year. In colder climates, protect your plants from freezing temperatures by applying a thick layer of mulch, such as straw or pine needles. You can also cover the plants with a row cover or burlap to provide additional insulation. In milder climates, simply removing dead leaves and debris may be sufficient. Water the plants thoroughly before the ground freezes. Avoid fertilizing the plants in the fall, as this can encourage new growth that is susceptible to frost damage. In the spring, gradually remove the mulch as the weather warms up.
Q: What if I don’t have access to straw? What are some alternative mulching options?
A: While straw is a popular and effective mulching material, there are several alternatives you can use if it’s not readily available. Pine needles are an excellent option, especially if you have pine trees in your area. They are acidic, which strawberries appreciate, and they decompose slowly, providing long-lasting mulch. Wood chips are another good choice, but make sure to use aged wood chips to avoid nitrogen depletion in the soil. Shredded leaves are a readily available and cost-effective option, but they may decompose more quickly than other materials. You can also use compost as mulch, which will provide nutrients to the soil as it breaks down. Avoid using grass clippings, as they can mat together and prevent air circulation.
Q: How long does it take to see results from this strawberry harvest maximization method?
A: You should start to see positive results within a few weeks of implementing this method. The mulch will help retain moisture, suppress weeds, and regulate soil temperature, creating a more favorable environment for your strawberry plants. You may notice increased growth, healthier foliage, and more abundant flowering. The most significant impact will be on your strawberry yield. Expect to see a noticeable increase in the number and size of your strawberries compared to plants grown without this method. The exact timing will depend on factors such as your climate, the variety of strawberries you’re growing, and the overall health of your plants.
Leave a Comment