
DIY Plastic Garden: Transform Trash into Treasure for a Thriving Green Space!
Have you ever looked at a pile of discarded plastic bottles and thought, “There has to be a better use for this?” I know I have! Well, get ready to unleash your inner eco-warrior and green thumb because this article is packed with ingenious DIY plastic garden ideas that will revolutionize your gardening game.
From ancient civilizations utilizing repurposed materials for irrigation to modern-day urban farmers embracing sustainable practices, the concept of resourceful gardening has deep roots. Today, with growing concerns about plastic waste, the need for creative solutions is more pressing than ever. Imagine turning those unwanted plastic containers into vibrant vertical gardens, self-watering planters, or even miniature greenhouses!
Why should you embrace these DIY tricks? Because they’re not just about saving money (though that’s a definite perk!). They’re about reducing your environmental footprint, adding a unique touch to your outdoor space, and experiencing the immense satisfaction of creating something beautiful and functional from what others consider trash. Plus, these hacks are incredibly easy to implement, even if you’re a complete beginner. So, let’s dive in and discover how to build your own amazing DIY plastic garden!
Dollar Store DIY: High-End Home Decor on a Budget
Hey there, fellow DIY enthusiasts! I’m always on the lookout for ways to spruce up my home without breaking the bank. And let me tell you, the dollar store is a goldmine! Forget those expensive, name-brand home decor items – with a little creativity and elbow grease, you can achieve a luxurious look using budget-friendly finds. Today, I’m going to share some of my favorite dollar store DIY hacks that will transform your space without emptying your wallet.
Section 1: Glamorous Mirror Makeover
Mirrors are fantastic for making a room feel larger and brighter. But those fancy, designer mirrors can cost a fortune! Here’s how to create a stunning statement mirror using dollar store supplies.
Materials You’ll Need:
* Dollar store mirror (any size or shape)
* Dollar store picture frames (multiple, similar sizes)
* Hot glue gun and glue sticks
* Spray paint (gold, silver, or any color you prefer)
* Newspaper or drop cloth
* Optional: Sandpaper (fine grit)
Step-by-Step Instructions:
1. Prepare the Frames: First, remove the glass and backing from all the picture frames. If the frames have a glossy finish, lightly sand them with fine-grit sandpaper to help the spray paint adhere better. This step is crucial for a professional-looking finish.
2. Spray Paint the Frames: Lay down newspaper or a drop cloth in a well-ventilated area. Spray paint all the picture frames with your chosen color. Apply thin, even coats, allowing each coat to dry completely before applying the next. I usually do two or three coats for full coverage. Remember, patience is key!
3. Arrange the Frames: Now comes the fun part! Arrange the painted frames around the dollar store mirror to create the desired design. You can overlap the frames, create a sunburst pattern, or go for a more geometric look. Play around with different arrangements until you find one you love. I like to take a picture of a few different arrangements before committing to one.
4. Hot Glue the Frames: Once you’re happy with the arrangement, carefully hot glue the frames to the back of the mirror. Apply a generous amount of hot glue to the back of each frame and press it firmly onto the mirror. Hold it in place for a few seconds until the glue sets. Be careful not to burn yourself!
5. Reinforce the Glue (Optional): For extra stability, you can add a second layer of hot glue around the edges of each frame where it meets the mirror. This will ensure that the frames are securely attached.
6. Finishing Touches: Once the glue is completely dry, inspect the mirror for any loose frames or excess glue. Touch up any areas with spray paint if needed. And that’s it! You now have a gorgeous, custom-made mirror that looks like it came straight from a high-end boutique.
Section 2: Elegant Vase Transformation
Plain glass vases from the dollar store are begging for a makeover! Here’s how to transform them into stunning centerpieces or decorative accents.
Materials You’ll Need:
* Dollar store glass vase
* Twine or rope
* Hot glue gun and glue sticks
* Optional: Faux flowers, pearls, or other embellishments
Step-by-Step Instructions:
1. Prepare the Vase: Make sure your vase is clean and dry. This will help the glue adhere properly.
2. Start Gluing: Apply a small amount of hot glue to the bottom of the vase. Attach the end of the twine or rope to the glue.
3. Wrap the Vase: Carefully wrap the twine or rope around the vase, applying hot glue as you go. Overlap each layer slightly to ensure full coverage. Keep the twine taut as you wrap to avoid any gaps.
4. Continue Wrapping: Continue wrapping the vase until you reach the top. Apply a final bead of hot glue to secure the end of the twine or rope.
5. Add Embellishments (Optional): Once the glue is dry, you can add embellishments to your vase. Glue on faux flowers, pearls, or any other decorative items you like. You can also tie a ribbon around the vase for a more polished look.
6. Display Your Vase: Fill your transformed vase with fresh flowers, dried branches, or simply display it as a decorative accent. It’s amazing how a little twine and glue can elevate a simple dollar store vase!
Section 3: Chic Storage Baskets
Storage baskets are essential for keeping your home organized and clutter-free. But those trendy woven baskets can be pricey. Here’s how to create your own stylish storage baskets using dollar store bins and rope.
Materials You’ll Need:
* Dollar store plastic bins (various sizes)
* Thick rope (jute or cotton)
* Hot glue gun and glue sticks
* Scissors or utility knife
Step-by-Step Instructions:
1. Prepare the Bin: Choose a plastic bin from the dollar store. Make sure it’s clean and dry.
2. Start Gluing: Apply a small amount of hot glue to the bottom edge of the bin. Attach the end of the rope to the glue.
3. Wrap the Bin: Carefully wrap the rope around the bin, applying hot glue as you go. Overlap each layer slightly to ensure full coverage. Keep the rope taut as you wrap to avoid any gaps.
4. Continue Wrapping: Continue wrapping the bin until you reach the top edge. Apply a final bead of hot glue to secure the end of the rope.
5. Create Handles (Optional): If you want to add handles to your basket, cut two pieces of rope to the desired length. Fold each piece in half and hot glue the ends to the inside of the bin, creating a loop. Reinforce the glue with extra glue for added strength.
6. Trim Excess Rope: Once the glue is completely dry, trim any excess rope with scissors or a utility knife.
7. Enjoy Your Stylish Storage: Use your transformed storage baskets to organize toys, books, blankets, or anything else you need to store. These baskets are not only functional but also add a touch of rustic charm to your home.
Section 4: Faux Succulent Garden
Succulents are all the rage right now, but real succulents can be a bit finicky to care for. Here’s how to create a low-maintenance faux succulent garden using dollar store supplies.
Materials You’ll Need:
* Dollar store planter or bowl
* Dollar store faux succulents (various sizes and shapes)
* Dollar store decorative rocks or pebbles
* Foam block (to fit inside the planter)
* Hot glue gun and glue sticks (optional)
Step-by-Step Instructions:
1. Prepare the Planter: Choose a planter or bowl from the dollar store. Make sure it’s clean and dry.
2. Insert the Foam Block: Cut the foam block to fit snugly inside the planter. This will provide a base for the faux succulents.
3. Arrange the Succulents: Arrange the faux succulents in the foam block, creating a visually appealing arrangement. Play around with different heights and textures to create a realistic look.
4. Secure the Succulents (Optional): If you want to secure the succulents in place, you can add a small amount of hot glue to the base of each succulent before inserting it into the foam block.
5. Add Decorative Rocks: Cover the foam block with decorative rocks or pebbles. This will hide the foam and add a natural touch to your garden.
6. Display Your Garden: Display your faux succulent garden on a shelf, table, or windowsill. It’s a perfect way to add a touch of greenery to your home without the hassle of watering and maintenance.
Section 5: Designer-Inspired Candles
Candles are a great way to create a cozy and inviting atmosphere. But those fancy, scented candles can be expensive. Here’s how to create your own designer-inspired candles using dollar store candles and essential oils.
Materials You’ll Need:
* Dollar store candles (plain, unscented)
* Essential oils (your favorite scents)
* Double boiler or heat-safe bowl and saucepan
* Wooden skewer or chopstick
* Optional: Dried flowers, herbs, or spices
Step-by-Step Instructions:
1. Melt the Wax: Place the dollar store candles in a double boiler or heat-safe bowl set over a saucepan of simmering water. Heat until the wax is completely melted.
2. Add Essential Oils: Once the wax is melted, remove it from the heat and add your favorite essential oils. Start with a few drops and add more until you achieve the desired scent strength. I usually use about 20-30 drops per candle.
3. Add Embellishments (Optional): If you want to add embellishments
Conclusion
So, there you have it! Transforming discarded plastic into a thriving garden isn’t just a whimsical idea; it’s a practical, eco-conscious, and surprisingly rewarding endeavor. We’ve explored how to harness the potential of something often considered waste and turn it into a vibrant space for growing herbs, vegetables, flowers, or whatever your green thumb desires.
Why is this DIY plastic garden a must-try? Because it’s a win-win-win. You’re reducing plastic waste, contributing to a healthier planet, and creating a beautiful and productive garden space, all while saving money. Think about the satisfaction of nurturing plants in containers you crafted yourself, knowing you’ve given a second life to materials that would otherwise clutter landfills.
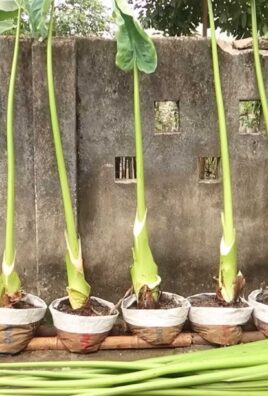
But the beauty of this project lies in its adaptability. Feel free to experiment with different types of plastic containers. Soda bottles, milk jugs, yogurt tubs, even old plastic storage bins – the possibilities are endless! Consider painting your containers to add a splash of color and personality to your garden. You can also get creative with drainage solutions, adding layers of gravel or pebbles to the bottom of your containers to ensure proper water flow.
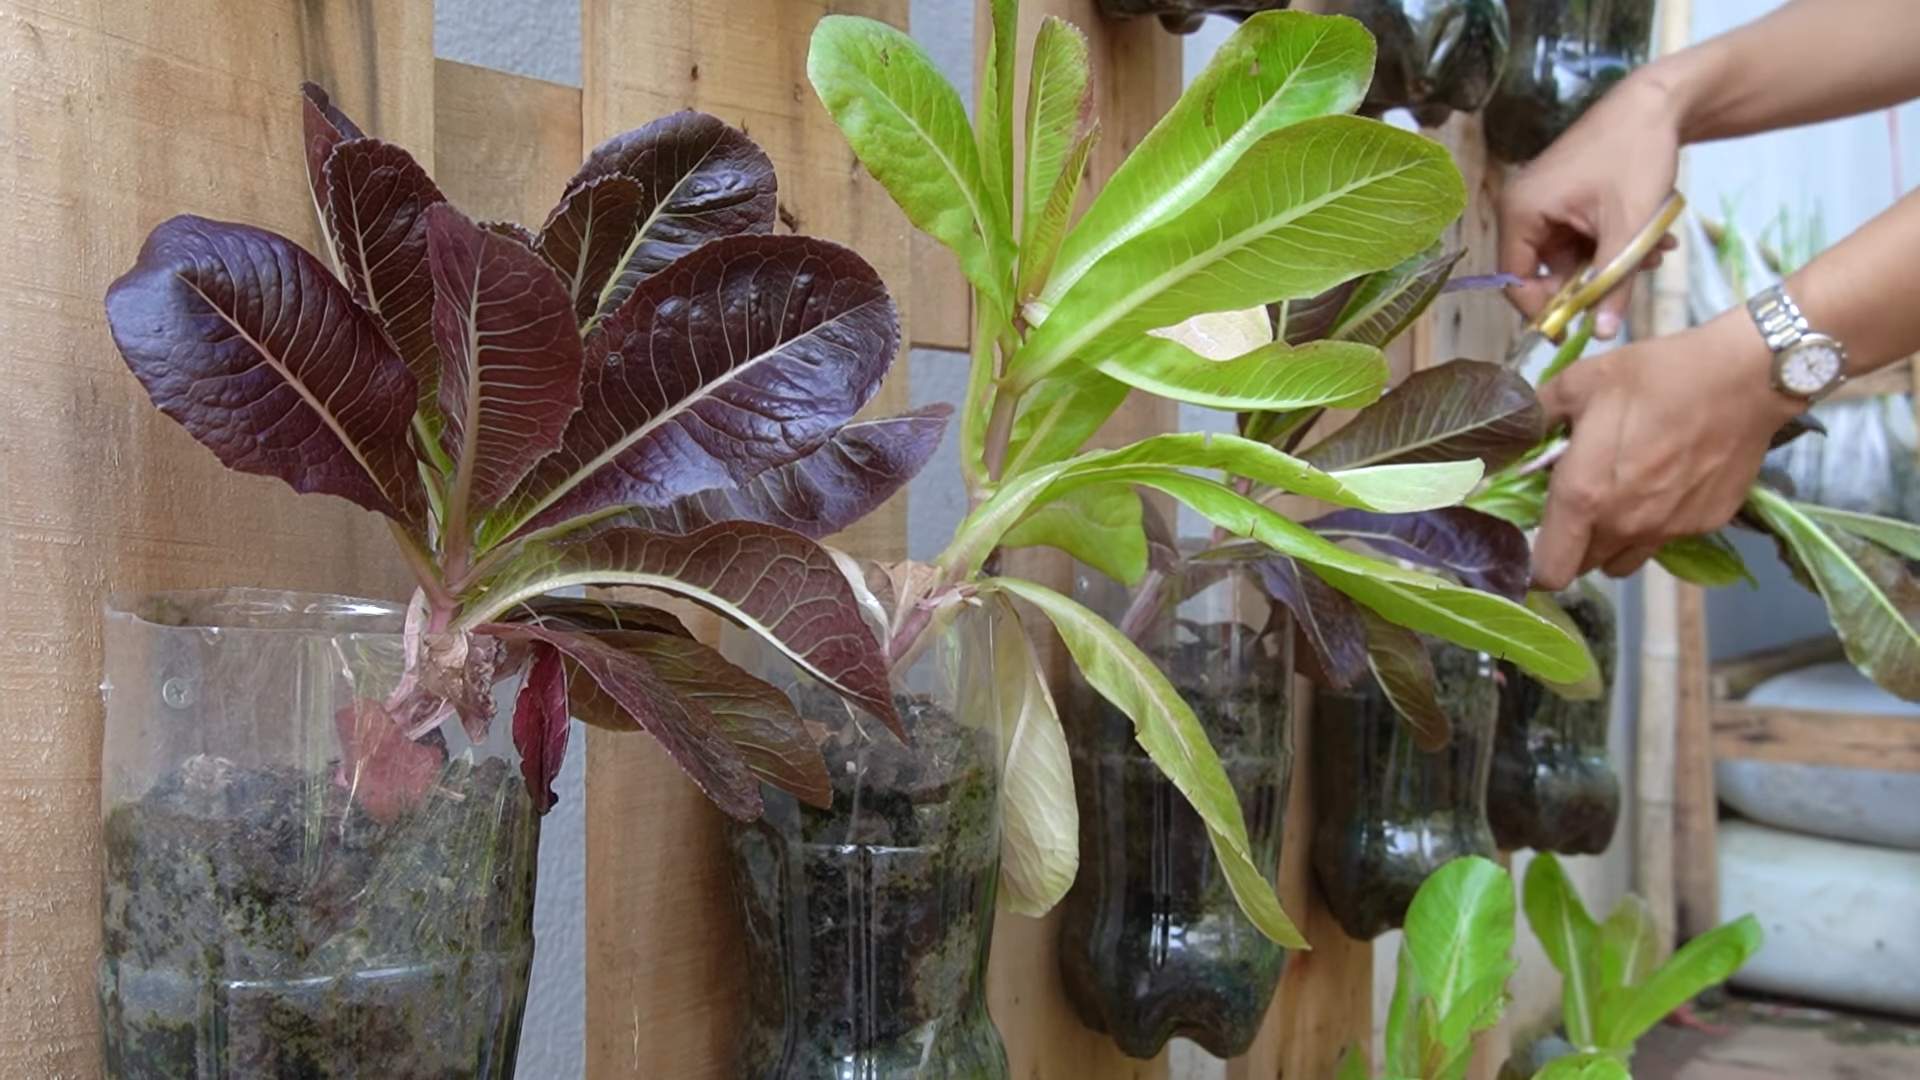
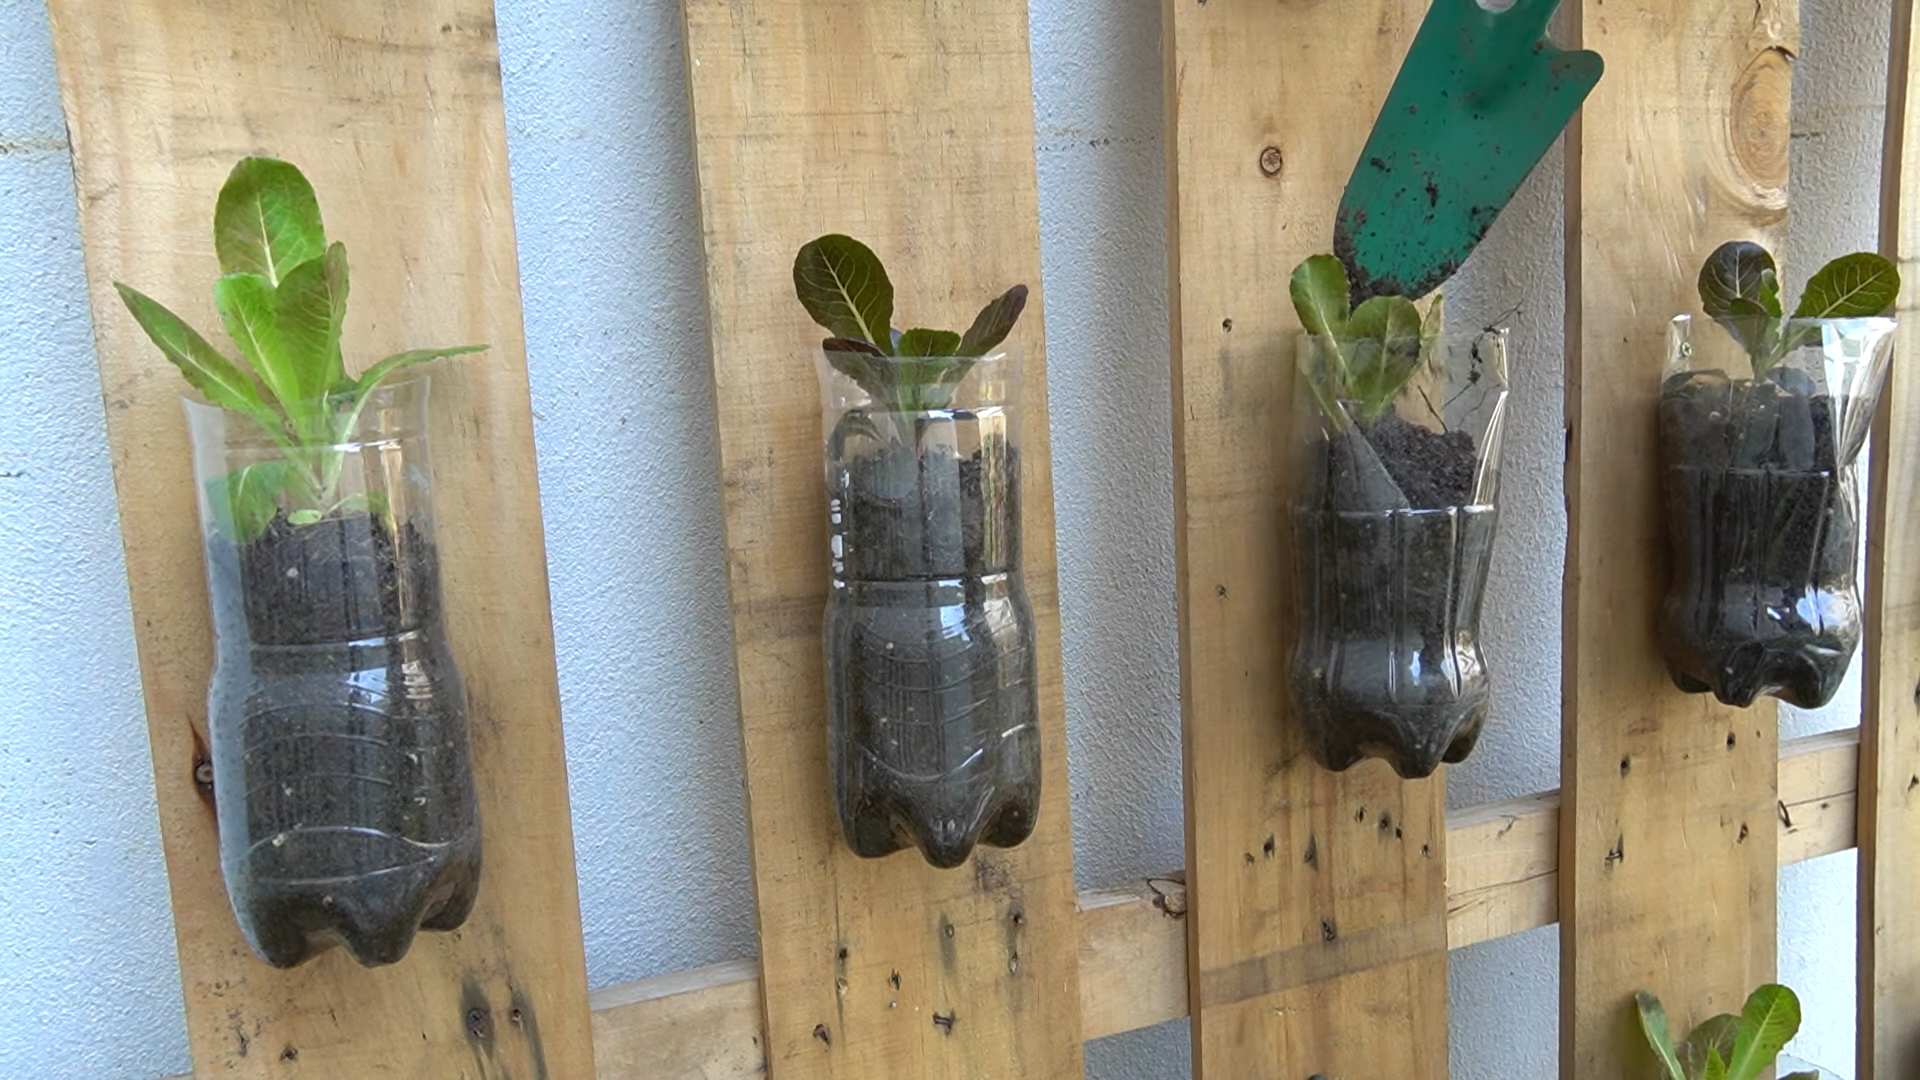
For those with limited space, vertical gardening with plastic bottles is an excellent option. Simply cut openings in the sides of the bottles, fill them with soil, and hang them from a fence or wall. This maximizes your growing area and adds a unique visual element to your outdoor space.
If you’re feeling ambitious, you can even construct raised garden beds using plastic lumber made from recycled materials. This is a more substantial project, but it offers a durable and long-lasting solution for creating a larger garden area.
Don’t be afraid to experiment with different planting techniques. Try companion planting, where you pair plants that benefit each other, such as basil and tomatoes. This can help deter pests and improve the overall health of your garden.
The key to success with a DIY plastic garden is proper preparation and maintenance. Ensure your containers have adequate drainage, use high-quality potting soil, and water your plants regularly. With a little care and attention, you’ll be amazed at how much you can grow in your repurposed plastic containers.
We wholeheartedly encourage you to embark on this rewarding journey. It’s a fantastic way to connect with nature, reduce your environmental impact, and enjoy the fruits (and vegetables!) of your labor.
Once you’ve created your own DIY plastic garden, we’d love to hear about your experience! Share your photos, tips, and challenges in the comments section below. Let’s inspire each other to create a more sustainable and beautiful world, one plastic container at a time. Your insights could be invaluable to others who are just starting out. Let’s build a community of resourceful gardeners who are passionate about making a difference. So, grab those plastic containers, get your hands dirty, and let’s grow something amazing together!
Frequently Asked Questions (FAQ)
What types of plastic are safe to use for gardening?
Ideally, you should use food-grade plastics like those found in milk jugs, yogurt containers, and soda bottles. These are generally considered safe for growing edible plants. Avoid using plastics that are labeled with recycling codes 3 (PVC), 6 (PS – polystyrene), and 7 (other), as these may leach harmful chemicals into the soil. If you’re unsure about the safety of a particular plastic container, it’s best to err on the side of caution and use it for non-edible plants like flowers. Always thoroughly clean any used plastic containers before planting to remove any residue.
How do I ensure proper drainage in my plastic container garden?
Proper drainage is crucial to prevent root rot and ensure the health of your plants. Start by drilling drainage holes in the bottom of your plastic containers. The number and size of the holes will depend on the size of the container, but generally, a few holes that are about ¼ inch in diameter should suffice. You can also add a layer of gravel or pebbles to the bottom of the container before adding soil. This will help to improve drainage and prevent the soil from becoming waterlogged. Another option is to use a layer of landscape fabric between the gravel and the soil to prevent the soil from washing through the gravel.
What kind of soil should I use in my DIY plastic garden?
Using high-quality potting soil is essential for the success of your plastic container garden. Avoid using garden soil, as it can be too heavy and compact for containers, leading to poor drainage and root growth. Instead, opt for a lightweight potting mix that is specifically formulated for container gardening. These mixes typically contain a blend of peat moss, perlite, and vermiculite, which provide good drainage, aeration, and water retention. You can also amend your potting soil with compost or other organic matter to improve its fertility and nutrient content.
How often should I water my plants in plastic containers?
The frequency of watering will depend on several factors, including the type of plant, the size of the container, the weather conditions, and the type of soil you’re using. Generally, you should water your plants when the top inch of soil feels dry to the touch. Avoid overwatering, as this can lead to root rot. When watering, water deeply until the water drains out of the drainage holes. This ensures that the entire root system is thoroughly moistened. During hot and dry weather, you may need to water your plants more frequently.
How do I fertilize my plants in a DIY plastic garden?
Container plants require regular fertilization because the nutrients in the potting soil are quickly depleted. You can use either a liquid fertilizer or a slow-release granular fertilizer. Liquid fertilizers are typically applied every 2-4 weeks, while slow-release fertilizers are applied less frequently, usually every 2-3 months. Follow the instructions on the fertilizer package carefully to avoid over-fertilizing, which can damage your plants. Choose a fertilizer that is specifically formulated for the type of plants you are growing. For example, flowering plants benefit from a fertilizer that is high in phosphorus, while leafy greens benefit from a fertilizer that is high in nitrogen.
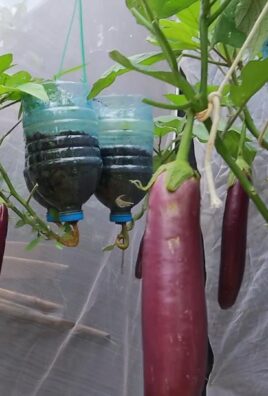
Can I grow vegetables in plastic containers?
Absolutely! Many vegetables thrive in plastic containers. Some popular choices include tomatoes, peppers, cucumbers, lettuce, spinach, herbs, and strawberries. When choosing vegetables to grow in containers, consider the size of the plant and the size of the container. Larger plants, like tomatoes and peppers, will require larger containers. Also, make sure to provide adequate sunlight and water for your vegetables.
How do I protect my plastic container garden from pests and diseases?
Regularly inspect your plants for signs of pests or diseases. If you spot any problems, take action immediately to prevent them from spreading. You can use organic pest control methods, such as insecticidal soap or neem oil, to control pests. For diseases, ensure good air circulation around your plants and avoid overwatering. You can also use organic fungicides to treat fungal diseases. Consider companion planting to deter pests naturally.
What if my plastic containers are not aesthetically pleasing?
Don’t worry! You can easily enhance the appearance of your plastic containers. Paint them with colorful paints, decorate them with stencils, or wrap them in burlap or other natural materials. You can also group your containers together to create a more visually appealing display. Get creative and have fun with it! The possibilities are endless.
How do I prepare my plastic container garden for winter?
If you live in an area with cold winters, you’ll need to take steps to protect your plants from frost and freezing temperatures. Move your containers to a sheltered location, such as a garage or shed. You can also wrap your containers in burlap or bubble wrap to provide insulation. Water your plants less frequently during the winter months, as they will not need as much moisture. Some plants may need to be brought indoors to survive the winter.
Leave a Comment