
Watermelon planter setup: Dreaming of juicy, homegrown watermelons bursting with flavor, but think you don’t have the space? Think again! This isn’t just another gardening article; it’s your passport to a surprisingly simple and rewarding DIY project that will transform your patio, balcony, or even a small corner of your yard into a watermelon wonderland.
For centuries, watermelons have been a symbol of summer, abundance, and shared joy. From ancient Egyptian tombs where they were placed as provisions for the afterlife, to the vibrant watermelons sold at roadside stands today, this fruit has a rich history. But growing your own? That feels extra special, doesn’t it?
Let’s be honest, traditional watermelon farming requires a lot of space. But what if I told you there’s a way to enjoy the taste of summer without needing acres of land? That’s where our DIY watermelon planter setup comes in. This guide will walk you through creating a thriving watermelon garden in a container, saving you space, time, and money. Imagine the satisfaction of harvesting your own sweet, refreshing watermelons, knowing you nurtured them from seed to fruit. Ready to get started? Let’s dive in!
DIY Watermelon Planter: From Fruit to Flower Power!
Hey there, fellow plant enthusiasts! Ever thought about giving your leftover watermelon rind a second life? Instead of tossing it in the compost (though that’s a great option too!), let’s transform it into a quirky and eco-friendly planter. It’s surprisingly easy, super fun, and adds a unique touch to your garden or windowsill. Plus, it’s a fantastic conversation starter! So, grab your watermelon, your gardening gloves, and let’s get started!
Materials You’ll Need:
Before we dive in, let’s gather our supplies. This project is pretty low-key, so you probably have most of these things lying around already.
* A Watermelon Rind: Obviously! Choose a watermelon that’s ripe and juicy, but not overly soft. The firmer the rind, the better it will hold its shape.
* A Sharp Knife: For carefully carving and preparing the rind. Safety first, friends!
* A Spoon or Ice Cream Scoop: To scoop out any remaining watermelon flesh.
* Potting Soil: Choose a good quality potting mix that suits the type of plant you’ll be using.
* Your Plant of Choice: Small succulents, herbs, or even flowering annuals work great. Think about the size and light requirements of your plant.
* Drill or Thick Nail: For creating drainage holes. Essential for healthy plant growth!
* Gloves (Optional): If you don’t want to get your hands dirty (but where’s the fun in that?).
* Watering Can or Spray Bottle: For keeping your new plant hydrated.
* Optional Decorations: Paint, markers, twine, or anything else you want to use to personalize your planter.
Preparing the Watermelon Rind: The Foundation of Our Masterpiece
This is where the magic begins! We need to transform that watermelon rind into a suitable home for our plant.
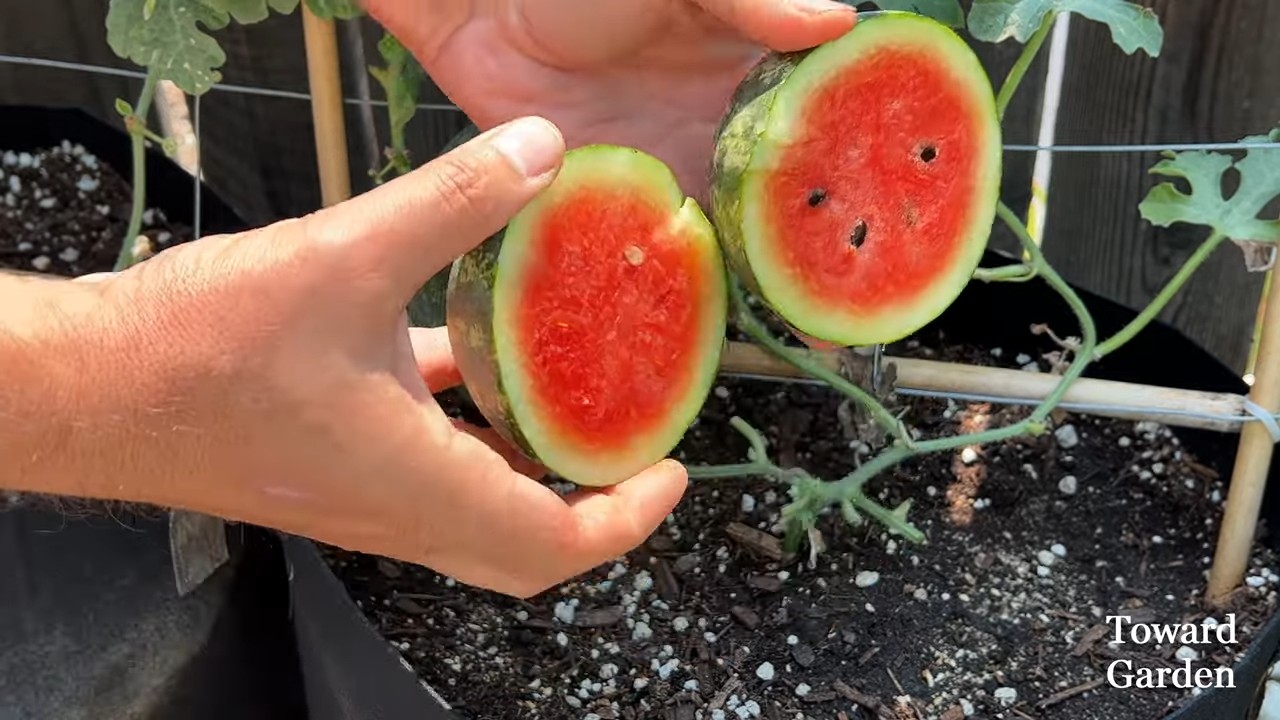
1. Enjoy the Watermelon! First things first, cut open your watermelon and enjoy the delicious fruit inside. Try to cut it in a way that leaves you with two relatively equal halves of the rind. You can also cut off just the top portion of the watermelon, leaving the bottom as a larger planter. It’s all about personal preference!
2. Scoop Out the Remaining Flesh: Once you’ve enjoyed the watermelon, use a spoon or ice cream scoop to remove any remaining pink flesh from the inside of the rind. Get it as clean as possible to prevent rotting and attract fewer pests. This step is crucial for the longevity of your planter.
3. Clean and Dry the Rind: Rinse the inside of the rind with water to remove any lingering sugar. Then, pat it dry with a paper towel. A clean rind is a happy rind!
4. Drill Drainage Holes: This is super important! Water needs to be able to drain out of the planter to prevent root rot. Use a drill or a thick nail to create several drainage holes in the bottom of the rind. I usually aim for at least 4-5 holes, depending on the size of the rind. Make sure the holes are large enough to allow water to escape easily.
5. Let it Dry (Optional): For extra durability, you can let the rind dry out for a day or two before planting. This will help it harden slightly and last a bit longer. Just place it in a well-ventilated area. However, this step is optional, and you can proceed directly to planting if you prefer.
Planting Your Green Friend: Giving Life to the Rind
Now for the fun part – bringing our planter to life with a beautiful plant!
1. Choose Your Plant Wisely: Consider the size of your watermelon rind and the amount of sunlight your planter will receive. Small succulents like echeverias or sedums are excellent choices because they’re drought-tolerant and don’t require a lot of space. Herbs like basil, mint, or thyme also work well and add a fragrant touch. If you’re feeling adventurous, you can even try planting small flowering annuals like petunias or pansies.
2. Add Potting Soil: Fill the watermelon rind with a good quality potting mix. Leave about an inch of space at the top to prevent soil from spilling over when you water. Don’t pack the soil too tightly, as this can restrict root growth.
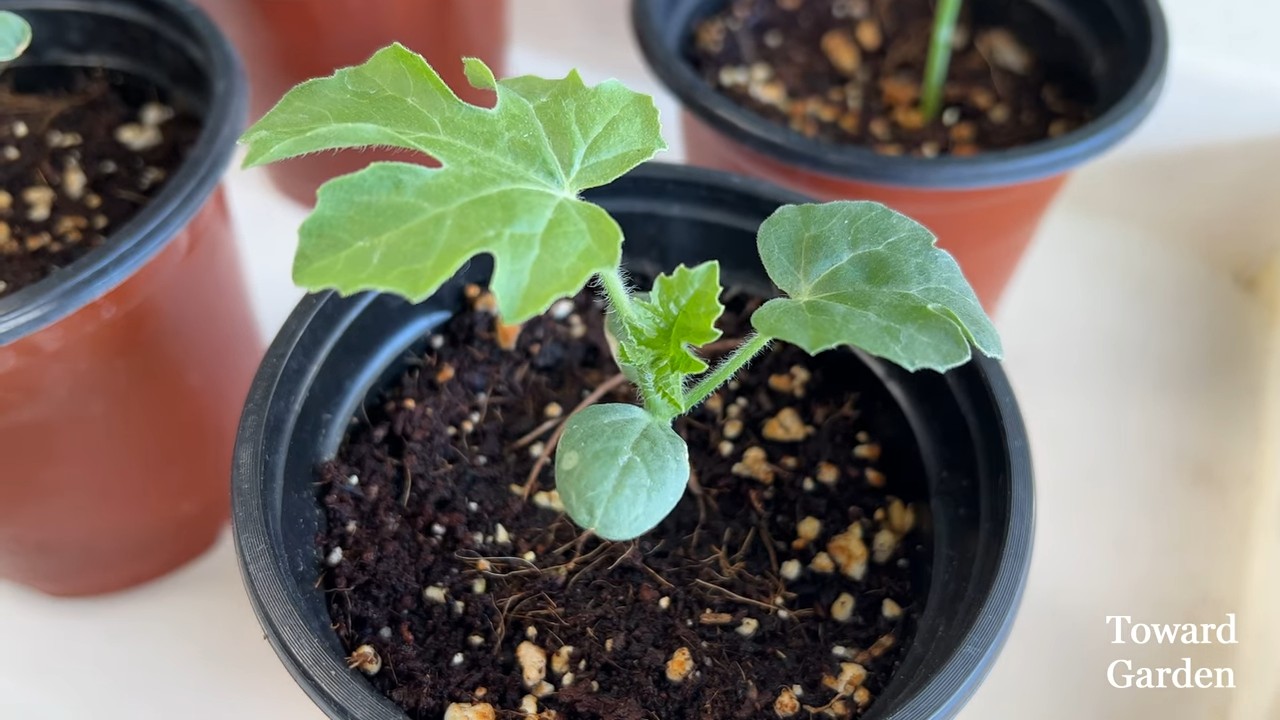
3. Plant Your Seedling: Gently remove your chosen plant from its original container. Loosen the roots slightly to encourage them to spread out into the new soil. Dig a small hole in the potting soil and carefully place the plant inside. Make sure the top of the root ball is level with the surrounding soil.
4. Fill in with Soil: Fill in the remaining space around the plant with potting soil. Gently pat the soil down to secure the plant in place.
5. Water Thoroughly: Water your newly planted creation thoroughly until water drains out of the drainage holes. This will help settle the soil and ensure that the roots are properly hydrated.
Decorating Your Watermelon Planter: Adding Your Personal Touch
This is where your creativity can really shine! While the watermelon rind itself is already pretty unique, you can add your own personal touch to make it even more special.
1. Painting: Use acrylic paints to decorate the outside of the rind. You can paint stripes, polka dots, floral patterns, or anything else that inspires you. Just make sure to use paints that are safe for outdoor use.
2. Markers: Permanent markers are another great option for adding details and designs to your planter. They’re easy to use and come in a wide variety of colors.
3. Twine or Ribbon: Wrap twine or ribbon around the rind to add a rustic or elegant touch. You can secure it with glue or simply tie it in a knot.
4. Stickers or Decals: Add stickers or decals to personalize your planter with your favorite characters, quotes, or designs.
5. Natural Elements: Glue on small shells, pebbles, or pieces of driftwood to create a natural and organic look.
6. Let it Dry: If you’ve used paint or glue, allow your planter to dry completely before placing it outside or watering your plant.
Caring for Your Watermelon Planter: Keeping it Thriving
Now that you’ve created your beautiful watermelon planter, it’s important to take good care of it to ensure that your plant thrives.
1. Watering: Water your plant regularly, but don’t overwater. Allow the soil to dry out slightly between waterings. The frequency of watering will depend on the type of plant you’ve chosen and the weather conditions.
2. Sunlight: Place your planter in a location that receives the appropriate amount of sunlight for your plant. Most succulents and herbs prefer bright, indirect sunlight, while flowering annuals may need more direct sunlight.
3. Fertilizing: Fertilize your plant every few weeks with a balanced liquid fertilizer. This will provide it with the nutrients it needs to grow and thrive.
4. Pest Control: Keep an eye out for pests like aphids or spider mites. If you notice any pests, treat them with an appropriate insecticide or horticultural oil.
5. Lifespan: Keep in mind that a watermelon rind planter is biodegradable and won’t last forever. Depending on the weather and the thickness of the rind, it may last for a few weeks or even a couple of months. When the rind starts to decompose, you can simply transplant your plant into a more permanent pot.
Troubleshooting Tips: Addressing Common Issues
Even with the best intentions, things don’t always go according to plan. Here are a few common issues you might encounter and how to address them:
* Mold Growth: If you notice mold growing on the rind, it’s usually a sign that the planter is too moist. Try watering less frequently and ensure that the drainage holes are clear. You can also wipe away the mold with a damp cloth.
* Rind Decomposition: As mentioned earlier, the rind will eventually decompose. If it starts to break down too quickly, it could be due to overwatering or exposure to excessive heat. Try moving the planter to a cooler location and adjusting your watering schedule.
* Plant Wilting: If your plant is wilting, it could be a sign of underwatering or overwatering. Check the soil moisture to determine the cause and adjust your watering accordingly.
* Pest Infestation: If you notice pests on your plant, treat them promptly with an appropriate insecticide or horticultural oil.
Beyond the Basics: Creative Variations
Want to take your watermelon planter game to the next level? Here are a few creative variations to try:
* Hanging Planter: Drill holes near the top of the rind and thread twine or rope through them to create a hanging planter. This is a great way to add a touch of whimsy to your patio or balcony.
* Multi-Plant Planter: Use a larger watermelon rind to create a planter with multiple plants. This is a great way to create
Conclusion
So, there you have it! Transforming a simple watermelon into a stunning and functional planter is not only incredibly easy but also a fantastic way to add a touch of whimsy and sustainability to your garden or indoor space. This DIY watermelon planter project is more than just a craft; it’s an opportunity to connect with nature, reduce waste, and showcase your creativity.
Why is this a must-try? Because it’s a triple threat! First, it’s budget-friendly. You’re repurposing something you’d normally discard, saving you money on store-bought planters. Second, it’s eco-conscious. You’re giving the watermelon rind a new life, preventing it from ending up in a landfill. And third, it’s undeniably unique. Your watermelon planter will be a conversation starter, a testament to your resourcefulness and artistic flair.
But the fun doesn’t stop there! Feel free to experiment with different variations. For a rustic look, leave the rind as is, embracing its natural imperfections. For a more polished aesthetic, consider painting the exterior with non-toxic acrylic paints. You could even add decorative elements like twine, beads, or mosaic tiles.
Consider using different types of plants to create diverse looks. Succulents thrive in well-draining environments, making them ideal for watermelon planters. Herbs like basil, mint, and thyme will not only look beautiful but also provide fresh ingredients for your culinary creations. For a vibrant display, plant colorful annuals like petunias or pansies. Remember to choose plants that are appropriate for the size of your watermelon planter and the amount of sunlight it receives.
Don’t be afraid to get creative with the drainage! While drilling holes is the most common method, you could also line the bottom of the planter with gravel or small stones to improve drainage. This is especially important if you’re using a particularly juicy watermelon variety.
And remember, the size of your watermelon will dictate the size of your planter. Smaller watermelons are perfect for individual plants or small groupings, while larger watermelons can accommodate more substantial arrangements.
We’re confident that you’ll love creating your own DIY watermelon planter. It’s a rewarding project that’s both fun and functional. So, grab a watermelon, gather your supplies, and let your imagination run wild!
We can’t wait to see what you create! Share your watermelon planter creations with us on social media using #WatermelonPlanterDIY. We’re eager to see your unique designs and hear about your experiences. Let’s inspire each other to embrace sustainable gardening and creative repurposing! Your feedback and shared experiences will help others discover the joy and benefits of this simple yet impactful DIY project. Happy planting!
Frequently Asked Questions (FAQ)
What kind of watermelon is best for making a planter?
The best type of watermelon for a planter depends on the size you’re looking for. Larger watermelons, like the Charleston Gray or Jubilee varieties, will provide a bigger planting area, suitable for multiple plants or larger individual plants. Smaller watermelons, such as Sugar Baby or personal-sized watermelons, are great for single plants or smaller herb gardens. Consider the thickness of the rind as well; a thicker rind will provide more stability and longevity for your planter. Ultimately, any watermelon can be used, so choose one that fits your aesthetic and planting needs.
How long will a watermelon planter last?
The lifespan of a watermelon planter depends on several factors, including the climate, the type of watermelon, and how well it’s cared for. In general, you can expect a watermelon planter to last anywhere from a few weeks to a couple of months. To extend its lifespan, keep the planter in a shaded area to prevent it from drying out too quickly. Avoid overwatering, as this can lead to rot. You can also apply a sealant to the inside of the rind to help prevent moisture from seeping through. Once the rind starts to decompose, it’s time to compost it and start a new planter.
What kind of soil should I use in a watermelon planter?
The best soil for a watermelon planter is a well-draining potting mix. Avoid using garden soil, as it can be too heavy and compact, leading to poor drainage and root rot. A good potting mix will provide the necessary nutrients for your plants while also allowing excess water to drain away. You can also amend the potting mix with perlite or vermiculite to improve drainage further. Consider the specific needs of the plants you’re growing; some plants may prefer a slightly acidic or alkaline soil.
How do I prevent my watermelon planter from rotting?
Preventing rot is crucial for extending the life of your watermelon planter. Here are some key strategies:
* **Ensure proper drainage:** Drill adequate drainage holes in the bottom of the planter.
* **Avoid overwatering:** Water only when the soil is dry to the touch.
* **Provide good air circulation:** Place the planter in an area with good airflow to prevent moisture buildup.
* **Use well-draining soil:** As mentioned above, a good potting mix is essential.
* **Consider a sealant:** Applying a non-toxic sealant to the inside of the rind can help prevent moisture from seeping through and causing rot.
* **Monitor regularly:** Check the planter regularly for signs of rot, such as soft spots or mold. If you notice any rot, remove the affected area immediately.
Can I paint my watermelon planter?
Yes, you can paint your watermelon planter, but it’s important to use non-toxic acrylic paints that are safe for plants and the environment. Avoid using oil-based paints, as they can be harmful. Before painting, clean the rind thoroughly and allow it to dry completely. You may also want to apply a primer to help the paint adhere better. Get creative with your designs! You can paint intricate patterns, simple stripes, or even create a whimsical scene. Remember to seal the paint with a non-toxic sealant to protect it from moisture and prevent it from chipping.
What plants are best suited for a watermelon planter?
Many different types of plants can thrive in a watermelon planter. Here are a few suggestions:
* **Succulents:** These drought-tolerant plants are perfect for watermelon planters, as they don’t require much water and can tolerate well-draining soil.
* **Herbs:** Basil, mint, thyme, and oregano are all great choices for a watermelon herb garden.
* **Annuals:** Petunias, pansies, and marigolds will add a pop of color to your planter.
* **Vegetables:** Smaller vegetables like lettuce, spinach, and radishes can also be grown in a watermelon planter.
Consider the size of the planter and the amount of sunlight it receives when choosing your plants.
How often should I water my watermelon planter?
The frequency of watering depends on several factors, including the climate, the type of plants you’re growing, and the type of soil you’re using. In general, you should water your watermelon planter when the soil is dry to the touch. Avoid overwatering, as this can lead to root rot. Check the soil moisture regularly by sticking your finger into the soil about an inch deep. If the soil feels dry, it’s time to water. Water deeply, allowing the water to drain out of the drainage holes.
Can I compost the watermelon planter after it’s no longer usable?
Absolutely! One of the best things about using a watermelon as a planter is that it’s completely compostable. Once the rind starts to decompose, simply break it up into smaller pieces and add it to your compost bin. The watermelon rind will break down quickly and provide valuable nutrients for your compost. Remove any plants or soil before composting the rind. This is a great way to reduce waste and create nutrient-rich compost for your garden.
Is this DIY watermelon planter safe for pets?
While the watermelon rind itself is generally safe for pets, it’s important to consider the plants you’re growing in the planter. Some plants are toxic to pets, so be sure to choose plants that are safe if you have furry friends who might be tempted to nibble. Also, be mindful of any paints or sealants you use on the planter, ensuring they are non-toxic and pet-friendly. Always supervise your pets around the planter to prevent them from ingesting anything harmful.
Leave a Comment